Workshop Wednesday: ABC Flashcards

Anyone want to upcycle some of that ubiquitous cardboard packaging that passes through our homes and turn it into teaching/learning tools? You’re on! Let’s make some flashcards!!

DIY flashcards from upcycled cereal boxes

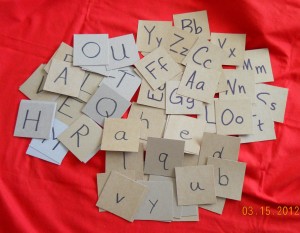
This week’s photo actually shows three related sets of alphabet flashcards that measure 3” square. Call these approximate measurements, because no one needs to waste precious time obsessing over the precision and exactness of something we’re making for free. I collected cereal boxes, brownie mix boxes, popsicle boxes, tissue boxes, pudding cup boxes, and pretty much every flavor of thin cardboard box that was large enough to cut up into something else. Confession: I made these with a paper cutter, but only because I saved up and treated myself to one. During most of our homeschooling years, I used a ruler and scissors for projects like this, and the results were just as good.

Open the boxes flat and start measuring and cutting. Again, don’t let perfectionism sidetrack you with thoughts of non-90-degree corners or less-than-perfect sides. Your students can learn from playing with these cards even after they are rescued from an eager-to-play-fetch-with-anything puppy. When you have a decent supply of cards cut from the cardboard, grab your Sharpie marker and write on the blank sides. Here we have one set with upper case letters (upper left), a set with lower case letters (lower center), and a set with both upper and lower case letters in pairs (upper right). I have also made sets with numbers 1-100, states and capitals, and many other topics that I hope to address in future Workshop Wednesday posts. (Anticipation!)

Bonus Tips:

  • I favor teaching letter recognition with upper case letters first, since reversals are less likely; then introducing the lower case letters as the “little brothers” of the capitals. Kids get it, even when the big brothers and little brothers don’t look exactly alike. Learning to group the larger and smaller letters as pairs is another method for avoiding reversals.
  • Making multiple sets of letters will allow your students to spell out vocabulary words, play word games, or leave traces of their newly-acquired knowledge all around the house as they spell out the names of every lamp, vase, and throw pillow.
  • If your students have mastered letter recognition, you can make 3×5” word cards and practice turning sounded-out words into sentences.

Learning Style Activities

Visual learners will appreciate flashcards with color, so you can either use colored markers for the main information or let your visual student draw designs on the edges and corners of the cards with colored pencils or fine-point markers to jazz up the natural gray or brown of the cardboard.

Auditory learners will love to read each letter aloud, no matter what activities or games you play with the cards. Switch things up by asking them to say the sound of the letter instead of (or in addition to) its name.

Tactile learners have already grabbed your new supply of flashcards and are spreading them out on the floor or table, rearranging the letters into words. That’s how you can confirm that you have a tactile student: their hands and fingers are into everything, learning as much as they possibly can about texture, heft, and balance. Please don’t scold them for grabbing and touching—it’s how they learn best. A tactile learner who is forced to keep his hands in his lap is like a visual learner wearing a blindfold. Seriously.

Kinesthetic learners will adore playing games with these cards, especially if you spread things out. Drop the stack of upper case letters on the floor in the living room. Drop the stack of lower case letters on the kitchen table. Now shuffle the “pairs” cards and place that stack in a neutral location somewhere between the other two piles of cards. Ask your student to look at the top card and run to find the matching letter cards from each of the other locations and bring them back. (Beginning students may need to take the pairs card with them for reference.) Grouping all three cards together will prove he brought the correct ones. Your energetic student can repeat this activity until he is worn out enough to sit down for reading time or some other lesson that requires seatwork.

Combine all learning styles into challenging activities that will help your students learn from all situations and all styles of teaching. Let your imagination run free with ideas and adaptations for your own students, living quarters, and academic needs. If the weather is agreeable, take the cards outside and combine relay races with spelling or vocabulary words. Mud puddles can’t destroy your prized set of flashcards, since replacements are easily made from the next empty box. You may soon find yourself rescuing cardboard boxes from the recycling bin and calling them your “homeschool supplies” as you think of more and more uses for homemade flashcards!
Back to Homeschool with New Ideas

Back to School signs are everywhere. The stores are stocked with new boxes of crayons, new notebooks, and new backpacks. If you are not quite ready for the next semester to begin, it may be because you feel insufficiently prepared for it yourself. Where are the new school supplies for you — maybe some new coping skills, a new supply of encouragement, and a new box of ideas?

If you are a First-Time Homeschoolerand are beginning with a preschooler or Kindergartner, these articles contain the coping skills you need for this new task ahead of you.

For those of you who are Leaving Public Schoolto begin homeschooling, the following articles will give you a generous dose of encouragement.

Perhaps you have been teaching your own children for a while now, but feel that you are Stuck in a Homeschool Rut. Here are some fresh ideas to break the boredom and put a little life into your tedious routine.

Maybe you have just “hit the wall.” You’ve come to the end of yourself, and you don’t know where to turn next. You love the idea of homeschooling, but you just can’t find one more lesson inside yourself.

No matter what your homeschooling status, be assured that you are not alone. Guilt-Free Homeschooling is here to help you with a comforting hug, a large dose of encouragement, a bonus scoop of confidence, and answers to your questions. Let’s have a great year together!

Preschool Is Not Brain Surgery

I have tackled the topic of homeschooling older students while you have preschoolers around several times before, but I’ve never yet directly addressed homeschooling for preschool itself, especially when preschool marks the official beginning of schooling for your oldest child. This changes now: I am here to encourage you that you can teach your own child for preschool. You do not need an advanced degree in education to be able to effectively teach your child at home for preschool.

I have prepared a list of things that my children and I did during their preschool years that cover all of the types of activities and subjects your child will need to prepare them for their future academics. These activities may be done in any order, corresponding to your child’s interests and abilities. Progress according to your child’s abilities: if your child has difficulty understanding any given concept, set it aside for two weeks or two months while you do other activities and see what a difference that makes. Pick it up again later, or set it aside a second time, if necessary. All children learn at different rates, just like they begin to walk or talk or get teeth at different times. Faster or slower is not better, it’s just different.

Multiple activities can be done each day, if it works with your schedule and with your child’s interests. Fifteen minutes at a time may be adequate for the average preschooler, but the child may enjoy several of these short sessions throughout the day. Focus on only one activity at each session, but if your child is really enjoying the activity, you can let him continue playing with it after the formal “lesson” time is completed.

Read books to your child. Snuggle up together for special Mommy-and-me time. Use funny voices for the characters. Vary your tone to match the scene: fast and loud for the exciting parts, slow whispers for the sneaky parts, sniffling when the character is sad, bouncy and happy when the character is happy. When the book is a familiar favorite, stop periodically to ask your child questions: Where is Papa Bear going next? Why is he doing that? What will he find there? These help build your child’s memory by asking him to recall details he has learned from all of the times you have read this story in the past. Which bear is wearing the red shirt? Point to the smallest bear. Can you find a bowl on the bears’ table? Questions of this type help your child notice details and learn to identify colors, sizes, objects, etc. Why did the bears leave the house? Where did they go? What is this little girl’s name? These questions teach comprehension: read a portion of the story, and then ask the child about key elements that were just read. At first, you may want to ask questions about one page at a time, but soon your child will be able to recall details from several pages back.

Include ABC books, even though they usually have no plot or story. As a child, my personal favorite was The Nonsense ABC by Edward Lear. For my own children, their favorite was The Dr. Seuss ABC. What those books have in common are fun, rhyming poems for each letter. Lear’s “A was once an apple pie” was just as easy to remember as Dr. Seuss and his “Aunt Annie’s alligator.” The delightful poems were much more enjoyable than a simple picture book of ABC’s, although those are useful, too, as you will see in a moment.

Learning letters. Gather all the ABC books you have, and compare the pages for the same letter in each book. Linger over one letter per week or a letter every few days, until you know for sure that your child knows that letter. Use sticky-notes or home-made flashcards to label objects in your home that begin with the letter of the week, and help your child make the letter’s sound every time you see one of those objects and say its name. Banana, B, buh, buh-nana. You get the idea — and so will your preschooler. You may need to get creative on a few letters, such as Q, unless you live with a queen in a home full of quilts and have a pet quail. For X, you may need to use words that have an X in them, such as fox. The picture ABC books will come in very handy now, especially if they use several items for each letter. Don’t overlook your public library — they may have ABC books for unique topics, such as animal ABC’s or around-the-world with ABC’s.

Help your child learn to recognize a letter, no matter what font it is written in. Making a Letter Recognition Notebook is an excellent method for this. Focus on the appearance of the letters themselves, instead of what objects begin with each letter. Do one page for the upper case of a letter and another page for samples of the lower case letter. The goal here is for your child to be able to spot an a, whether it looks like a ball against a wall or like an egg underneath a tiny umbrella.

Learning numbers. Repeat the activities from the Learning Letters section above, but do them for the numbers 1-10. Draw a group of dots on the page to correspond to the number represented. Use counting books for activities similar to the ABC book activities. Once your child knows 1-10, you may add numbers up to 20, if you’d like. Your goal here is for the child to recognize each digit and immediately know how many objects that number stands for.

Learn colors. Ditto. A color-of-the-week activity will show your child all the varieties of each color. Light blue, dark blue, bright blue, dusty blue, navy blue, sky blue. Blue jeans, blue socks, blueberries, blue blanket, blue water bottle, blue crayons, blue cars, blue blocks, blue game pieces. How many blue things can you find in your home? You may be surprised!

Learn shapes. Ditto once again. The variety within each shape can be confusing at first to little ones. Is a big circle the same thing as a small circle? Are a cookie and a ring both circles even though one has stuff inside it and the other one is empty? Rectangles and triangles can be particularly tricky. Use a dollar (kids love learning with real money) as an example of a rectangle, then turn it up on end to show the child how the dollar is the same shape as a door. No more tricky rectangles! Long and skinny or short and fat, rectangles will still look mostly like a door or a dollar. Triangles have 3 sides, no matter how long or short those sides may be, and once your preschooler can count to 3, he can begin to recognize triangles. Browse through the snack cracker aisle at the supermarket for some tasty, edible geometric shapes! Careful nibblers will transform one shape into another, naming the shapes as they admire their creations and then eating their artwork.

Fine motor skills. See Preschoolers’ Educational School-time Activities for a variety of helpful activities that your child will enjoy doing and learn wonderfully useful skills at the same time.

Gross motor skills. Let your child practice on a “balance beam” made by drawing a straight line with chalk on the sidewalk or driveway. Masking tape on the floor is a good substitute indoors. When your child can do it easily without stepping off the line, switch to using a 4″ x 4″ board (any length) lying directly on the ground. When the child can walk that board easily without losing his balance, prop the board up with a brick or concrete block (or other stable item) at each end — just don’t go too high, so that the child will not be hurt if he does fall. Please stay close by your child whenever he is practicing this.

Other useful concepts. Play. Notice the weather each day. Go to the park. Walk around the block. Smell flowers. Watch an anthill. Put a bird feeder or a bird bath near a window and keep it filled so you can watch the birds and learn to identify them. Make cookies. Add a set of measuring cups to the bath toys. Visit a zoo. Watch a construction site (from a safe distance) and talk about what each man or machine is doing. Learn from life every day.

Social Skills. See Social Skills — What Should I Teach My Preschooler? for a very complete explanation.

What about school questions? Preschoolers ask questions; it’s what they do, and it’s who they are. Your homeschooled preschooler will undoubtedly ask questions about going to school: Why does my friend go to school and I don’t? When will I go to school? Can I ride on a school bus? Can I play on the school playground? Why does my storybook show kids doing things at school, but I don’t have any stories about kids who homeschool? Ah, yes, those questions.

You can share as much as you think your preschooler will understand about why you chose to homeschool, but try not to make other families look bad for not homeschooling. One way around this is to point out what vehicles are owned by the families on your block or in your neighborhood. Some have small cars, some have pickup trucks, and some have minivans. They pick the type of vehicles that they want for the things they do. Some families send their children to public school, some go to private schools, and some homeschool. Each family picks the type of school that they want for their children. Each family can also decide if they want to plant flowers around their house or raise tomatoes in their garden. They can decide if they want to have a dog or a cat or tropical fish or no pets at all. Some families choose to eat in fancy restaurants, some families get burgers at the drive-through, and some families make all their meals at home. Every family gets to make choices, and homeschooling is one thing your family has chosen.

Sometimes the trickier part of answering these questions is to show that not following the crowd can be more fun. Because you are homeschooling, you can go to the park when the other children are stuck inside the school building. This is also a good way to bring weather (good or bad) into the conversation: you can play outside on nice days instead of having to sit at a desk all day long, or you can stay inside where it’s warm and dry all day long on the cold and rainy days. Perhaps you can visit the school playground after school is over for the day or on a weekend or during the summer. Perhaps you can ride on a city bus or a church bus. I have known preschoolers who begged and begged their parents to let them go to school, only to find out that school was not the fun experience they had imagined it to be. One little boy asked his mommy if he could be homeschooled again, because all he really had wanted from school was to play on the playground, and when he was in school, the teacher only let him go out to the playground at certain times and for very short periods. Being homeschooled with his brothers was much more enjoyable.

Many children (and parents) ask about the lack of homeschooling in storybooks. I agree that there are very few books that portray education at home, but I have a sneaky way around that, too. Not all storybooks show everything that a child does every day, and not all storybooks show children going to school. Therefore, maybe, just maybe, the children in some books are homeschooling, but the story is telling about some other part of their day. Our school books were not in every room of our house — ok, sometimes, but not always. When the Bear family went for a walk to let their porridge cool down, perhaps they had been doing their lessons all morning, and now it was lunch time, and they would continue their lessons after lunch. Stories are not always about what you can see — sometimes there are also lessons to be learned in what the pictures do not show. And finding those lessons also teaches your child to think about the story and what it does and does not say.

Do I need curriculum to homeschool preschool? No. If you don’t believe me, take this quick test:

  • Do you know the alphabet?
  • Can you count to 20?
  • Can you identify basic colors and shapes?
  • Do you know how to use a pencil?
  • Do you know how to use scissors?
  • Can you read a child’s storybook?

If you answered Yes to 3 or more of these questions, you will probably do just fine. Use the money you would have spent on curriculum for a family zoo pass or a storage cabinet for all of the arts and crafts supplies you will accumulate in the next few years!

Preschool-aged children need foundational skills: pre-reading (recognizing letter names and letter sounds; visual distinction: recognizing differences and similarities between objects), pre-writing (small muscle skills and coordination: using fingers), and body control (large muscle skills and coordination: using arms and legs). Children who are only three, four, or five years old do not need to be able to identify nations of the world, Presidents of the United States, or the life cycle of seahorses. These tiny tots will benefit much more from spending 15 minutes cutting colored paper into confetti than they would from endless coloring pages for geography, history, science, or social studies topics. I have probably just stepped on the toes of multiple eager teachers, but please understand that your little ones will not remember very many of these superfluous lessons until they are able to read fluently for themselves. Then you can turn them loose on the library shelves and get ready to hear them recount the myriads of fascinating facts they have read.

Once when I was selling some of our outgrown books at a used curriculum fair, my customer asked if I had the teacher’s manual for the 2nd grade reading text. “No,” I replied with a smile, “I thought if I couldn’t figure out the answers to the questions in a 2nd grade reading book, I had bigger problems than the teacher’s manual could fix.” She thought about that for a few seconds and began laughing along with me. “You’re absolutely right!” And she bought the book. Teaching preschool is even easier than teaching 2nd grade reading. And you will be able to do it just fine without a teacher’s manual or fancy curriculum.

More articles related to Preschoolers are listed in Topical Index: Preschoolers.

Preschoolers’ Educational School-Time Activities

How much trouble can a bored preschooler get into while you are trying to help your older children with their lessons? Don’t answer that. Instead, let’s just focus on providing your preschooler with some fun activities as his own version of “schoolwork.”

Preschoolers can begin to learn school-time skills with a few simple projects of their own. Try some of these activities by setting up your preschooler with his own individual work area, just as though he were another “real” student, but your space allowances will determine whether your preschooler is seated near his siblings or in his own special location with plenty of elbow room. If it is possible to group your children together in the same area, your preschooler can begin to observe how his siblings sit and work independently, so that he can learn to duplicate their actions. Not every preschooler will be eager to sit still and “play” school for long periods, but for those who are determined to mimic their older siblings, these suggestions offer safe, semi-supervised activities that will develop essential skills. Activities can be changed periodically, just as your older students change subjects throughout the day. These projects can work to lengthen a short attention span, as well as keep your little one occupied in fascinating, educational activities while you explain a lesson concept or demonstrate a few math problems to your older students.

You will probably need to work back and forth, setting up the preschooler with his activity, then starting the older children on their lessons, checking back on the preschooler, following up with the olders, and repeating the cycle as often as needed. Yes, at first you will feel as busy as the old-time plate juggler who balanced spinning plates on tall sticks placed around a table, running and spinning and running and spinning and running to catch the far one just before it falls, but your diligence will quickly pay off with rewards of students who can work independently for a few minutes until Mom is available for help.

The following is a list of materials and activities to help keep your preschooler occupied and give him a boost in the learning department, beyond the usual board books and wooden puzzles. Whether these activities look educational or not, they do include getting-ready-for-learning skills, often disguised as creative fun. Reserving these materials (especially the scissors and glue sticks) and activities for use only during school-time or at the school table will help reinforce the idea of schoolwork in your preschooler’s mind and help him become accustomed to your family’s homeschooling routine. If the “fun” activities can only be done during school, it helps to plant the idea that learning is fun — plus it keeps those activities from becoming boring. Many other activities and playthings also have educational benefits, so please extend this list with your own activities and variations to fit your child’s interests and skill level. Be sure to swap ideas with your friends, no matter what the ages of the children, because ideas can be adapted to suit any age level.

“Sample” Notebooks
Materials: an assortment of old magazines, newspapers, greeting cards, sales ads, junk mail, etc.; spiral notebooks and glue stick, or magnetic photo album/pages. Store these in a specific box for the preschooler’s use, to prevent him from cutting up your newest magazines, unpaid bills, and expensive set of leather-bound first edition books.
Method:Let your child find and cut out pictures, letters, or numbers that fit certain criteria:

  • Objects matching a specific color (use basic colors to allow for variations in shading);
  • Objects starting with a certain letter of the alphabet;
  • Letters and/or numbers in a variety of fonts/typefaces.

Use each of the above groups to create individual “sample” notebooks, making 1-2 pages for each category: color recognition (separate pages for red, yellow, etc), letter-symbol recognition (separate pages for a/A, b/B, etc), letter-sound recognition (separate pages for things that begin with “a,” “b,” etc), number-symbol recognition (separate pages for each numeral, 0-9 or higher, if desired), number-value recognition (groups of 2 items for “2’s,” groups of 3 items for “3’s,” etc.), etc. (Recognition of the letter or number symbols is important because the variations in fonts and typefaces can be quite confusing to beginning readers.)

Keep the child busy looking and searching on his own for the needed samples and let him do the cutting, so that this activity lasts more than a few seconds. Samples can be glued into an old spiral notebook with a glue-stick or put into an old photo album or 3-ring binder with “magnetic” photo pages for minimal mess. The notebooks can also be “studied” for help in recognizing colors, letters, etc. Occasional supervision may be necessary to help the beginner understand the placement of the samples. A younger child may just enjoy cutting/gluing random pictures into a notebook without any specific categories. Pictures can also be arranged so as to tell a wordless story: This little girl went to this house to visit her grandmother
Skills Developed: visual recognition, cutting with scissors, glue-stick, fine motor skills
Mess Alert: paper scraps from cutting; glue-stick residue

Tangram Pictures & Patterns
Materials: felt pieces, flat craft foam shapes, colored paper or card stock pieces (cut into circles, squares, rectangles, triangles, parallelograms, etc.)
Method: free play; challenge student to duplicate patterns; challenge student to keep enlarging designs
Skills Developed: eye/hand coordination, fine motor skills, pattern recognition
Mess Alert: pieces to pick up (Store the pieces in a box large enough that your child can easily return the pieces himself at clean-up time)

Stringing Beads
Materials: wooden, plastic, or craft foam beads; empty thread spools; leather boot laces, shoestrings, or plastic laces
Method: Tip of shoelaces can be stiffened by wrapping with masking tape to form a child-safe “needle” about 3″ long. Free play, or challenge student to duplicate patterns.
Skills Developed: eye/hand coordination, fine motor skills, pattern recognition
Mess Alert: pieces to pick up (Store the pieces in a box large enough that your child can easily return the pieces himself at clean-up time)

Sewing/Lacing Cards
Materials: cardboard or poster board shapes with holes punched close to the edges; plastic canvas; yarn, heavy string, shoelaces, or plastic laces
Method: Sew through the holes to outline the shape or loop around the edges. (See above for creating a safe “needle” with masking tape) Plastic canvas can be “stitched” randomly or into any pattern desired; it can be cut into shapes or used as squares or rectangles (circles can also be found in most craft stores). Blunt yarn needles (metal or plastic) can also be found in craft stores, if desired.
Skills Developed: eye/hand coordination, fine motor skills
Mess Alert: strings to pick up (Store the pieces in a box large enough that your child can easily return the pieces himself at clean-up time)

Building Blocks
Materials: Cuisenaire rods, building blocks, etc. (may be interlocking or non-interlocking)
Method: free play; building/stacking; pattern matching (include paper patterns to reproduce with blocks); counting, matching, & sorting. Simple patterns may be drawn as a guide for the child to reproduce over and over: red/red/blue or square/rectangle/triangle, etc.
Skills Developed: eye/hand coordination, fine motor skills, pattern recognition, basic math awareness
Mess Alert: pieces to pick up (Store the pieces in a box large enough that your child can easily return the pieces himself at clean-up time)

Buttons
Materials: jar or box of assorted clothing buttons
Method: free play; sorting, matching, & counting
Skills Developed: eye/hand coordination, fine motor skills, basic math awarenes
Mess Alert: pieces to pick up (Store the pieces in a box large enough that your child can easily return the pieces himself at clean-up time)

Wikki Stix
Materials: Wikki Stix (like chenille sticks, but made of wax)
Method: free play; pattern duplication; shaping into letters or numbers
Wikki Stix may be stuck to windows, table tops, paper, or stuck to each other for 3-D creations.
Skills Developed: eye/hand coordination, fine motor skills, pattern recognition, creativity
Mess Alert: may leave slight waxy residue on surfaces, depending on brand used

Cutting Practice
Materials: child-safe scissors, construction paper or newspapers (Again, have a designated supply of papers for the child to use, avoiding accidental cutting of valuable materials.)
Method: Let child practice cutting photos or ads from newspapers, cutting along lines, etc.
Let child practice cutting by reducing construction paper to bits! Leftover scraps of paper, torn sheets, or less-pretty colors may be used up in this manner, giving valuable practice in scissor skills.
Skills Developed: eye/hand coordination, fine motor skills, cutting with scissors
Mess Alert: paper scraps

Handwriting Practice
Materials: newspapers, junk mail (Again, have a designated supply of papers for the child to use, avoiding accidental drawing on valuable materials.)
Method: Let child practice handwriting by tracing lines inside the thick lines of headlines and large font letters and numbers. The child may also like to copy letters or entire words onto blank sheets of paper or wide-lined paper.
Skills Developed: eye/hand coordination, fine motor skills, pre-handwriting basics
Mess Alert: paper scraps; marks from pencils or other writing implements

Activity Jar
Materials: Activity Jar full of assorted items
Method: (see this article for details)
Skills Developed: sorting, matching, counting, fine motor skills
Mess Alert: pieces to pick up (children can easily help toss pieces back into the large container). Pieces may be poured out onto a cookie sheet or cake pan to minimize scattering.

Felt Shapes

Do you need a new idea for keeping the kiddies occupied indoors when it’s too hot to play outside? Are you looking for a “down time” activity? Have you had it with the constant noise of TV and kids and more TV? Here is something that will occupy their minds as well as their hands, stir their imaginations, and give your ears a few moments of blissful solace: a box of felt pieces.

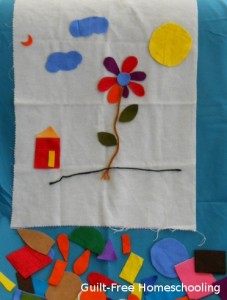
This was a favorite activity for my tactile child. It makes a great “lap toy” for quiet time. I started with some leftover pieces of craft felt, cutting them into geometric shapes and random shapes. A piece of flannel fabric (approx. 18″ x 24″) served as a background and could be spread over a sofa cushion, the carpeted floor, or a bed pillow, then folded up easily to fit into the storage box when playtime was done. [Hint: cut up an old flannel shirt, nightgown, or pillow case.] I used felt in bright colors, pastels, neutral colors, and black and white for squares, rectangles, triangles, circles, and ovals in a wide range of sizes. [Note: thin sheets of craft foam can be used, but the foam pieces tend to jump or cling from static electricity, and they lack the softer flexibility of the felt cloth.] The child makes “pictures” and patterns with the felt shapes on the flannel, stacking or layering pieces as desired. Smoothing the pieces in place provides an important tactile connection for a touch-feely child.

It works best to keep the smallest pieces larger than a coin — anything smaller will be difficult to cut. The largest pieces do not need to be bigger than your hand, since larger pieces will be more difficult to store flat. (An older child may enjoy cutting the pieces for younger siblings to play with, but remember the size limitations.) If you are feeling especially creative, add some half-circles, crescents, teardrop/petal shapes, stylized leaf shapes, and a few 4″-10″ strands of yarn (useful for flower stems, kite strings, and other necessary lines). Pinking shears can add variety to some pieces, but will be difficult to use on smaller pieces; the shears must also be quite sharp to produce a good zigzag edge. (Optional: applying iron-on interfacing will stiffen the felt, making cutting easier and the pieces more durable.)

Remember that this project will be a plaything, so your shapes do not have to be exactly measured or accurately cut. Keep it simple: free-hand cutting is adequate. Circles do not have to be perfectly round, and squares, rectangles, and triangles do not need perfectly straight sides or precise corners. Your child’s imagination will be broadened through playing with the felt shapes, and imagination is a great substitute for precision.

Quick trick for cutting triangles: cut squares or rectangles in two diagonally.
Quick trick for cutting petal shapes: cut a rectangle in two diagonally, making two long triangles, and round off the short end opposite the long pointy tip, producing the stylized silhouette of a single-scoop ice cream cone.
Quick trick for cutting leaves: round opposite corners of a square or rectangle, leaving the uncut corners as the pointy ends of the leaf.

Don’t feel that you need to make shapes that look like real objects. Your child’s imagination will take over, transforming those simple rectangles, circles, and triangles into wonderful things. A child who has always relied on printed coloring pages for “art class” may need some time and a little help to activate his imagination, stop depending on literal representations, and begin developing creative thinking skills.

Store the pieces as flat as possible in a box large enough to make clean-up easy for the child, and a container with a tight-fitting or locking lid will prevent accidental spillage. Any pieces that are wrinkled or folded when put away will be wrinkled and folded at the next playtime, so try to smooth each piece out as flat as possible. (The tactile child will actually enjoy this step.) Badly wrinkled pieces can easily be ironed flat again.

A solid felt board or “flannel-graph” can be made by covering heavy cardboard or a bulletin board with a large piece of felt or flannel fabric. The board requires more storage space than just a loose piece of cloth, but the board can be useful for illustrating lesson concepts to more than one child at a time by propping it up where all can see it at once. A small strip of felt on the back of paper pictures will make them cling to the fuzzy board — the entire back surface of the picture does not need to be covered. Sandpaper can also be used as a backing by cutting thin strips of fine sandpaper (1/2″ wide by 1″ or 2″ long) and gluing the strips to the backs of cardstock pictures or word/number cards. Large cards may need wider or larger pieces of rougher sandpaper to help support their weight. All sorts of visual aids for lessons can be used with flannel boards. Christian bookstores usually carry Sunday School lesson materials for felt boards, including great pictures of Bible heroes or generic pictures of children and families.

Ideas for Lessons:
Sorting — Can you sort pieces by color? By shape? By size?
Counting — How many of each color/shape/size?
Matching — Can you find a piece that is the same color/shape/size as this one?
Patterns — Circle, circle, square… can you make a pattern that matches this one?
Sequencing — Red, red, blue, red, red… what comes next?
Explaining Processes (using flannel-graph letters or cards)– To make the word kitty work for two kitties, we change this y to an i and add es.
Phonics & SpellingC-a-t, b-a-t, r-a-t… can you make more words that end with -at?
Reading — Put these word cards together to make a sentence.
Fractions — Is this rectangle divided into halves or fourths? (Use several squares in the same size to form rectangles.)
Arithmetic — How many ways can you group these pieces? (Use matching sizes & shapes to teach addition, subtraction, multiplication, division, perimeter, and area. Ratios and percentages can be illustrated with a mix of colors, sizes, or shapes: 3 red squares and 1 blue square = 3/4 red and 1/4 blue, or 75% red and 25% blue.)

Felt shapes and felt-backed pictures can be used for just about anything you can think of. Let your creativity take over as you adapt the felt pieces and pictures to whatever lesson you are working on, and watch more applications come to mind the longer you use them. Whether you use this as an educational tool or a quiet-time toy, the learning possibilities will be unlimited!

Top 10 Dress-up Items

Kids love costumes. Dressing up in fanciful attire does something to spark a child’s imagination. Turn your children loose with a boxful of dress-up items, and they will be busy for hours, dressing up, imagining, changing, playing, wondering, and becoming many different characters.

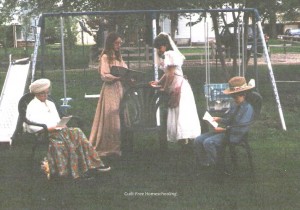
When I was a little girl, my family had a large box of dress-up clothes. I remember playing with them for hours and hours. My favorite Halloween costumes either came out of this box or were added to it after the treats were gone. Specialty items were gathered and quickly tucked into the box. Fanciful costumes created for school plays also went into the box once the performances were over.

Many years later, I created a dress-up box for my own children. They spent many afternoons trying on everything in the box, sharing the costumes with friends during play days, making up skits to fit their costumes, and doing it all over and over again. Some days they dressed up as elegant ladies and gentlemen and held fancy “tea” parties; other days they strived for the goofiest costumes possible and convulsed with laughter and delight.

As dress-up quickly became one of my children’s favorite activities, I began searching for specific items to round out their collection. I cleaned out closets and shopped thrift stores and yard sales for wonderful items: a faded prom dress had been discarded in a yard sale “free” box, and my daughter played with it for years afterward. Here are some basic categories of dress-up goodies to help you get started on your own fanciful fashion collection.

1. Hats. Ladies’ hats; men’s hats; silly, Dr. Seuss-style stocking caps; construction hard-hat; sailor hat; baseball caps; cowboy hats; berets; English-style driving caps; plastic crowns and tiaras; any type of specialty headwear you can find! We had extra boxes just for hats to keep the fancier ones from being crushed.

2. Skirts and Dresses. Elastic-waist skirts, with the elastic made tight enough to fit small kiddies. Full, twirly skirts are best! Dresses are wonderful, especially an old prom dress or bridesmaid’s dress with lace, sparkles, and/or layers of ruffles. My mom sewed spaghetti straps onto a formerly-strapless 1950’s prom dress so that it could hang from my ultra-thin childhood frame. She also made me a “Miss America” banner (which I still have to this day) when I entered the 2nd grade costume carnival in my beautiful gown. It didn’t matter to me that some of the canary-yellow lace ruffles were torn or that the gown was woefully out of style–I loved it and felt very special when I was wearing it. It was originally designed as mid-calf in length, but it dragged on the floor when worn by a 7-year-old, making me feel beautiful and elegant in my tattered, hand-me-down gown.

3. Vests. Dark colors or leather vests work just right for playing cowboys or sheriff. Add a necktie for a businessman’s look. (Keep the knot tied, and just loosen it to slip over the child’s head. For safety with very small children, hand-stitch the knot in place, then cut the tie at the back of the neck and sew in a section of elastic.)

4. Suit Coat or Blazer. Don’t forget that boys like to play dress-up, too! And both boys and girls have fun dressing up as Mommy and Daddy.

5. Gloves. Any colors, all lengths–children love gloves. I snagged opera-length gloves in bright turquoise and short brown gloves trimmed in shiny gold glass beads at a yard sale for 25 cents per pair.

6. Costume Jewelry. Ear clips, bangle bracelets, long strings of beads–the gaudier, the better. Old eyeglass frames (lenses removed) and sunglasses fall into this category as well. You may want another box just to hold the junky jewelry!

7. Shoes. I combed dozens of yard sales before I found the ultimate treasure: women’s black suede pumps in a petite size 5 (for only $1)–the perfect size for a small child to clomp around in. We also had a pair of lace-up shoes large enough that my youngsters could put their foot (shoe and all) inside them for clown shoes they could actually walk in!

8. Furs. Fake furs are best for wash-ability after tea party accidents. We had stoles, wraps, and hats. (Real furs can be quite heavy, especially if the garment is very large and the child is very small. Real furs also attract insects to your dress-up closet!)

9. Scarves. The larger, the better–a really large scarf can double as a superhero’s cape, a princess’s train, an elegant shoulder wrap, an apron, a doll blanket, etc. Include remnants of lace (even a discarded lace tablecloth or lace curtain panel) for veils or wedding dress trains. Remember to include bandanas for your cowboys.

10. Props. Plastic swords, holsters and six-guns, purses and tote bags, a sheriff’s badge, artificial flower corsages, aprons, suspenders, tool belts or carpenter’s nail aprons, etc. Bring out the toy dishes for the tea parties, the toy doctor’s kit and old elastic bandages, and the play tools and an afternoon of make-believe will be unstoppable.

We tossed everything into a huge cardboard carton, large enough that the children could clean up after themselves easily. The size of your storage box is important: it should easily hold everything when tossed in carelessly. Folding the garments as they are put away will result in better looking costumes at the next play session, but diligence sometimes gives way to speed in clean-up. From time to time, I went through the items as we cleaned up and sorted out things which needed laundering, mending, or disposal.

A full-length mirror is another valuable item–the children will love seeing their creative couture, and the resulting giggles will fill your home with the sounds of happiness. Be prepared for costume parades, spontaneous dramatizations, and strange looks from the neighbors if your children venture outdoors in their finery. One mom even asked me how we created a hoop skirt, and she praised our ingenuity: several sizes of hula hoops suspended with string from a belt worn underneath the full-skirted dress.

My children are now grown, but they still cherish their favorite costume pieces and manage to find uses for them year after year. They also find new items now and then that they want to save for their future children’s dress-up collections! Dress-up and make-believe are excellent ways to ignite a child’s imagination, stimulate creative thinking, and reward Mom with a bit of free time while the kiddies entertain themselves.

The Activity Jar

**UPDATED** — See the photo link at the bottom of this article.

Homeschooling parents often lament that they lack the educational gadgets and fancy learning aids that students can benefit from in “real” school classrooms. The Activity Jar is a wonderful store of math manipulatives and assorted learning aids that you can assemble yourself from no-cost items readily available in your home. Gathering the items and filling the jar is as much fun as dumping the contents out again and playing with them.

How to Assemble an Activity Jar–
Begin with one rather large, wide-mouthed container, such as a gallon jar (unbreakable plastic, if possible). Use a small storage tub or cardboard box if you wish, but a secure lid is a must and see-through sides are a bonus. Now set out on a scavenger hunt through your home and garage, poking through the “junk” drawers and all of those little nooks and crannies that tend to collect odds and ends. Pick up those interesting bits of stuff and place them into your jar. Continue this process until you have unearthed all possible objects or until your container is approximately 75% full. Do not give in to the impulse to fill your container brim-full, or you will seriously impede the clean-up phase of using the Activity Jar. Close the lid and set the container aside for a rainy day or any other time when your children want something to do or need practice in sorting, categorizing, or math in general. Bear in mind that the jar will be shaken and rattled around often, so you may need to remove any objects from the jar that become broken with use and replace them with more objects as you find them to keep the Activity Jar’s contents new and interesting.

Be creative with what you select, thinking “outside the box” and including items from all areas of your home, not exclusively small toys. Do include tiny toys, coins, buttons, paper clips, nuts and bolts, and any other fascinating flotsam and jetsam. This is a great opportunity to recycle the remnants from incomplete, broken, or discarded board games. Be careful to select only larger pieces if toddlers may be at risk for swallowing the objects.

How to Use the Activity Jar–
Pour the contents into a large cake pan, unless your children can easily reach into the container to remove the items. Caution: unless your children are already skilled in sharing and showing patience, you will want to limit the Activity Jar to one student at a time. The discovery process can foster territorial feelings and selfishness, especially if two students are attempting to divide the contents without supervision or guidance. Encouraging your students to work together as a team toward a common goal can help them to overcome competition and rivalry.

Allow a student to begin with periods of free play with the objects, and watch him begin sorting without being prompted. When the student has exhausted his own ideas, challenge him to begin sorting the contents into 3 basic categories: Category A (such as round), Category B (such as not round), and Category C (for Other, or I’m not sure what to call this one, because one side of it is A and the other side is B). Other possible basic categories (for A & B) are flat objects and fat objects, single-colored objects and multi-colored objects, buttons and not buttons. Category C is always useful for speeding up the process, since there will usually be something that does not fall easily into the two main categories. Use more cake pans, cookie sheets, shoe boxes, freezer containers, bowls, muffin pans, egg cartons, paper cups, or any containers that will make the sorting process simple and easy.

Once Categories A and B have been sorted out, choose one of them and set the other objects aside for now. Further divide this selection of objects into more specific categories. Sort single-colored objects into individual color families; sort round or flat objects into disk-shaped objects and non-disk shapes; or sort the objects into general size categories of small, medium, and large before measuring them for more accurate classifications. Again, it may help your child to have an “Other” category for things that are difficult to categorize into his chosen groupings.

Preschoolers can enjoy digging through the contents of an Activity Jar (filled with toddler-safe objects) while Mom is helping their older siblings with lessons. Provide them with several empty plastic bowls or freezer containers, and they will have fun sorting and moving objects from here to there and back again.

How to Learn from the Activity Jar–

Sorting and categorizing are the most basic skills that can be learned. Since the jar contains a variety of objects, the student must make decisions for which category applies to each object. Begin with very basic categories (as described above) and proceed to more complicated descriptions later, as the student’s abilities advance. The more the student sorts and categorizes, the finer the details become that can be used for sorting as categories are divided and sub-divided into smaller and smaller groupings.

Even the youngest student can perform simple sorting tasks. Vocabulary and recognition skills are increased as preschoolers practice sorting to learn shapes: Let’s find all of the round things. Color names can be even easier to demonstrate with the jar’s goodies: Today, let’s find all of the blue things. Now let’s make another group of things that have some blue on them.

Students quickly learn that each object can be classified in numerous ways: a single button may be round, flat, pink, have a certain number of holes through its middle, and be an object that starts with the letter “B” or a color that starts with the letter “P.” It may have a design of squares on its top, and it may be made of wood. The student will expand his abstract thinking skills as he learns to look at each object in numerous ways and learns to see all of the various attributes of any given item. Sorting these same objects over and over (by colors, by shapes, by materials, etc.) will illustrate to your child how common objects can be anything but common.

As skill levels advance, so can the sorting criteria, as well as the mathematical applications. Students of all ages will benefit from practice in sorting and counting, resorting and recounting, but other skills can be improved as well: comparing, judging, and classifying; the basic arithmetic of adding, subtracting, multiplying, and dividing; illustrating fractions and percentages; taking measurements; and on and on.

Once your student has divided and sub-divided objects into satisfactory groupings, challenge him to count the total number of objects and count the number of objects in each sub-group. A student who can perform long division can calculate each smaller group as a percentage of the larger group. If the concept of percent is difficult for the student to grasp, try the exercise again, but this time limit the large group to exactly 100 objects, then repeat the sorting, counting, and arithmetic portions. After the student understands percentages of 100, he can try again with a different (larger or smaller) number of objects as the larger grouping. Fractions can also be illustrated with sub-groups: one student has sorted out 12 game tokens, 6 of which are red; therefore, one-half of the tokens are red. Notice that 2 of those red tokens have a pattern of ridges on them, representing one-third of the red tokens and one-sixth of the larger group of 12 tokens.

Algebra uses the concept of sorting with polynomials. An algebraic expression may contain many objects to sort and categorize, but instead of being red buttons and blue buttons, pennies and nickels, and yellow and white game tokens, they look like X and 2X, XY and 3XY, and 4Y and 2Y. A student who understands that buttons are buttons and that coins are not buttons can also understand that X and 2X are both X-objects, and that neither of them are XY-objects or Y-objects. That is the basis of algebra: sorting and grouping similar objects, while not grouping dissimilar objects.

The skills to be gained from an Activity Jar are nearly limitless. Classification is the basis of scientific research, sorting useful facts from insignificant facts. The plant and animal kingdoms are carefully sorted and classified into similar groups. Other applications of the Activity Jar cover many academic subjects. The visually-oriented student might make graphs and charts to show how many objects were sorted into each group or compile lists of attributes (color, size, shape, material, etc.) for some items. The tactile student might experiment with stacking objects to see which types of shapes can and cannot be stacked easily. You can spur your students’ creativity by them to invent a game using some of the objects. Sharpen your students’ tactile and memory skills by placing some objects inside a paper sack, then asking each student to reach into the sack and try to identify the objects by touch alone. To improve auditory skills, secretly place an object inside a box and challenge your students to listen closely as each one shakes and tips the box to see if he can determine what type of object is inside, just from the sounds it makes while sliding back and forth.

The more activities your students do with the Activity Jar, the more ideas you and your students will think of for new activities to try. Your applications for the Activity Jar will probably go far beyond the few simple projects that I have described here, making your jar one of the most valuable learning aids in your homeschool. And you thought this was just a jar full of useless junk.

Photos of my Activity Jar and some examples of sorting activities can be viewed HERE.

Verified by MonsterInsights