Workshop Wednesday: Color-Coding As a Learning Tool

[This article was written by Jennifer Leonhard.]

Is your student attracted to color or motivated by markers? Does your student struggle with staying organized when studying? Color-coding is a great learning tool. Visual learners respond well to color as an organizational method, and non-visual learners can improve their visual skills by using color to organize information. As classes become more complex in high school and college, color-coding becomes an even more valuable organizational tool.

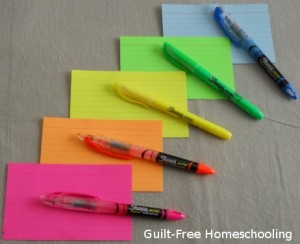
As a strong visual learner, I used assorted colors of index cards and highlighters to help me organize my thoughts and the material I was studying in my college classes. I used the order of the color spectrum as my color code whenever I needed to maintain a beginning-to-end, front-to-back sequence: red, orange, yellow, green, blue. My system always began with red (pink worked as the closest available color in note cards and highlighters) and proceeded through the spectrum to blue (violet/lavender was too hard to find in highlighters).

Here’s how I wrote the various parts of a speech or oral presentation: one pink card held the introduction, several orange cards for the information for Point 1, several yellow cards for Point 2, several green cards for Point 3, and one blue card held the conclusion. I could rehearse a presentation using these cards, and if I dropped them or they got mixed up in my backpack, I could easily put them into color spectrum order again. Any supporting quotes had their own index cards (using the appropriate color code for each point), and I would draw a squiggly outline on those cards to indicate that they contained the quotes. Each card had a topical title at the top and a number in the corner to indicate its order within each color group. I rarely ever needed to look at my note cards when giving a presentation, because I had them so well organized that I could easily see them in my head and go from there, but I did keep the cards with me in case of a blank-out moment. I could also turn them in to the teachers who asked for them as part of the assignment.

I also used this system for writing extensive research papers to create an outline in this format. I could put anything supporting Point 1 on orange cards and just go through all the orange cards later to put them in order for writing my paper.  When doing research papers and printing out a stack of articles for a 50+ page paper, I would use highlighters in the same colors as my note cards to circle significant points in the article. I could then grab all articles with orange outlines and work just on my first point without being distracted by all the other sections.  If an article had information for several points I would do a thicker outline in the color that it discussed the most and a thinner outline in the color of the point it discussed less, and then highlight or circle the section of text that pertained to each part in the appropriate color.  I could flip through my notes very quickly and efficiently in this way and find exactly what I was looking for at any particular moment.  I rarely had a “blanking” moment when writing, because I had a system that provided me with a place to start.  I didn’t have to write the individual sections of the paper in any particular order, and if I found myself overwhelmed by the sheer amount of research information I had printed, I could simply start color-coding instead of freaking out.  If I found myself unsure of where to stand on an issue or how to phrase my findings, I could simply grab all of the items outlined in orange and start highlighting, circling, or underlining the important sections that I wanted to use.  Stuck on what to write for orange? No problem! Just work on the yellow items for a while, and then come back to orange later.  I had no fear of getting confused or forgetting what I was doing next, because everything was very plainly color-coded for picking up where I left off.

Similarly, I would use this method to study complex material. I used the same color-code for highlighters, note cards, in my lecture notes, and in the text books, so that I could start the process while reading and know what to put on the index cards later. I used yellow as my color-code for keywords from the text. Pink was for any important dates to remember, green signified important people, and orange was for formulas and diagrams. Blue was for any other information I needed to make sure to remember. By categorizing things like this, I could pull out just my orange cards right before a test and review the formulas and diagrams, if I thought I was suddenly blanking on something. I’m bad at remembering specific dates, so I could grab the pink cards to quiz myself on those. This made it easier to categorize the test elements in my head, and instead of all the information being a blur of grey pencil notes on white lined paper, I could focus my memory on just the orange parts, or just the pink parts. The colors became just as important as the facts themselves, especially when trying to sort through all the facts in my head to find the one correct answer I needed on a test.

Whatever color-coding system you choose to use, the color significance can vary from subject to subject, but consistency within each subject is the key to making your system work. Yes, I bought a lot of index cards and highlighters, but they became valuable assets to my study habits, and the positive results proved their worth. Other colored items could also be added to a colorized system, such as colored pencils, file folders, pocket folders, notebooks, divider tabs, sticky-flag bookmarks, and whatever else your favorite office supply store has crammed into its aisles. Using color-coding is a great organizational and memory tool, and it strengthens your visual learning skills, even if visual skills are not your strongest learning style. And who doesn’t like playing with a whole rainbow of highlighters?
Workshop Wednesday: Tactile Card Holders, Version 2

Based on last week’s Tactile Card Holders, Version 1, this week’s version uses a few different supplies to create a similar product.

Equipment:
Cereal box cardboard
Photo corners for index cards
Glue (optional)

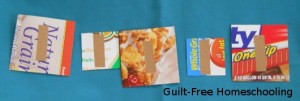
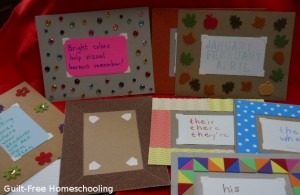
Yes, we are breaking out our old friends, the cereal boxes, to make yet another great learning tool. I cut the cardboard into pieces larger than my index cards and attached self-stick photo-corners in the middle for the index cards. You can use 3×5″ or 4×6″ index cards, depending on what you have available and how much information will be put onto the cards. Then I decorated the surrounding “border” with whatever was available (1 “theme” per card), using glue to attach the things that weren’t already self-stick.

Edges decorated with:
Ribbon
Sequins
Craft foam/felt stickers & shapes
Sandpaper
Acrylic rhinestones/gems
Textured papers

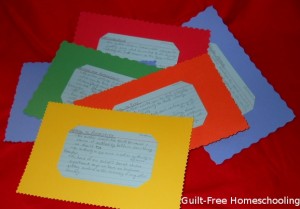
The examples in the picture show photo corners without an index card inserted, along with a few examples of spelling rules. As in last week’s article, these card holders can be especially helpful for older students who are trying to memorize more complicated information and formulas. Once learned, the note cards can be easily switched with new cards for studying new facts. The border textures work by appealing to tactile fingers and giving them something to focus on while the eyes are busy reading the facts on the cards. Later on, when the mind tries to remember the facts, the textures, patterns, and colors from the borders of each card holder will serve as markers on a virtual road map to help the brain find those facts and pull them up into view. Students who have had trouble memorizing dull, dry facts in the past will find these note card holders add some pizazz to the process and actually help stimulate their memories.

The borders of these card holders will offer even more tactile interest than the ones from last week that simply had their edges trimmed with special scissors. My favorites among these have to be the cards with sandpaper borders — I made several of those, each with a different level of coarseness. Satin ribbons offer a smoother texture, but grosgrain ribbon is different yet. I also found some wonderful textured papers at a scrapbooking supplies store to expand the variety of textures and visual appeal. Other cards had their borders adorned with thick felt stickers, craft foam shapes, acrylic “gems,” and other crafty materials to add texture and color. Let these examples spark your imagination and see what you can come up with!

Workshop Wednesday: Tactile Card Holders, Version 1

Sometimes certain facts work well for studying from homemade flashcards. However, some students just don’t do well with trying to learn from ordinary index cards. Today, we’re going to make those cards extraordinary! These card holders will work especially well for teens who are trying to learn complicated facts and formulas, but who need some extra learning methods thrown in.

Equipment:
Index cards to hold the facts or information
Bright colored card stock
Razor knife for cutting slits
Scrapbooking scissors for trimming edges

How To:
I started with 8 1/2″ x 11″ sheets of brightly colored card stock and cut them in half to make two pieces 5″ x 8 1/2″. Lay an index card in the middle of each of these sheets and mark about 1/2″ from each corner. Use the razor knife to cut angled slits (connecting the marks you just made) for the corners of the index cards. You don’t need to get the cards exactly centered or the slits angled perfectly; if you have a student who is fanatical about precision, give this job to him. Either 3×5″ or 4×6″ index cards will work, depending on what size you have on hand or how much info will be put on each card. The bright colors add visual interest to the boring facts (did I just say boring? oops), and colored index cards can do the same thing (the ones in the photo are light blue, but white cards work just fine). Just be careful that the colors don’t clash or create such a visual disturbance that no one can stand to look at them!

I had a variety of scrapbooking scissors available, so I trimmed the edges of the card holders, using a different pattern on each card. If you only have one or two fancy scissors (or even just a pair of pinking shears), that will still work. You could even use regular scissors and just cut some wavy or zig-zaggy edges. The idea here is to create a little bit of tactile interest for the fingers that will be holding the cards.

As your student studies the facts on each card, the bright color of the card holder will become a visual cue to those facts, and the tactile edge will do the same for his fingers. Reading the card information aloud lets the student say and hear the info, important methods for auditory learning — and when he stops reading aloud, he’ll catch himself wandering off-topic. The large size of these card holders makes them more of a kinesthetic learning tool than just small index cards are. The colors, edge textures, size, and reading aloud will all provide memory keys that his brain can rely on when trying to remember the facts on each card. Hmm… that card was in a red holder… I was holding it with both hands… the edges were pointy… I remember hearing myself say these points over and over… I know — it said THIS!

By inserting the index card’s corners into slits, the holder becomes reusable. When this set of facts has been learned and the student is ready to move on to learning different information, the index card can easily be slipped out and another inserted in its place. Make as many card holders as needed, but if possible, trim the edges of like colors with different patterns to make them different (notice that the 2 blue card holders in the photo have different edge patterns).

The cards shown here are for fallacies of reasoning, but you can use this method for learning vocabulary words, their spelling, and meanings; math or science formulas; historical events or people; or anything else that needs to be memorized.

Also see Tactile Card Holders, Version 2 for more ideas!

Workshop Wednesday: The Moving Answer Worksheet

Addition facts are not tricky; they are merely a short-cut to counting from one number to a higher number. Subtraction is not a difficult procedure; subtraction is just un-doing addition. When taught together, addition and subtraction become different ways of looking at the same problem. Children often get the impression that addition is one skill, and subtraction is a completely different skill. They are not different skills, they are just different methods of looking at the same facts. It’s the same principle as if you and I were holding several pencils, but I give you a pencil, and then you give me a pencil. We can trade pencils back and forth for as long as we want, but we are still holding the same total number of pencils.

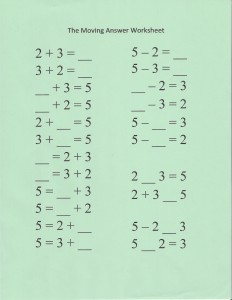
When my kids got stumped on variations of the same math fact (is 2+3 different from 3+2?), I created a simple worksheet to show them how to see those variations as always being the same statement, no matter what form it took. I rearranged the numbers in every way possible, and I moved the answer blank around to different locations, too. By completing this short worksheet, my kids learned to see the statement as a whole, instead of seeing each variation of it as a completely different problem. By combining the addition and subtraction variations of the same math fact, my kids caught on quickly to the idea that those particular numbers always went together, whether adding or subtracting.

Some math teachers and some math programs only place the answer blank at the extreme right end of each problem at this stage. Some students who experience this consistency can become incredibly confused when they are eventually presented with a problem that has the answer blank in a different location. Learning to relate to each set of facts as a completed puzzle helps students identify which piece of the puzzle is missing, and the many variations possible in this worksheet will prepare students for later math (such as algebra) when the answer blanks shift around to different positions within the problems.

Notice how this method was extended in a few examples to include the arithmetic symbols, as well as the numbers, such as in 2 ___ 3 = 5. Obviously, a plus sign belongs in that space, since 2 and 3 must be added to equal 5. It’s obvious to you and me, because we’ve been doing this for so many years, but to a youngster just learning arithmetic, it’s not quite as apparent, and a little discovery is good for the brain cells.

This principle can also be applied to multiplication and division facts, as division is simply the un-doing of multiplication. The stage of learning the facts is a good time to combine these skills, since there are no remainders yet.

The worksheets don’t have to be fancy at all — a handwritten version is just as valid as a computer printed one, but handwriting will probably be much faster and easier to produce. Stick to one set of numbers for each worksheet, but include all the possible variations. Your students will catch on quickly!

Use other learning style methods along with this visual worksheet. Auditory learners will benefit from discussing the patterns in the problems and will appreciate a chance to answer orally. It helps to connect learning styles if you encourage them to write their answers in the blanks after giving the correct oral answer. Do any of the following activities with your auditory learner, but talk about what you’re doing and read the problems aloud, or let him talk aloud to himself. Background music is also helpful for auditory students who need it as “white noise” to drown out other noises and help them concentrate, so keep the iPod and headphones handy! If you have any other students nearby who are not auditory learners, they may appreciate being allowed to do their work in another part of the house — my visual/tactile daughter did a lot of lessons quietly in her bedroom while her auditory brother and I discussed his work in the kitchen.

Tactile learners can use manipulatives to help solve these problems, such as small blocks or dry beans. The same group of objects can be used for the entire worksheet by rearranging them to fit each of the various problems. Other helpful items may be individual cereal-box cardboard “flashcards” for each number and arithmetic symbol–students can arrange and rearrange them to see which piece of the puzzle is missing. Tactile learners need to keep their fingers and hands involved during the lesson, so use whatever materials you have available to make that happen, even if that means making the worksheets large enough to hold numbers formed from Play-Doh on each answer blank!

Kinesthetic learners work well with large-scale manipulatives, such as sports balls arranged in groups in the back yard to fit the problems. You can adapt tactile manipulative, table-top methods for kinesthetic learners by making things large enough that they will be using the big muscles of arms and legs instead of just fingers to move items around. Another good kinesthetic learning method is to write large problems on a whiteboard or chalkboard, or use a slick-finish white shower curtain liner as a giant piece of paper on the floor and write on it with wet-erase markers (or use Post-It notes for the answers). Chalk on the sidewalk or driveway is another good stand-by for over-sized writing projects, but don’t forget that your kinesthetic student will also respond well to doing standard worksheets if he can lie on his tummy on the floor to do them! Any method that keeps those big muscles active is a kinesthetic method, so if you want your student sitting quietly in a chair, it’s not a kinesthetic lesson.

Whatever your students’ learning styles may be, it should be their goal to learn how to learn through every style. Therefore, using a few of the above ideas for each student in whatever lessons you do will increase their ability to learn through other styles and increase their overall understanding. Besides that, variety just makes the learning that much more fun!

Workshop Wednesday: 100-Grids and Flashcard Bingo

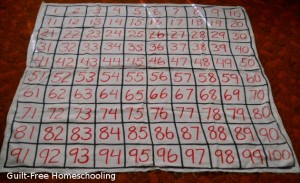
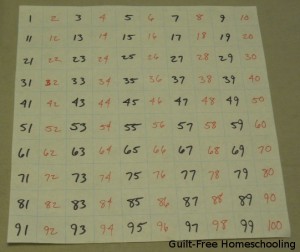
A 100-grid is another marvelous teaching and learning tool that can be made in numerous fun ways. A standard 100-grid contains the numbers from 1 to 100 (too obvious?) in ten rows of ten squares each, 1-10 in the top row, then 11-20 in the second row, and so on.

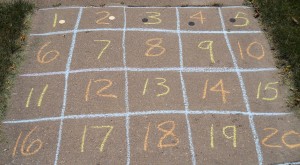
Draw the grid on the driveway with chalk; your kids may also get Dad’s permission to draw it on the garage floor if they promise to sweep it clean again when they’re done. I drew a 100-grid on an old tablecloth (you can also use an old bedsheet) with permanent markers for a reusable, storable, portable, floor-cloth version. These grids are big enough for your kinesthetic learners to hop around on for hopscotch-style, action learning!

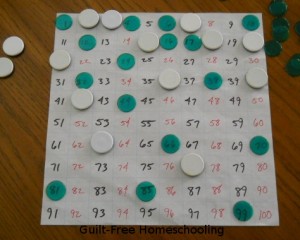
Draw a smaller 100-grid on paper or cover the blank-grid side of a Scrabble Junior game board with clear Con-Tact paper (to make it washable & more durable) and fill in the numbers with either wet-erase or dry-erase markers. These versions are more tactile, since your students can use game pawns, pennies, or dry beans for marking number squares in learning activities.

Add a visual learning element to your 100-grid activities by alternating colors of the numbers. To skip-count by 2’s, write the odd numbers in one color and the even numbers in another color. To skip-count by 3’s, use one color for the multiples of 3 and another color for all the other numbers. If you want to do this activity many times for many multiples, write all the numbers out in one color, then place a colored marker on the appropriate skip-counting intervals.

Do you have an auditory learner? Challenge him to say the numbers aloud while hopping or jumping from number to number, or while placing markers on the correct squares.

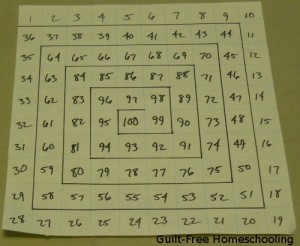
Try varying the arrangement of the numbers in your grid for some interesting game play. If you have a Chutes and Ladders game, you can see one simple variation of our grid — it starts in the lower left corner and zig-zags back and forth to the top. For another game board variation, start with 1 at an outer corner and spiral the numbers in toward the central 100 square–but you might want to outline the path to make it easier to follow.

For a very simple game to practice math skills using these novelty grids, remove the face cards from a normal deck of playing cards and use the remaining “math deck” for an addition game. Let each player select a pawn and set it just off the grid near the 1 square; on his turn, each player will turn up a card from the deck and move his pawn that many spaces. The first player to reach 100 wins that round. For more advanced play, let the black cards represent positive numbers (adding, or moving forward) and let the red cards represent negative numbers (subtracting, or moving backward).

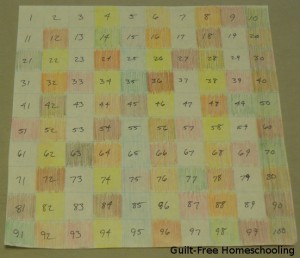
Another amazing math activity is the “Sieve of Eratosthenes.” This scholar from long, long ago created a fairly simple mathematical process for isolating prime numbers. On a standard 100-grid, have your students cover each multiple of 2, starting after 2 itself, to cover each number that has 2 as one of its factors. Since 2 has only itself and 1 as factors, leave it uncovered; it is a prime number. Now repeat with 3, covering each number after 3 that is a multiple of 3. Continue for 4, 5, 6, 7, 8, and 9. The numbers that are left uncovered are all prime numbers that have no other factors besides themselves and 1. This is fun to do on paper, using colored pencils to color in the squares and using a different color for each round. Starting with a light color and getting a bit darker on each round will show very plainly which numbers have the most factors — they will be very dark when you have finished.

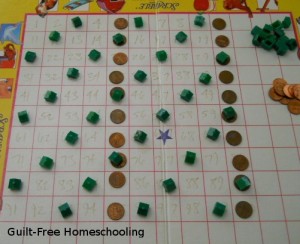
Now for a bonus — here are the instructions for a game I call “Flashcard Bingo,” that is played on a 100-grid.

FLASHCARD BINGO

Equipment:

  • 1-100 chart
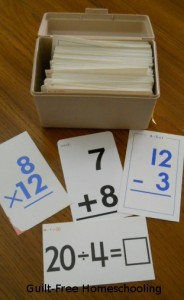
  • Math flashcards–combine addition, subtraction, multiplication, and division flashcards (The combination of cards used should be appropriate to the players’ skills.)
  • Several dozen markers for each player (colored paper squares, pennies, dry beans, etc.). If playing outdoors, larger objects, such as poker chips, can be used as markers.

Shuffle all the flashcards together and place them in an index card file box or other box that will hold all the cards and allow extra room for fingers to draw them out.

Use the honor system for not peeking at the answers if they are printed on the cards, or have players draw & hold cards for each other, covering answers as needed.

The first player draws a card at random and gives the answer to the problem. If he gives the correct answer, the player puts his marker on the answer number’s square on the 100-grid. If the card has two different problems on front & back, he may look at both problems and choose either side of the card for strategy: if the player already has possession of the square for that card’s answer, he may choose to answer the problem on the opposite side.

If the player gives an incorrect answer, the next player gets a chance to answer correctly and “steal” the square. If the second player cannot answer correctly, each player in turn is given a chance to answer and steal the square with the correct answer. The player giving the correct answer may not be holding the flashcard or may not have seen the answer on the flashcard.

At the end of a player’s turn, his card is returned to a random location in the box. Play proceeds to the left of the player who drew that card, even if he answered incorrectly, and even if the player who gave the correct answer is the next player in the circle.

If a player’s answer number is already covered by another player’s marker, the new player may “bump” the occupying player’s marker off the grid and place his own marker on the square, or the player may opt to take another card instead of bumping the occupying player’s marker.

If the player already has possession of the squares for both sides of the card, he may announce that he will combine both answers as desired (adding, subtracting, multiplying, or dividing) to achieve a hard-to-reach number square, such as prime numbers or large numbers. Paper & pencil may be permitted, but not calculators. If a player draws a flashcard with a correct answer of 0 or an answer larger than 100, and he is not able to combine the answers from both sides of the card, he may opt to draw again. There is no limit to how many cards a player can draw, as long as he already owns the squares representing the answers to the cards drawn, but he must use the first available square.

Winner is the first player to get 5 markers in a straight row, vertically, horizontally, or diagonally.

Advanced Option: Add a game die for another challenge. Players roll the die on each turn and add, subtract, multiply, or divide that number into the answer on the flashcard to determine which square to occupy on the grid.

Discussion Question: As your students play this game, ask them if they notice which part of the grid accumulates the most markers and if they can explain why that happens.

Younger Players Option—

Use only addition & subtraction facts from 1-20. Play on a 20-grid with 4 rows of 5 squares each (1-5, 6-10, 11-15, 16-20). Winner is the first player to get 4 markers in a straight row in any direction, vertically, horizontally, or diagonally.

For more ideas, see also:
Applying Learning Styles with Skip-Counting
Hopscotch–A Powerful Learning Game

Workshop Wednesday: Flannel-Graph

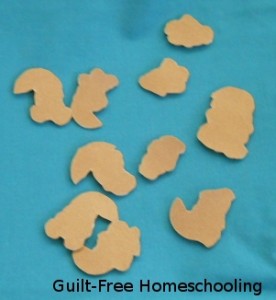
Back when I was a wee tot, every one of my Sunday School teachers used a flannel-graph to illustrate lessons. If you’re not sure what I mean, a flannel-graph was a board covered in fuzzy flannel fabric, usually made so it could fold in the middle like a book. Teachers opened it enough to stand it on a table or spread it wide open on an easel. Cut-out pictures made of felt could be placed on the flannel board and magically stayed where they were placed — well, it appeared to be magic to a small child in the Sunday School classroom. What really intrigued me was when the teacher would place a paper picture on the board, and it stuck, too! I remember watching those pieces of paper carefully, trying to see what gave them their magical sticking ability, finally noticing a small strip of fuzzy cloth glued on the back of each one. One summer, during Vacation Bible School, I got to make my very own set! Each student was given a set of pictures appropriate to whatever the lesson was that day, and we got to color them, cut them out, and glue a small strip of sandpaper on the back of each one. Many years later, I applied that same simple technology to making quiet toys and learning aids for my kids.


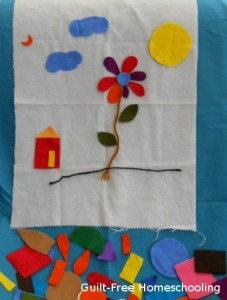
I cut a remnant of flannel cloth about the size of a pillow case, but I did not attach it to a board. Instead, we would spread it over a pillow or sofa cushion or any suitable surface and place felt shapes on the cloth. My tactile child loved to smooth out the pieces, rearrange them, and rub them with her fingers. She would use the random geometric shapes to make simple pictures or sort the pieces into groups of squares, rectangles, triangles, and circles. We had a storage box for all of the pieces that allowed them to be stored flat, since a wrinkled or folded piece does not make good pictures in the next session. Our flannel cloth was folded up and placed in the top of the box for the next use. I also added a few pieces of yarn at my daughter’s request, to use for flower stems, grass, fences, and other imaginative play. This was her favorite quiet-time toy, and she never ran out of ideas for pictures to make with the pieces.


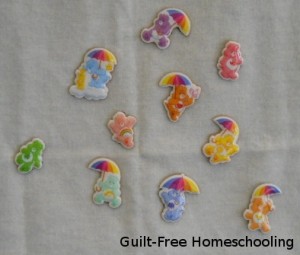
A sheet of Care Bear puffy stickers added another dimension to this set by sticking each one onto the back of a piece of sandpaper and carefully cutting around the sticker. Re-usable stickers!


The more I thought about my old Sunday School lessons, the more I realized we could use this low-tech play set for some creative learning aids. I glued a small strip of sandpaper onto the backs of some cereal-box cardboard math cards for some magically-adhesive, tactile flashcards.

Colors, shapes, letters, words, numbers, and more — how will you use this idea? This activity can grow with your students and expand to fit their needs. How about lots and lots of sandpaper-backed letter squares for tactile spelling practice? Or lots and lots of little number squares and arithmetic symbols for tactile math practice? Ooooh, how about flannel-graph fraction pieces? Mix and match fractional segments to prove that three-quarters of a circle occupies the same space as nine-twelfths of that circle.

The tactile student who plays with a paper clip or twirls his pencil during lessons needs that finger interaction as much as a visual student needs to study the diagram or read the directions himself. Tactile learning aids work for any student who prefers to keep his fingers busy, not just for fidgety youngsters. Tactile fingers help the student absorb information, just as much as standing up and moving around helps a kinesthetic learner pay attention and concentrate. Older students can make their own flannel-graph states from a cut-up map for tactile, self-checking, geography practice. Use flannel-graph techniques to create a timeline of historical events. Even diagramming can be accomplished with flannel-graph word cards! If some lesson concept is giving your student trouble, try making some flannel-graph manipulatives for it. Brainstorm together, and let your imaginations run wild! The textures can be surprisingly helpful for learning — and a lot of fun, too!


See this article for more ideas: Felt Shapes

Workshop Wednesday: Map Puzzle

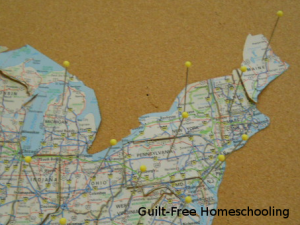
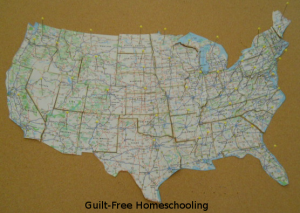
Take one large, atlas map of the USA (preferably an older one, not the one needed for an upcoming vacation or business trip). Cut it apart on state borders; mine was a 2-page map, so I taped the pages together before cutting the states apart. Optional: Leave the smaller states of Rhode Island, Connecticut, Massachusetts, Vermont, & New Hampshire together as one unit, making them slightly harder to lose. Using a large bulletin board and some long “quilting” pins (mine are approx. 1 5/8″ long), reassemble the map by pinning the state puzzle pieces in place on the board, forming the contiguous 48 states.


This puzzle can take students further than traditional USA jigsaw puzzles, since the pieces are not different colors and the highway markings can be used as clues for lining up the pieces. State borders become less noticeable, and major cities, highways, lakes, rivers, and other geological features are included on an atlas map, taking this from a simple puzzle activity to a fascinating exploration. The learning continues after the puzzle is assembled, by following the interstate highways from state to state, coast to coast, or border to border. Students can trace the route of a past family vacation or plan another, perhaps even evaluating various paths of travel across the country. Select two states at random and plot the most direct route from one to the other or the most scenic route or the best route to use during summer or winter driving for avoiding super-hot weather or snowy/icy roads. Older students who are nearing driving age may find this activity particularly interesting.


The map puzzle in these photos does not include Alaska or Hawaii, since they are usually not represented on maps in the same scale as the other states. The state of Hawaii consists of more than 100 islands, not just the eight larger islands we usually see on maps. The total land area of the Hawaiian islands is less than the area of the state of New Jersey, but greater than the area of the state of Connecticut. Alaska has more than twice the land mass of Texas, but Alaska’s boundaries and archipelago islands stretch its dimensions to massive proportions (see link below). Other state-to-state comparisons can easily be made with these puzzle pieces. A globe or world map is also helpful in comparing size and location of the various states, using latitude and longitude lines as guides.

Another way to supplement your explorations is with Google Maps. Use the satellite views to zoom in on tiny islands or coastal details, or visit the Grand Canyon, Mount Rushmore, Niagara Falls, or New York City’s Central Park (or anywhere else!) with Google Street View to take a virtual field trip! Many locations include a selection of up-close-and-personal photos from previous visitors to enhance your “travels.”

Here is a map showing the full size of Alaska as compared to the continental USA — http://www.tongass-seis.net/media/images/AK-USA.jpg

Other topics could be explored with a little extra research, then compared to today’s highways on this puzzle map:
The Appalachian Trail
The Lewis & Clark Expedition
The Oregon Trail
The Santa Fe Trail
…and many others!

Similar puzzles can be made from other maps for more fun geography — state road maps cut on county lines; a Canadian map cut on province boundaries; a map of Mexico or Australia cut on state borders; a map of South America, Europe, Africa, or Asia cut on borders between countries.

Verified by MonsterInsights