Workshop Wednesday: Natural Science

Summer is a great time for science exploration. The backyard is the perfect location for mixing Diet Coke and Mentos (search You Tube if you don’t know what I’m talking about), and the weather is relatively cooperative for spending time outdoors. There are abundant species of plants, birds, bugs, and other critters just waiting to be studied, so by adding a few basic supplies, we can turn a boring afternoon into a great learning experience.

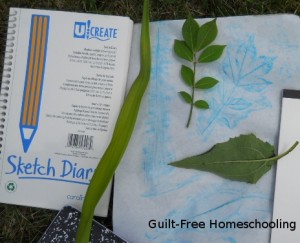
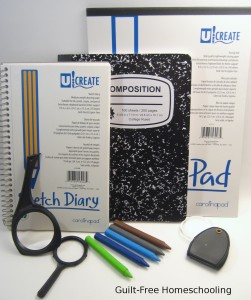
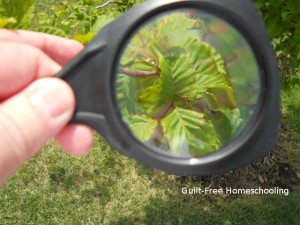
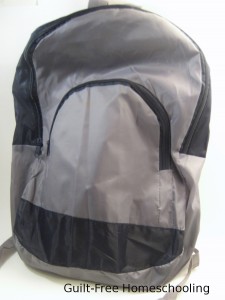
The required supplies may surprise you: a pocket-sized magnifying glass is good enough for this project, and some simple drawing supplies complete the list. A small sketchbook and pencil are good for making simple drawings, tracing paper and dark crayons work well for texture rubbings, and a notebook and pencil can serve as your journal for noting what species are found or recording any experiments you try. Toss these into a bag or backpack, along with some bottled water, snacks, bug spray, and sunscreen, and then head out on an exciting trek through the wilderness or a walk around the block, which can yield just as many thrills in the variety of species to be found!

We went on picnics and nature hikes in our favorite parks, but we also found that walking the same route through our neighborhood would reveal new discoveries each time. The trees bloomed and leafed out at different rates in the Spring, flower beds bloomed throughout the seasons, and weeds could be as much fun to identify as anything else. Birds were another category we learned to identify, both by sight and by their songs or calls. Fishing with Dad always gave us opportunities for seeing more natural wonders.

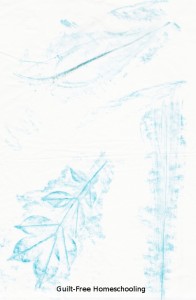
We made rubbings of leaves, we drew sketches of birds and bugs (not very artistic, but good enough to help us look them up later in wildlife reference books), and we studied all sorts of things through a magnifying glass. Sometimes we just sat in amazement and watched the miniature world of an anthill or a pond full of tadpoles. We watched bees and wasps diligently visiting every blossom on an apple tree. We giggled at the antics of squirrels burying acorns, then digging them up again only to bury them in another spot. We listened to the birds and learned to mimic them well enough to have them answer when we called. We sorted a handful of random pebbles into several types of rocks. We carefully pulled flowers apart, petal by petal, to study the intricate designs. The various categories of nature study could fill an entire summer by selecting a different interest each day!

When I was in high school, my science teacher required each student to compile an extensive collection of plants as a year-end project, and each year he increased the number of species! I think the final tally was 40 wildflowers, 40 trees, 10 grasses, and 5 mosses – all different, no duplicates, and we had to label each one with its correct name. My kids loved the idea of being able to identify that many individual species, so we hiked through some of the same areas that I had frequented during high school, just to see if we could find those same plants again. I wish that when I was making my high school collection that I’d had the book we used then. We had a wildlife reference book that covered everything from trees to mushrooms to wildflowers and more creepy-crawlies than you want to know about. There are now many websites for reference, and you can find apps for your smart-phones, too! If you don’t already own or have access to the supplies listed above, visit our Etsy shop to purchase the GFHS Natural Science Mobile Learning Lab, which includes a Usage Guide with many activity ideas.

Here are a few references to get you started:
“Natural Science Mobile Learning Lab” from Guilt-Free Homeschooling
What Bird Is That?
What Tree Is That?
North American Wildlife
Workshop Wednesday: Jumpropes

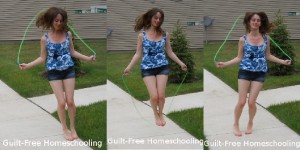
I spent a lot of summer days in my childhood jumping rope, so when we heard about a precision jumprope team in our area, we had to investigate. My kids joined the group and learned some amazing acrobatic tricks that make jumping rope much more fun and a great way to impress your friends! In this Workshop Wednesday, we will also move beyond merely jumping the ropes and explore some other ideas that will show you how to use jumpropes in making ordinary lessons extraordinary! These tips will take lessons off the table and out of the classroom and make them into kinesthetic learning fun!

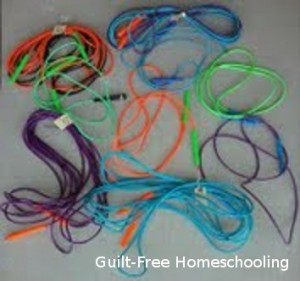
Jumping rope is a great strength and stamina building activity, which is why boxers and other athletes use it as part of their training. Before we get started in the how-to’s of fancier jumping, let’s talk over some basics. Speed ropes are best for this type of activity; a speed rope is plastic or vinyl but may be solid or a hollow tube, with handles that spin freely. To get your rope to the perfect size for your body, stand on the middle of the rope and pull the handles up as high as they will go: the handles should come up to your shoulders. To shorten a rope, untie the knot in one end and retie it at the appropriate length, sliding the handles back in place; you can cut off the excess rope if you wish, or keep some extra length for kids who are still growing. If your rope is too short, you will be more likely to trip over it; if your rope is made of something soft like braided cotton roping, it will move too slowly and mess up your timing.

Ow! If you are new to jumping rope or haven’t done it for a long time, you will probably experience a painful side-ache after an extended period of steady jumping. This is an indication that you are retaining too much carbon dioxide from breathing in more than you are breathing out. You can remedy this situation by exhaling forcibly for a count of 5, then inhale for only a count of 3, and repeat until the ache is gone. I know it hurts, and this is hard to do when all you want to do is gasp for more air, but controlling your breathing like this for about a minute will dissolve that pain! The more you practice jumping rope, the quicker you will get in shape, and the sooner those side-aches will be a thing of the past. Trust me.

If you’re all practiced up and ready to move beyond ordinary rope-skipping, try using a jumping-jack technique: move your feet about shoulder-width apart on one jump, then bring them back together on the next jump, repeating the out-in-out-in movement over and over. Another variation is a forward-backward jump: jump a half-step forward on the first jump, then jump back a step on the next jump, repeating the forward-backward-forward-backward motion. Another move that is fun to watch (and impresses your friends) is called the Slalom: move both feet to the left on one jump, then move both feet to the right on the next jump, repeating left-right-left-right.

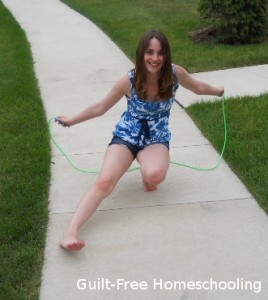
As your legs get stronger, you can try squatting down on one jump, then standing up on the next: up-down-up-down. When your muscles are ready for a really big challenge, try the Cossack, which resembles a Russian Cossack dance done while jumping rope: squat down for jump #1, extend your right leg on jump #2, pull in your leg again for jump #3, extend your left leg for jump #4, and repeat jumps 1-4. Every jump takes place in a squatting position, but you hop up and down a little as you jump the rope and switch your legs out and in. Try practicing the leg moves without the rope first for best results. It takes lots of strength and coordination to do this one, but no one who sees you perform it will ever forget it, and they may ask you to show it off to everyone who comes along!

Once these basics steps have been mastered, you can use them to make boring lessons more interesting. Mom can call out a spelling word for the student to spell out loud while jumping. Mom can hold up math flashcards, and the jumping student can call out the answers. What other basic facts could be reviewed while jumping rope? Try defining vocabulary words, giving examples of parts of speech, calling out matching states and capitals, and so on. The jumprope games of my youth incorporated counting rhymes, but today’s kids could use songs, raps, or poems for whatever subject they are learning and give an auditory element to their learning-while-jumping.

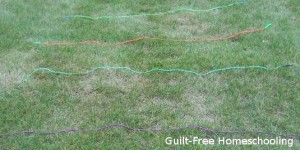
After everyone’s tired from all that jumping, the jumpropes can still help out in lessons. Lay several ropes in the grass or on the floor in vertical parallel lines and create a timeline, using the ropes for century divisions. Hang a name tag around Barbie’s neck and let her represent Betsy Ross. GI Joe can receive a similar name tag and become Jim Bowie at the Alamo. My Little Pony might represent the Cavalry at the battle of Little Big Horn, and a tiny model of the Empire State Building can be built from Legos, and all of these historical people and events (and more) can be placed in the appropriate places in your time line. Those same parallel ropes could be used for lanes in a relay race or as part of an obstacle course, and please don’t overlook the obvious math lesson concepts of vertical, horizontal, parallel, and perpendicular.

Now let’s rearrange the ropes a little to make a hopscotch pattern on the grass, as a nice change from playing hopscotch on hard concrete. Tennis balls can be used instead of rocks for the marking “stones,” and the squares can be marked with numbers or other information written on large pieces of paper or cereal box cardboard, held in place with shoes, bricks, or anything heavy that won’t blow away on windy days. Remove the obstacles and add a garden hose and a sprinkler for some hot weather fun!

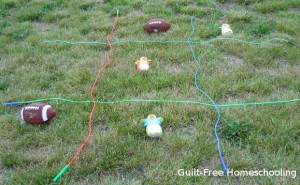
Another rearrangement of the ropes can create a giant tic-tac-toe grid on your lawn. Use extra shoes or sports balls for the markers. Little ones can walk across the grid to place their markers, but older kids will enjoy the challenge of standing behind a marked line (another jumprope!) and trying to toss their markers onto the correct squares. Objects that bounce and roll will only add to the challenge and the fun.

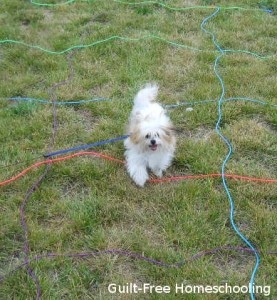
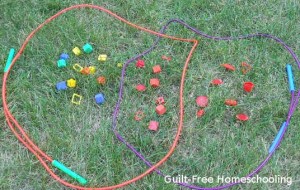
Our lessons for today wouldn’t be complete without making gigantic Venn diagrams with our jumpropes. This example shows square things in the left group, red things in the right group, and square red things in the intersection of the two groups. Challenge your students to create their own Venn diagrams for practice in understanding the various ways objects can be categorized, perhaps using sports equipment, toys, shoes, or anything that can be sorted appropriately. Jumpropes can also be used indoors for this type of jumbo lessons on the floor.

See also:
Hopscotch–A Powerful Learning Game
Kinesthetic Learners

Workshop Wednesday: Freebie Magnets

Magnets are a wonderful learning tool for tactile learners. There is something about that magical, magnetic connection that appeals to fingers of all ages. Fortunately, most of us have a ready supply of free advertising magnets from the pizza place, the hairdresser, the auto mechanic, the new phone directory, and every politician who marches in a summer parade. Peel your collection off the refrigerator, and let’s turn them into some great learning aids. I’ll list several possible uses and some basic how-to’s for the magnets. You’ll want to analyze what topic your students are struggling with or where they need the most help, and then focus your efforts there. Students can also help make magnetic learning aids, and helping to make them means the learning begins right away.

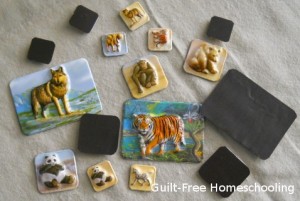
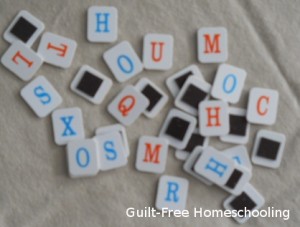
Stickers are probably the easiest things to turn into magnets, since you just have to stick them onto a magnet and cut around the stickers with scissors or a razor knife (such as an X-Acto). I have used scrapbooking stickers that looked like Scrabble letter tiles, foam letter stickers that were shaped like small jigsaw puzzle pieces, and 3-dimensional plastic stickers with raised animal shapes. The puzzle piece stickers were slightly tricky because of their irregular shapes, but I cut the magnets into squares small enough to fit in the center of each sticker, and then (after attaching the magnets) dusted the surrounding sticky edges with baby powder, using a dry artist’s paintbrush. It took two rounds of dusting powder to get the foam pieces to stop sticking to each other, but I’ve had no problems with them since then. With regularly shaped stickers, it is fairly simple to line them up next to each other (as many as will fit on the magnet), press them down securely, and then cut them apart. If your stickers have rounded corners, cut them apart as squares first, then round off each corner with scissors. There may be a strip of magnet left at the side that is too narrow to hold more stickers, but hang onto that piece—you’ll cut it up and use it later.

Once upon a time, my kids had some puffy stickers that they wanted to be able to save and reuse. Magnets to the rescue! I covered the backs of the stickers with adhesive plastic, then attached a magnet to each one. Those cartoon character magnets became a great quiet toy for imaginative play.

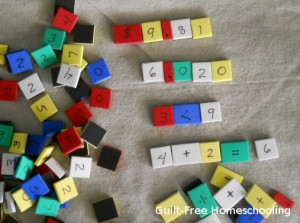
Craft foam sheets allow you to make your choice of subject matter by writing on the foam with a permanent marker, such as a Sharpie. (Some foam sheets can even be purchased with a magnetic backing already attached!) I had some magnetic strips that were adhesive on one side (leftovers from a weather-stripping project), so I cut squares of craft foam the same width as the magnetic strip, stuck them on, and cut the magnetic strip between the squares. Adding numbers to each square produced magnetic manipulatives for math! I drew arithmetic operation symbols on a few more squares to complete the set.

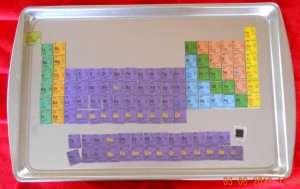
Laminated placemats have been featured in a previous Workshop Wednesday article, but I will mention them again here for good measure. That example showed a periodic table of elements placemat that I turned into magnets, but any subject matter will do. If a placemat doesn’t lend itself to a building block format (such as the periodic table) or a map (USA, etc.), perhaps you can cut it into a simple jigsaw-style puzzle to entice your kids to play with the magnetic pieces and learn the information.

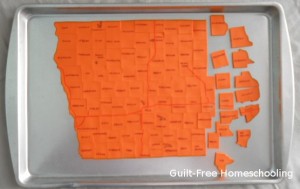
I have also used the plain (back) side of a thick foam-like vinyl placemat by cutting it into the desired shapes and attaching a small piece of leftover magnet to the back of each piece (formerly the front of the placemat). Adhesive squares made for scrapbooking, card making, and other popular paper crafts work great for attaching magnets (without the mess and hazards of hot glue guns). These vinyl-foam placemats are a bit heavier than craft foam and are made of a material that is not subject to the static electricity that can leave you covered in bits of craft foam for the rest of the day. Yes, that is a magnetic map of Iowa’s 99 counties, made from the backside of an orange jack-o-lantern placemat, but please don’t feel you have to try something quite so ambitious as your first project (that thing was tricky!).

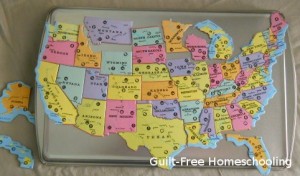
A USA jigsaw puzzle (cut on state borders) received new life as a magnetic puzzle with the addition of a magnet square to the back of each puzzle piece.

Letter game tiles were repurposed with the addition of a magnet on the back of each tile.

Sandpaper cut into small squares can be glued to cardstock for added strength and then attached to a magnet. Grab your Sharpie marker again and write or draw letters, numbers, symbols, etc. for magnetic manipulatives with a bonus tactile texture. I made some in 1” squares, but don’t let that limit your imagination!

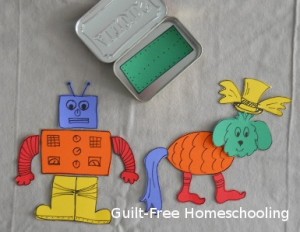
Funny facial features (eyes, eyebrows, noses, mouths, mustaches, ears, etc.) drawn on cardstock and attached to magnets become a fun game for preschoolers (I saw that idea on Pinterest, but I don’t know who originated it; someone deserves the credit!). Now what if you used the same principle for body parts and made interchangeable heads, bodies, legs, feet, arms, and tails for a magnetic build-a-monster activity? Build-a-bug, build-a-robot, build-a-car, build-an-animal, build-an-alien—the possibilities are endless! Your older students may have fun creating these magnets for their younger siblings, and they’ll learn some great problem-solving skills in the process. I wonder if we can make these small enough to fit in this empty Altoids tin? Hmmm… then Mom could keep it in her purse for Timmy to play with in church or while waiting in a restaurant!

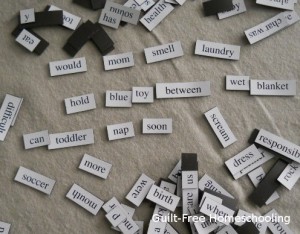
So let’s review: we’ve discussed making magnets for letters to use for phonics and spelling practice, numbers and operation symbols for math, chemical elements for science, and states for geography. Need more ideas? How about geometric shapes, colors, incrementally-scaled pieces for number value (make them match the size of other math blocks you may own), fraction pieces, or pattern blocks. Have a struggling reader? Use the “magnetic poetry” type of word magnets (purchased or home-made) to focus on reading one word at a time, then adding them together to build a sentence. Have a struggling writer? Those same magnetic words can help him write sentences, stories, or poetry, since it can be much easier to rearrange someone else’s words than it is to think up new words from your own head. Pick up a small, inexpensive, cardboard skeleton party decoration, cut it apart into individual bones or groups of bones (such as the rib cage, hands, feet, etc.), attach some magnets, and you have an anatomy learning aid. Plastic or cardboard coins can become magnetic money manipulatives (say that three times really quickly).

When you have accumulated a large supply of educational magnets, the traffic in front of your refrigerator may get overly congested. Solution: steel cookie sheets or steel pizza pans are lap-sized and much more portable than the refrigerator door. If you need to shop for steel pans, you may want to take along a small magnet in your pocket for testing purposes. (That nosy store clerk will leave you alone when you explain that you’re obviously shopping in the kitchen section for educational materials.)

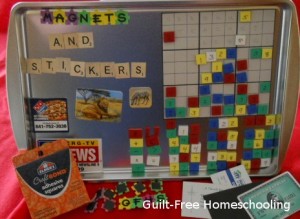
Now before I forget, there is one other accessory that makes magnetic learning aids even more beneficial: paper. I drew a Sudoku grid large enough to hold our number magnets and placed it on the cookie sheet, using the magnets to hold it in place. Ta-da, magnetic Sudoku can take the visual puzzles from a book or newspaper and turn them into a tactile masterpiece. A worksheet with fill-in-the-blank problems could hold magnets on those blanks instead of written answers. Your kids might choose to color an underwater background picture to place behind their letter magnets, just because they are learning to spell the names of ocean creatures.

Learning isn’t limited to books, life doesn’t happen between the pages of a workbook, and we learn what we enjoy. Magnets get fingers involved, and fingers love to learn! So what are you waiting for???

See also:
What Is the Missing Element?
Placemats + Magnets = Educational FUN!

Workshop Wednesday: Clothespins

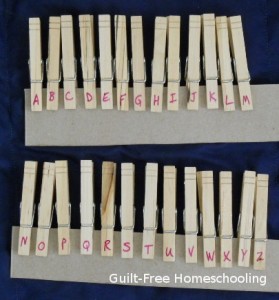
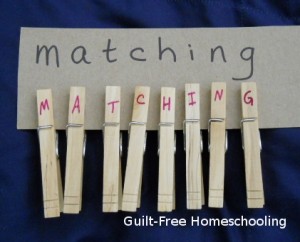
Clothespins? Yes, ordinary spring-type clothespins can be turned into some pretty snazzy manipulatives and still be pressed into laundry duty as needed. I used a Sharpie permanent marker to write on the “business end” of each clothespin. See the entire alphabet? (click on photos to enlarge)

I made my clothespins with upper case letters. Your students can practice matching them up with their lower case “little brothers” on flashcards, even homemade ones like this piece of cereal box cardboard.

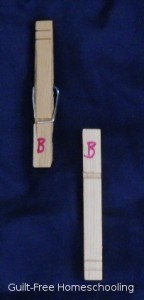
Did you notice that the first pic had the clothespins facing one way and the next pic had the clothespins facing the other way? Good for you—you’re very observant! I wrote the letters on both sides of the clothespins, carefully facing them in opposite directions, so that the pins could be used either up or down. Here’s one pin I took apart, so you can see both sides at once.

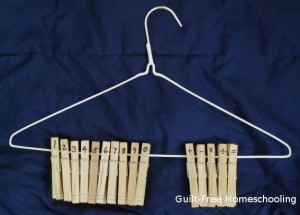
I repeated this trick with numbers and arithmetic operation symbols. These are clipped onto a wire hanger to spark your imagination with more ideas for use!

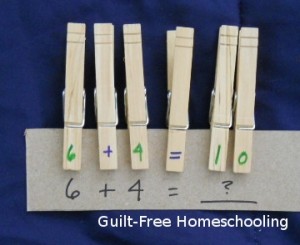
And here’s a quick math problem with clothespins:

You can make multiple sets of letters and numbers with these low-cost, multi-purpose manipulatives. Let your early learners sort the letters in alphabetical order or clip the clothespin letters onto matching flashcards, letter tiles, or the title words on their favorite storybooks. Use the pins for phonics practice, challenge your students to form their spelling words, or leave silly messages on the clothesline. Bring a different tactile dimension to math lessons by letting the littles sort the numbers in order, combine pins for multiple-digit numbers, or include the operation symbols for writing out math problems. Best of all, these manipulatives can do double duty on laundry day, and your students will get plenty of stealth learning practice when they sort the pins out again for lessons!

For more fun, combine these with:
ABC Flashcards
What Is the Missing Element?
Letter & Number Recognition


Workshop Wednesday: Building Blocks for Success in Spelling

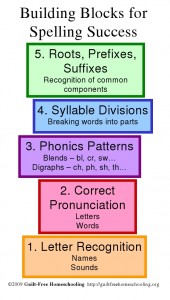
Spelling, like math, is a subject that requires several foundational skills learned in sequential order, as shown in the diagram, beginning at the bottom and building up, one skill upon another. No one is born knowing how to spell correctly, but the individual steps to spelling proficiency can be somewhat tricky to identify by those who have already been reading for many years.

Skill #1 is the first building block: learning to recognize letters both by their names and by the sounds they represent. Since vowels can represent multiple sounds, depending on their combination with other letters, it is simplest to use their names and the short vowel sounds during the recognition phase. I preferred to teach my children upper case letters first, since that provides fewer opportunities for reversals (such as confusing b and d). Once the child knows the upper case alphabet well, the lower case letters can be introduced as the “little brothers” of the first set. Pairing the big brothers and little brothers together also helps avoid reversals, even when they don’t look that much alike—because kids easily understand the concept of siblings who belong together but aren’t identical.

Skill #2 is vital: correct pronunciation of each letter sound, leading to correct pronunciation of words as reading begins. A child must hear and speak the sounds correctly to be able to match those sounds to the appropriate letters. Some children may have already formed bad habits of mispronouncing certain sounds as toddlers (for example: difficulty with l’s, r’s, or w’s, lisping with a th-sound instead of an s, or dropping the initial s from sc-, sl- or sw-blends), but the visual application of learning the letters that represent those sounds can help straighten out the mistakes. However, if family members mimic the youngster’s incorrect pronunciation habits on a routine basis, confusion will follow, since the child who is learning to read won’t know which sound is correct! Take the time to instruct the child slowly and thoroughly so that he can learn to make the sounds properly. It is much better to learn correct methods in the loving security of home and family than to continue incorrect, juvenile habits into adulthood. Elmer Fudd’s manner of speaking may have been funny in cartoons, but if Elmer had been an actual person, his speech may have caused him to be taken less seriously in real life. Some local dialects can also twist the pronunciations of words away from their actual spellings, which is why television news reporters are encouraged to minimize regional forms of speech and learn to speak without a local accent.

Skill #3 consists of learning common patterns of letter combinations and the sounds made those combinations, known collectively as phonics. This level includes many different phonics patterns, from long and short vowels to vowel blends, consonant blends, and digraphs (the new sounds created by certain combinations, such as ch, ph, sh, th, and wh). Silent letters add another twist, but those are usually predictable, since they occur within specific combinations. (The ABC’s and All Their Tricks  is a wonderful reference book, explaining the origins of spelling patterns, giving examples of words using each pattern, and answering the spelling questions that had stumped my teachers throughout my education.)

Skill #4 comes after the phonics patterns are mastered: syllable division is the next logical skill to achieve. Knowing how words separate into predictable syllables helps the student tackle new, longer words and get the pronunciation correct, usually on the first try.

The #5 building block skill for spelling success is learning prefixes and suffixes and being able to recognize them from the root word. We kept our large dictionary handy that showed the meanings of the individual components of each word—a fascinating study. My students loved compiling lists of words that were all based on a common root and seeing how the prefixes related to the words’ definitions—instruct, destruct, construct, etc. We played the Rummy Roots card games to learn common Greek and Latin roots that have become part of our everyday vocabulary. The mastery of roots, prefixes, suffixes, and other syllables was proven by accurately reading the list of chemical ingredients on a shampoo bottle!

As my children conquered each of these skills, I encouraged them to “hear the sounds in order” in each spoken word, so they could then write those sounds in the correct order for accurate spelling. It takes careful listening to spell words correctly, and the visual skills attained through these building blocks will work together with the sounds heard to achieve success.

See also:
ABC Flashcards
Letter and Number Recognition
What Is the Missing Element?
When Children Mispronounce Words
A New Approach to Spelling-Word Lists

Workshop Wednesday: Hopscotch – A Powerful Learning Game

Who knew that a patch of concrete, some chalk, and a couple of rocks could produce a fun way to learn just about anything? When I was a little girl, I played hopscotch in the traditional way, tossing my stone and jumping from square to square, just as a game for practicing my tossing and balancing skills. Hopscotch can also be used as a kinesthetic learning method, involving the big muscles of arms and legs, pumping information through the blood vessels to the brain. I can see many other uses for the basic method of hopscotch, providing a great method for teaching preschoolers, kinesthetic learners, active children, or anyone else who just needs a break from sitting at a table for one more worksheet.

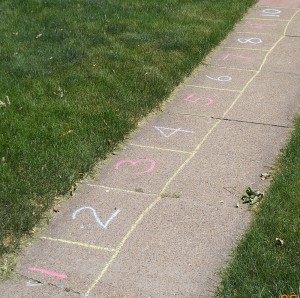
Let’s start by changing the standard hopscotch pattern to a row of 10 squares, numbered from left to right, and let your little ones practice counting as they hop from box to box and back again—tossing a marker stone or beanbag can be used later as their counting skills increase. Do the same thing with a row of ABC’s, first for letter recognition and later for reciting the sounds made by each letter or for a word beginning with that letter. Mom can say a word, and the child can hop to the letter that begins the word. For more advanced students, change the ABC’s to a grid pattern, and try “Twister Spelling” by putting hands and feet in the correct squares to spell the word. Use multiple beanbags, poker chips, or plastic yogurt lids for markers, and challenge your kiddies to spell out words by placing their markers on the correct letter squares.

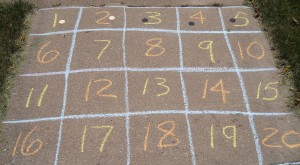
You can also practice addition and subtraction facts with a hopscotch grid. Draw a 1-10 grid by making two rows of five squares each: 1-5, 6-10. Make these boxes large enough for your student to stand in, sort of like a hopscotch game. Start with simple addition problems by asking: If you put down [this many] markers, starting with Box #1 and putting one marker in each box, and then you add [this many] more markers, how many boxes will have markers in them? What is the largest number box that contains a marker? Repeat this activity with as many different number combinations as possible, until your student knows addition facts from 1-10 so well that he cannot be stumped. Then draw two more rows of boxes, extending the grid to 20 (11-15, 16-20), and continue the addition practice with problems up to 20. You can also work on learning doubles in the teens: 5+5=10, 6+6=12, 7+7=14, 8+8=16, 9+9=18, 10+10=20. These facts will help him with problems where the answer is between 10 and 20.

Does one of your students have trouble with subtraction? Using the 1-20 grid, pick a problem that may have stumped your child, like 13-9=? In this example, cover all numbers larger than 13. Ask: If you put down 9 poker chips, with one on each box, starting with 13 and counting down, what is the largest number box that will still be showing? If he’s already experienced at using the 1-20 grid of numbered boxes, he will be able to recognize the row of 6-10 as being 5 boxes. Then he can see that there are 3 boxes for 11-13, so those two rows will use 8 of his 9 poker chips; now he can put the last chip in the largest numbered box in the top row (the 5), and he’s left with 4 as the largest number box still showing: 13-9=4

Another helpful trick is to show your student how to work up or down from 10 when the answer to a problem doesn’t come to him immediately. For example, 13-9=? Let’s see, I know that 10-9=1, and 13 is 3 more than 10, and 3+1=4, so 13-9=4! How about 17-9=? 10-9=1; 17=10+7, and 1+7=8, so 18-9=8! Did you follow that? Children can get discouraged when they don’t know or can’t remember an answer immediately. Showing them several different methods for figuring out the answer helps them to see that they are smart enough to find the answer anyway. Working toward the answer from 10 or from the nearest double is a legitimate method of solving the problem and is actually a better way to learn than just rote memorization, since it uses more creative solving methods.

Are you ready to take this up one more notch? Help your students draw a 1-100 grid (10 rows of 10 squares each, numbered 1-100) and challenge your young mathematicians to toss two beanbags onto the grid and add the resulting numbers. Add more beanbags as their skills increase, or switch to subtraction or multiplication. Use beanbags in different colors (or marked with mathematical operation symbols) for students with appropriate abilities: Color #1 means add this number, Color #2 means subtract this number, Color #3 means multiply by this number, and Color #4 means divide by this number. Use several beanbags for each mathematical operation, drawing them at random from a bucket to create an amazing running math problem. Number squares can be chosen by random tossing or through careful aim. Challenging siblings to toss the beanbags and create problems for each other to solve may result in some serious stretching of math skills! Other possibilities are to toss two beanbags to create a fraction, then simplify it as needed—and more beanbags mean more fractions, which can then be added, subtracted, multiplied, or divided, always reducing the answer to its simplest form. The hopping part of hopscotch doesn’t come into play with this method (unless your kids figure out their own creative way to use it), but the tossing and retrieving of beanbags will still give your wiggly kids plenty of action.

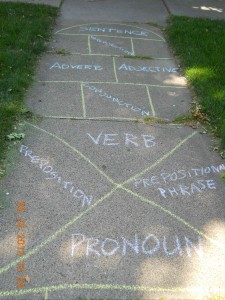
Now you think you’ve heard all of the possible ways to use hopscotch in learning, right? Not at all! Let’s go back to the original hopscotch pattern, but instead of numbering the squares, write in parts of speech: noun, pronoun, verb, adjective, adverb, conjunction, preposition,  prepositional phrase, and interjection.  Hopping through the boxes gives the student a chance to think of a correct example word to give when he stops to pick up his marker. Use more specific terms as your students’ grammar skills increase: irregular verb forms, verb tenses, plurals, reflexive pronouns, dependent clauses, and so on. I included a “sentence” space at the end, and students should make their example sentences match the level of grammar being studied.

If you have a student who is really interested in science, specifically chemistry, and if you have access to a large patch of concrete, consider helping him draw out the periodic table of elements and numbering the squares accordingly. Let him make simple flashcards for each element to fit the boxes on his diagram (cereal boxes are a great source for inexpensive flashcards; write on the back with permanent marker) and practice putting them in their proper places. Flashcards might include the atomic number, the element name and symbol, and the atomic weight. More advanced students may want to include more detailed information and use the jumbo flashcards for memory practice. Other hopscotch applications: a diagram of the solar system would provide practice at naming the planets, a simplified skeleton could be drawn for practice at naming the bones, or a map of the United States (or any geographic area) would provide practice at naming states, capital cities, or other geographic features. Coordinate planes with x- and y-axes provide a large grid for plotting specific points with poker chips. Students of advanced math can solve complex equations, plot the points from multiple solutions, and draw the curves with yarn or string.

Any of these hopscotch learning games may also be drawn with permanent markers on an old, discarded sheet or tablecloth (check local thrift stores), resulting in a reusable “game board” that can be folded up and stored between uses. Use the cloth on grass, carpeting, or other surfaces where it is less likely to slip underfoot. Beanbags aren’t required, but the “marking stone” needs to be something that won’t roll away when tossed—or blow away if used outdoors.

If the weather isn’t cooperating for outdoor activities, or if you don’t have a suitable surface for chalk, or even if your students are just not excited about going outside and jumping around where anyone in the neighborhood might see them, these activities can also be done indoors by using masking tape or sticky-notes on the floor. You can even draw the grids on a large sheet of paper and use coins or game pawns as markers.

See also:
What Is the Missing Element?
Building Blocks for Success in Math
Beanbags (No-Sew DIY)

Workshop Wednesday: Sugar Cube Math, Part 2

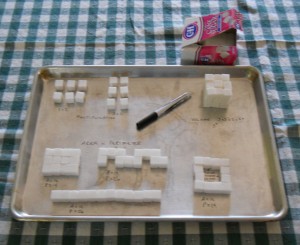
This topic has been explained in a previous post, but now we can supplement that with a photo. See the complete post HERE for detailed activities to make math understandable in such a fun way that it will prompt you and your kids to call it “SWEET!”

Notice that several activities are demonstrated in the picture: multiplication (upper left), showing that 2 rows of 3 cubes each is equal to 3 rows of 2 cubes each; volume (upper right), showing 3 layers of 3 rows with 3 cubes each, or 3x3x3; and the differences between area and perimeter (bottom). The four groups of sugar cubes at the bottom each contain 12 sugar cubes, so they all have an area of 12 units. However, the varying configurations show how the perimeter changes drastically. With the far right configuration, the sides in the middle hole could be counted as part of the perimeter, too, depending on the real-life application (e.g. if you were installing a fence along the sides of a trail, and the cubes represented the trail).

BONUS TIPS:
1) I wrote right on the cookie sheet with a dry erase marker and wiped it off with a tissue (but I did wash the pan well before putting it away).
2) The sugar cube activities can also be drawn on graph paper to save as a reference or worksheet.

See also:
Sugar Cube Math
What Is the Missing Element?
Building Blocks for Success in Math
Looking for the “Hard Part”
Why Does Math Class Take SO LONG?

Verified by MonsterInsights