Workshop Wednesday: Beanbags (No-Sew DIY)

Who has a child who can’t focus on anything while sitting in a chair? Who has a child who loves playing games and sports, but hates worksheets and written assignments? Who has a child who tries to make everything into an exhibition of physical abilities? You’re in luck! Let us help with some great ideas using beanbags that will enthuse your kinesthetic learner and keep him doing these learning activities on his own while you sneak in a coffee break!

Those energetic students are kinesthetic learners who need to move to be able to learn. Their brains don’t fully wake up and begin to learn until their arms and legs get moving, so these beanbag activities are ideal for getting them involved, holding their attention, and helping them remember what they’re learning.

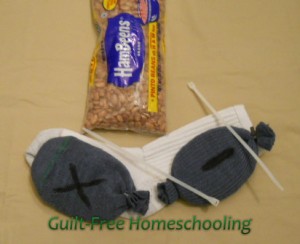
Inexpensive, no-sew beanbags can be made quickly from discarded socks (no holes or thin spots) by cutting them to an appropriate size and pouring in dry beans or uncooked rice. Tie the ends shut tightly with string, yarn, or plastic zip-ties (trim the ends with scissors), leaving each beanbag about two-thirds full, so that the contents have room to slide around—if filled too full, the bag will be more likely to burst when it lands. Aquarium gravel is a suitable waterproof filler, just in case your beanbags are likely to get left outside in the rain.

What can you do with all the wonderful beanbags you’ll create from your orphan sock stash? Use them for “throwing stones” for hopscotch (and all its variations), whether playing on the sidewalk, driveway, or patio. For indoor activities, hopscotch grids can be drawn with permanent markers onto an old bed sheet or tablecloth, but please use caution when using a cloth on hard surfaces to avoid slipping.

Learning Activities with Beanbags

Matching — If your clothes dryer has given you an abundance of sock orphans, you can mark them with letters or numbers for some preschooler’s matching activities.

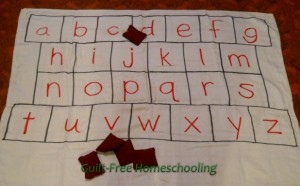
ABC’s — Toss a beanbag onto a jumbo ABC-grid and make the sound of the letter selected. Older students may say a word that is spelled with that letter (beginning, ending, etc. your choice). A bigger challenge is to toss two or more beanbags onto the ABC-grid and think of a word that uses all of them.

1-Sentence Stories — Lay out word cards on the floor (sticky notes will stay in place), toss beanbags onto several words, and create a one-sentence story that includes the words selected.

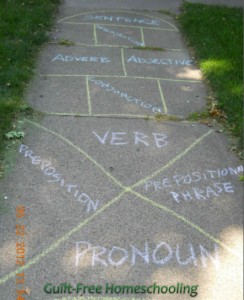
Hopscotch Variations — Make a parts-of-speech hopscotch grid and play the standard hopscotch game with the rules for numbers, but have players give an example of the part of speech selected, such as saying “ticklish” when picking up the beanbag from the adjective section, “skeleton” for a noun, or “angrily” for an adverb. This method can be varied for other subjects, too, such as naming the sections Nations, States, Cities, Lakes, Rivers, and so on for geography. Students would then have to name an appropriate geographical feature.

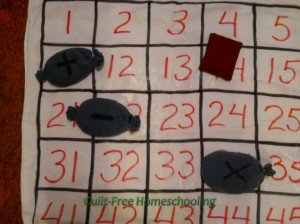
Math Symbols — Mark some beanbags with math operation symbols and toss them onto a jumbo 100-grid for instant math problems. Throw an unmarked beanbag onto a random square for a starting number, then draw a random operation-symbol beanbag from a sack or pillowcase and toss it onto another square, using that number for the designated operation. Repeat as long as your supply of beanbags lasts. Pencil and paper may be used to assist in calculations, but careful aim and an accurate toss may be the most help.

Target Practice — Use laundry baskets or cardboard boxes for target practice to improve eye-to-hand coordination and tossing skills (just don’t hit the lamp!).

Juggle — Learn to juggle!

These beanbags are quick to make and will add hours of fun to indoor or outdoor playtime, and they are a great way to make lessons kinesthetic for your active students!

See also:

Hopscotch, a Powerful Learning Game

100-Grids & Flashcard Bingo

Letter or Number Manipulatives (DIY)
Kinesthetic Learners


Workshop Wednesday: Wikki Stix as Learning Tools

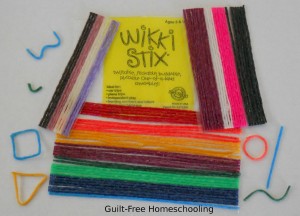
Does your hands-on learner need a new challenge? Try using Wikki Stix as manipulatives. If you’re not familiar with them, Wikki Stix are thin, wax-coated strings that resemble pipe cleaners or chenille sticks, except that they aren’t fuzzy, and they will stick to each other. The sticking-together aspect makes them wonderful learning tools, because they will also stay where you put them, and you can put them just about anywhere: table, window, cookie sheet, poster board — this list can go on forever. Stick them on the glass patio door or the refrigerator door for a kinesthetic, standing-up lesson activity. The Stix are waxy, but leave very little residue, and it is easily cleaned away. Bonus tip: If they accidentally get dropped on the floor and collect a few dust bunnies, cereal crumbs, and pet hair, holding them under running water and air-drying will restore them back to good-as-new condition.

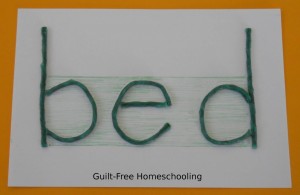
Wikki Stix come in a variety of colors, including neons, and I have also found knock-off brands — check your favorite stores for craft or school supplies. (Wikki Stix brand have a unique bumpy texture that is both tactilely and visually interesting.) Use them full length (8″ long) or cut them into small lengths with scissors, and start creating. Let your students make letters and words, make numbers and math problems, or just have fun making all sorts of fun art projects.

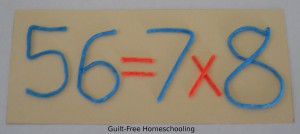
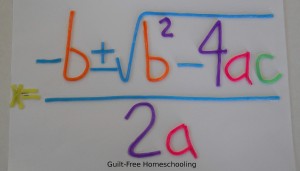
Your older students can combine letters and numbers into the latest complicated formula they are trying to memorize. Yes, Wikki Stix are a fantastic tactile and visual method for color-coding the components of a mathematic or scientific formula! The tactile process of assembling a complex formula from Wikki Stix, complete with color-coding, is a very subtle way of memorizing — once your student has finished this project, he may find he has it committed to memory without even trying!

How can Wikki Stix help with lessons? First of all, let your students use the Wikki Stix as their learning aids — the kids will learn much more if they do it themselves, than if Mom just shows them what she’s made for them. The extended process of building each letter, number, or shape keeps your student’s fingers involved in the lesson, and the child’s brain has to think the process through from a different perspective than if he was just writing normally with a pencil. (By all means, do help the child who needs help getting started with this activity, but encourage his independence once he’s understood what to do.)

Color-code certain parts of words (vowels, phonics patterns, prefixes & suffixes, etc.) or math problems (use different colors for positive and negative numbers, or x-components in one color and y-components in another color).

Make Wikki Stix flashcards with spelling words, vocabulary words, or formulas on a sheet of cardstock and insert the finished cards into plastic page sleeves. Works for spelling, phonics, math, science, geography, history, foreign language, etc. Using this method to “write” troublesome spelling or vocabulary words allows the student to focus on getting each letter and each syllable in the correct order.

Make geometric shapes on flashcards, just like the idea above, and use them for identification and recall drills, or use the shapes as tactile manipulatives for math problems. For a bigger challenge, let your students try identifying the shapes by touch alone, by feeling them with their eyes closed.

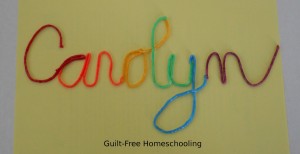
Cursive writing can be tricky to practice, especially for those who are just learning it. Stick several Wikki Stix together end-to-end and shape them into cursive writing. Using Wikki Stix for cursive slows the process down considerably and allows the writer to put the lines exactly where they need to go! (and no pesky eraser crumbs!)

Workshop Wednesday: Tactile Learning Bag

Children benefit from learning through all their senses and through all learning styles. Visual, eyes-only methods leave out so much of what a child uses to learn: the small muscles of fingers and hands, the big muscles of legs and arms, hearing, smelling, tasting, and so on. By removing eyes from the learning process, even for a few moments, we can actually enhance our students’ learning abilities. Tactile (touching) methods provide many more details to the brain than can be taken in through eyes alone, something which is especially vital for those who have trouble learning or remembering things that have only been seen.

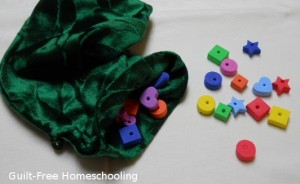
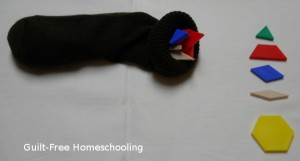
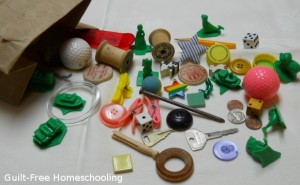
Take one drawstring bag, paper sack, wine gift bag, cloth shopping bag, pillow case, clean sock (all stretched out works best), etc. Dump in pattern blocks, foam beads, letter shapes, number shapes, or random objects. Challenge your students to reach into the bag, feel around, and find a certain shape or object. No peeking allowed, just feeling shapes with fingers to find the right one. It’s a good idea to begin with just a few objects in the bag and work up to more. Also, use only one type of items at a time, unless your kids are prepared for a really big challenge!

Tactile learners will do really well with this type of activity — their fingers are already well acquainted with gathering information, and their minds are already used to forming a mental picture from that tactile information. NON-tactile learners will benefit tremendously from these activities and expand their ability to learn from touching, which is why it’s good to start small and let them get accustomed to identifying shapes with just their fingers. Turning this activity into a game will help expand those tactile skills in a very fun way.

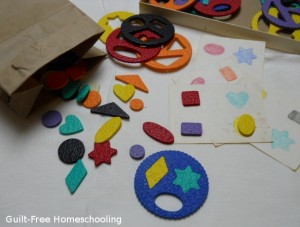
When my kids were preschool age, we had a Lauri Fit-a-Space puzzle set. They loved to pop the shapes out of the circular bases (Lauri calls them “faces,” but my kids called them “pizzas”) and put all the loose shapes into a paper sack. Then they would feel around in the sack to find the correct shape to fit into their chosen base. I also made very simple bingo-type cards by tracing around a few shapes on each card and coloring them in with crayons to match the pieces. My preschoolers got shape and color matching practice in a fun, self-testing activity, trying to find just the right square or heart or oval to go on the cards. (I let them search through a pile of pieces on the table for the color matching.)

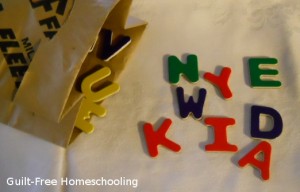
A child who is having difficulty learning letter shapes or one who reverses letters can benefit from tactile identification activities. Frequently, a child who mixes up the visual appearance of certain letters is more of a tactile learner, so giving them touchy-feely activities with those letters will help their brains sort out the information and clear up their confusion. For example, let’s use 3-dimensional letters, such as the magnetic letters that live on refrigerator doors and put a single letter into a paper sack (not letting the child see which letter it is), and let the child reach inside and feel the letter’s shape with one or both hands (use a pillow case for ease of getting both hands inside). Now let’s ask this child to find the matching letter on an alphabet chart. I recommend using upper case letters only at this point — fewer opportunities for reversals, and much less confusion over shapes. Consider tracing around each letter to make your own alphabet chart, especially if another chart would vary slightly in the shapes of the letters you have. (Differences to look for: some R’s have an angled “leg,” and others have a straighter leg; some M’s have vertical legs, and others have angled legs; some M’s have an inner “V” that extends to the base line, others have a shorter “v” that only comes down halfway.) Let the child lay the letter shape on top of its matching letter on the chart, and then you can drop another mystery letter into the sack — lather, rinse, repeat. Advanced students can start with all the letters in the sack at once and pull out each one as it is identified. Very advanced students can search through the entire contents of the sack with their fingers to see if they can find specific letters as needed.

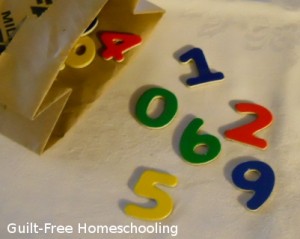
When your student has mastered upper case letter shapes, he will probably be ready to tackle lower case letters, even with their look-alike b’s, d’s, p’s, and q’s (not to mention the n’s and u’s that can also feel alike). This activity can be varied again by using number shapes, giving your student the opportunity to notice that 6’s and 9’s can often look and feel very much alike. Ditto for 2’s and 5’s, and sometimes 1’s and 7’s.

Whether the bag contains letters, numbers, geometric pattern blocks, geometric-shaped beads, or random objects, students of all ages can test their own tactile skills by feeling a piece, making a guess at what it is, and then pulling it out of the bag to check. Students with highly developed tactile skills may want to try identifying the letters carved into Scrabble tiles or the number of dots impressed into dominoes, but those activities will be much too difficult for the beginner!

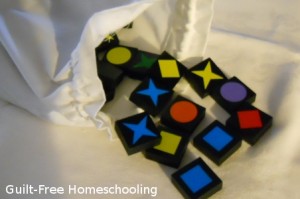
A sack or bag can also add convenience to any games that use tiles or similar pieces. For years, we have kept a paper sack in our Scrabble game, to use instead of a “draw pile.” It takes up much less room on the table, passes easily around to each player, and flattens out fairly well to go back in the box for storage, even with the tiles still inside it. We have a designated cloth bag for our dominoes draw pile, and our Qwirkle game came with its own drawstring bag to draw from — game makers are catching on!

It should be our goal as parents and educators to teach our children how to learn in every possible situation, using every skill they possess. By starting with these simple tactile activities, we can improve skills they already have, provide them with new skills, and open up new realms of knowledge to feed their curiosity. And they may also be able to find their keys in the dark someday.

See also:

Tactile Learners

Math Awareness: Tactile  Counting

Workshop Wednesday: Letter or Number Manipulatives (DIY)
Have you ever found yourself wishing you had a whole big bunch of fancy-schmancy letter or number manipulatives to help your struggling learner? Well, don’t move, because you’re about to learn how to make them inexpensively for yourself!

A child who has difficulty learning letters or phonics patterns, identifying syllables, spelling words, or reading will usually benefit from using letter manipulatives, something he can move around and re-position himself. The struggling student might be any age, so using letter tiles is helpful for older students who already know the letters but struggle in spelling or syllable divisions.

Number manipulatives are helpful for the student who struggles with math, as are extra tiles with math operation symbols, to use them in building and solving equations. It’s one thing to use math cubes to illustrate 3 + 2 = 5, but it’s another thing entirely to use number tiles to solve 3 + 2 = 4 + y.

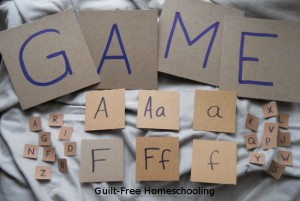
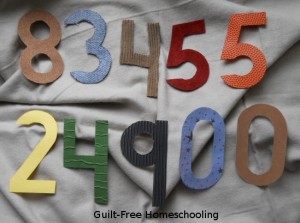
It’s fairly easy to cut out letter or number shapes by enlarging a simple font to super-size status, about 3″ tall (or around 350 points) on your computer’s word processor. Experiment to find a font you like, enlarge the letters or numbers, then print them on cardstock and cut out. These shapes can also be used as templates for making cut-out letters or numbers from materials that can’t be put through a computer printer, or to get more letters or numbers from a single sheet of paper.

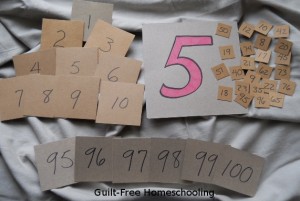
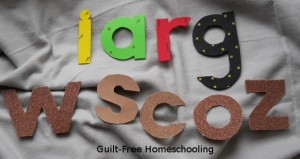
Squares or rectangles can be turned into cards or tiles by writing the letters or numbers on them with a Sharpie marker. I have used cardstock, sandpaper, and cereal box cardboard for these with great success. The sandpaper adds a nice tactile element for kids whose learning styles appreciate more texture. I have varied the sizes, depending on the age of the kids using them and the application they will fulfill — 6″ squares are great for matching games on the floor, but 1″ squares work great as tabletop tiles for spelling practice. We had a few hundred small letter tiles made from cardstock, which were great for building a list of spelling words.

For students who are just learning their letters, I highly recommend starting with upper case letters first, then once the student knows them without mistakes, introducing the lower case letters as the “little brothers” of the upper case. This results in less confusion and fewer possibilities for reversals.

These cut-out letter shapes are wonderful tools for teaching and learning recognition, matching, phonics, spelling, syllables, and so on, whether by themselves or in combination with cards, tiles, and a variety of sizes and font styles (especially helpful for learning to recognize all the different appearances letters can have). You could even make some in the exact same size and shape as the letter tiles from a Scrabble or Bananagrams game and combine them all for even more learning fun!

I have made letter and number shapes and cards from these materials:

  • Sandpaper (fine to medium texture works best)
  • Craft foam
  • Textured fabrics (corduroy, vinyl, fleece, denim, etc.)
  • Cardboard (including cereal boxes), poster board, etc.
  • Cardstock
  • Textured scrapbooking paper

Bonus Tips:

  • Sometimes I needed to glue an identical shape of cardstock or cardboard to the backs of some flimsy materials for stability and durability, especially with cloth or thin paper.
  • Wood or foam cut-outs can sometimes be found with craft supplies for a quicker start.
  • It can also be helpful to decorate the front side and/or bottom edge of letters and numbers to help kids learn to orient them correctly (even a line drawn with a marker can be enough to discern top from bottom or front from back).

Letter Activities:

  • Matching — sort lots of different letter shapes, tiles, and cards into separate piles for each letter. Alphabetizing — mix up one set of letters (A-Z) and put them into alphabetical order.
  • Phonics Practice — use letters to make short words (2-3 letters) and practice reading their sounds in order to read the words. Change one consonant and read again; repeat. Ditto for changing the vowel. Repeat for longer words as skills increase.
  • Spelling practice — use your supply of letter manipulatives to build spelling or vocabulary words. Add as many words as possible that use the same phonics patterns.
  • Syllables — build a vocabulary word, then scoot the letters apart to divide the word into its proper syllables. Compare to the dictionary entry to self-check.

Number Activities:

  • Matching — sort lots of different number shapes, tiles, and cards into separate piles for each number.
  • Numerical order — mix up a set of numbers (0-9 or 1-10) and put them into numerical order.
  • Number value — match the appropriate number shapes, tiles, and cards with the dots on dice or dominoes.
  • Double-digit numbers — combine digits to make teens, twenties, etc. and practice reading them. Ditto for three-digit numbers and beyond.
  • Arithmetic practice — build arithmetic problems using the number shapes, tiles, cards, and operation symbols, and put the correct numbers in place for the answers.
  • More operations — be sure to make some commas, decimal points, fraction bars, dollar & cent signs, percent signs, and anything else your student will encounter in his math lessons.


For more activity ideas, see also (in any order):

ABC Flashcards

Building Blocks for Success in Spelling

Building Blocks for Success in Math

“Stealth Learning” Through Free Play

What Is the Missing Element?

Letter & Number Recognition

Tactile Learners

Workshop Wednesday: Untangling the Math Pages

Do your student’s math papers sometimes look more like a tangled jumble of numbers instead of neatly arranged problems? Do you have a student who gets confused over complex math problems? Our old friends, graph paper and color, can come to the rescue once again!

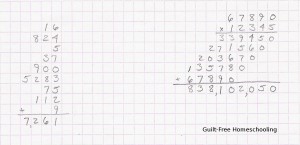
Graph paper was a blessing when my young students began writing math problems, but their numbers sometimes wandered aimlessly down the page, causing us to wonder which place value some digits represented. Using 1/4″ graph paper (4 squares per inch), I showed my son how to put one digit in each square and line up all of the ones’ column digits. That way, the tens’ digits ended up in the correct column, as did every other place value. It helped my student keep track of his math problems, which helped him perform the calculations correctly, which led to faster learning. It was a great benefit for the small price of a pad of graph paper.

Math function signs can be written in colors for kids who struggle with noticing which operation is required or in which order certain operations should be done. For example, parentheses in their favorite blue may catch their eyes first, and they know to do that before going on to the yellow plus signs later.

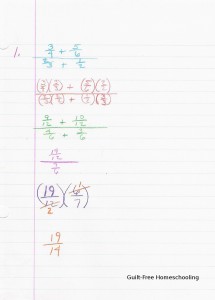
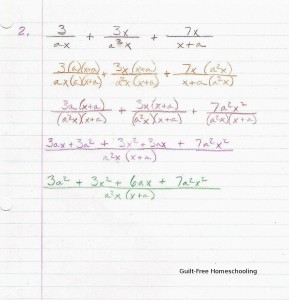
For particularly large and difficult math problems with complex fractions or higher math, I encouraged my kids to use an entire sheet of paper for each problem, if necessary. I told them they could make only as many changes per step as they were comfortable with and instructed them to leave a blank line after each step of the problem. That made it much easier for them to tell where they were and what they were doing. It also helped them to know they could use as much paper as necessary to be able to understand the steps and the transformations of tricky calculations (paper is cheap; understanding is priceless). Spread those numbers out so you can see exactly which digit belongs where, and skip a line between steps for amazing clarity in those super complicated problems.

Something my daughter Jen came up with on her own was to write each step with a different colored pencil. She is a strong visual learner, so color often played an important role in her schoolwork, and her set of colored pencils seemed like a natural tool to use for understanding the transitions in how each step changed from the one before it. The colors helped her eyes and brain differentiate one step from another, so the changes were much easier to see and understand. Using colored pencils can also work for students who get overwhelmed by trying to solve large math problems, helping them to focus on only one step at a time.

For those students who have difficulty understanding what is happening in each step, color can also be used to show the process of solving. The parent-teacher can write out everything in black pencil that remains the same for the next step, and use color only for the changing elements, to clarify what was changed in each step and exactly how it changed. Use a different color for each step to keep the transitions easier to follow.

Color can also make math more interesting for students who find math to be boring but find art to be all kinds of fun. Perhaps doing math in color is just the enticement little Billy or Sally needs! Bonus tip: Erasable colored pencils are well worth the slightly higher price!

Workshop Wednesday: Tactile Card Holders, Version 2

Based on last week’s Tactile Card Holders, Version 1, this week’s version uses a few different supplies to create a similar product.

Equipment:
Cereal box cardboard
Photo corners for index cards
Glue (optional)

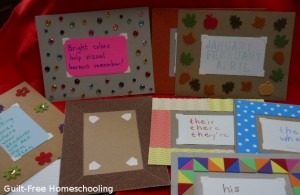
Yes, we are breaking out our old friends, the cereal boxes, to make yet another great learning tool. I cut the cardboard into pieces larger than my index cards and attached self-stick photo-corners in the middle for the index cards. You can use 3×5″ or 4×6″ index cards, depending on what you have available and how much information will be put onto the cards. Then I decorated the surrounding “border” with whatever was available (1 “theme” per card), using glue to attach the things that weren’t already self-stick.

Edges decorated with:
Ribbon
Sequins
Craft foam/felt stickers & shapes
Sandpaper
Acrylic rhinestones/gems
Textured papers

The examples in the picture show photo corners without an index card inserted, along with a few examples of spelling rules. As in last week’s article, these card holders can be especially helpful for older students who are trying to memorize more complicated information and formulas. Once learned, the note cards can be easily switched with new cards for studying new facts. The border textures work by appealing to tactile fingers and giving them something to focus on while the eyes are busy reading the facts on the cards. Later on, when the mind tries to remember the facts, the textures, patterns, and colors from the borders of each card holder will serve as markers on a virtual road map to help the brain find those facts and pull them up into view. Students who have had trouble memorizing dull, dry facts in the past will find these note card holders add some pizazz to the process and actually help stimulate their memories.

The borders of these card holders will offer even more tactile interest than the ones from last week that simply had their edges trimmed with special scissors. My favorites among these have to be the cards with sandpaper borders — I made several of those, each with a different level of coarseness. Satin ribbons offer a smoother texture, but grosgrain ribbon is different yet. I also found some wonderful textured papers at a scrapbooking supplies store to expand the variety of textures and visual appeal. Other cards had their borders adorned with thick felt stickers, craft foam shapes, acrylic “gems,” and other crafty materials to add texture and color. Let these examples spark your imagination and see what you can come up with!

Workshop Wednesday: Tactile Card Holders, Version 1

Sometimes certain facts work well for studying from homemade flashcards. However, some students just don’t do well with trying to learn from ordinary index cards. Today, we’re going to make those cards extraordinary! These card holders will work especially well for teens who are trying to learn complicated facts and formulas, but who need some extra learning methods thrown in.

Equipment:
Index cards to hold the facts or information
Bright colored card stock
Razor knife for cutting slits
Scrapbooking scissors for trimming edges

How To:
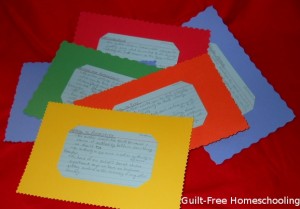
I started with 8 1/2″ x 11″ sheets of brightly colored card stock and cut them in half to make two pieces 5″ x 8 1/2″. Lay an index card in the middle of each of these sheets and mark about 1/2″ from each corner. Use the razor knife to cut angled slits (connecting the marks you just made) for the corners of the index cards. You don’t need to get the cards exactly centered or the slits angled perfectly; if you have a student who is fanatical about precision, give this job to him. Either 3×5″ or 4×6″ index cards will work, depending on what size you have on hand or how much info will be put on each card. The bright colors add visual interest to the boring facts (did I just say boring? oops), and colored index cards can do the same thing (the ones in the photo are light blue, but white cards work just fine). Just be careful that the colors don’t clash or create such a visual disturbance that no one can stand to look at them!

I had a variety of scrapbooking scissors available, so I trimmed the edges of the card holders, using a different pattern on each card. If you only have one or two fancy scissors (or even just a pair of pinking shears), that will still work. You could even use regular scissors and just cut some wavy or zig-zaggy edges. The idea here is to create a little bit of tactile interest for the fingers that will be holding the cards.

As your student studies the facts on each card, the bright color of the card holder will become a visual cue to those facts, and the tactile edge will do the same for his fingers. Reading the card information aloud lets the student say and hear the info, important methods for auditory learning — and when he stops reading aloud, he’ll catch himself wandering off-topic. The large size of these card holders makes them more of a kinesthetic learning tool than just small index cards are. The colors, edge textures, size, and reading aloud will all provide memory keys that his brain can rely on when trying to remember the facts on each card. Hmm… that card was in a red holder… I was holding it with both hands… the edges were pointy… I remember hearing myself say these points over and over… I know — it said THIS!

By inserting the index card’s corners into slits, the holder becomes reusable. When this set of facts has been learned and the student is ready to move on to learning different information, the index card can easily be slipped out and another inserted in its place. Make as many card holders as needed, but if possible, trim the edges of like colors with different patterns to make them different (notice that the 2 blue card holders in the photo have different edge patterns).

The cards shown here are for fallacies of reasoning, but you can use this method for learning vocabulary words, their spelling, and meanings; math or science formulas; historical events or people; or anything else that needs to be memorized.

Also see Tactile Card Holders, Version 2 for more ideas!

Verified by MonsterInsights