Encouragement Corner: What About Writing Assignments?

Encouragement Corner is a new feature here at Guilt-Free Homeschooling, sort of a mini-seminar for the busy moms who can’t spare the time or expense to go to a major homeschooling conference, but who still need answers to their biggest questions. We’ll be grouping a few of the most-often-recommended articles around a central issue and making those articles easier to share on Pinterest by adding a photo or graphic as needed.

I don’t believe in writing assignments. There, I said it. I never liked creative writing, story writing, or other frivolous paragraphs, essays, or compositions, so I didn’t force my students to write them either. What I used instead was reading — lots of reading, and grammar lessons. I only held a formal reading class during the learning-to-read stage, and once my kids were reading fluently by themselves, I let them choose their own pleasure reading to serve as an unstructured subject. Since they each spent as much (if not more) time telling me about what they had read than it actually took them to read it, I wasn’t at all worried about their reading or comprehension skills. Relaxing with a book at bedtime was a great way to unwind from the day, and it didn’t feel to them like yet another academic endeavor.

I frequently read aloud to them, and they read to themselves from a variety of sources (fiction, non-fiction, poetry, biography; books, magazines, newspapers, web articles, etc.), giving them vast understanding of many different types of writing. Exposure to a multitude of authors showed them how any given genre could be handled in a multitude of ways. My students loved some authors’ writing styles enough to read everything they could find by those authors. Other authors’ writing styles were so cumbersome and awkward that they closed the book and moved on with no regrets for not finishing.

As my students matured and developed their own voice (meaning personal thoughts and opinions) on various topics, they were able to express them coherently, in part because they had read how others had expressed ideas through the written word. Their first serious writing assignments came from a composition class at the local college (taken during their Senior year of high school), where the teachers were impressed with their writing abilities. They could write good summations of their reading and research, because they were already accustomed to reading and evaluating, and the results were scholarly compositions.

By skipping several years of trivial paragraph-writing, my students had been able to read a wide variety of sources. They had learned how to form their opinions into logical arguments. Their minds weren’t cluttered with topic sentences and formulaic outlines. They were able to reproduce any type of composition just by reading it and analyzing the key components. They had read good writing, they had found a voice, and they had many interests which afforded them numerous topics for their composition needs. Delaying the writing assignments worked very well for us.

Linked below are our most commonly recommended articles on writing (as composition, not to be confused with handwriting), to help you decide how to tackle this topic in your homeschool.

Tests, Book Reports, and Other Un-necessities 

Teaching Spelling (and Grammar) Through Reading and Listening

Grammar with Giggles, Mad Libs Style

How Did You Learn to Write? 

How to Adapt Lessons to Fit Your Student’s Interests and Make Learning Come Alive 
Workshop Wednesday: Handwriting — Beginning Techniques

Most children struggle with learning handwriting, and yours may currently be having trouble with it. Handwriting is a difficult task, especially in the very beginning. There are all those different letter shapes to remember, and trying to draw them with any consistency at all is tough. Children often wonder how adults write so effortlessly, because they don’t realize that those adults have had years of practice. Beginners can struggle just to hold on to the pencil or to draw the letters—doing both at once is a Herculean effort!

To begin with, young children who are just learning the skill of handwriting may not yet fully understand the need for letters and words to be written in a left-to-right orientation. They aren’t at the full reading stage yet, so (in their view of the world) they don’t yet see the need or importance of a left-to-right progression. Therefore, right-handed students are prone to begin writing on the right side of the paper, a more natural orientation to their pre-reading way of thinking. “Stealth learning” can help here. When reading favorite storybooks aloud to your child, place your finger underneath each word and move your finger smoothly across the page to reinforce the left-to-right movement, even if the child is not yet ready to read the words. Seeing the progression of your finger will help to build that left-to-right idea. You can hold her hand, too, and move her finger from letter to letter and word to word, again casually demonstrating the left-to-right progression as you read each word aloud. As your child learns to recognize individual letters, you can add “Find the letter B on this page” to your visual and comprehension activities.

Remember that reading and handwriting are two separate skills. Reading is much easier, since it’s all in the mind and doesn’t require any new muscle training. “Handwriting” and “composition writing” are also two separate skills: handwriting is the mechanical action of reproducing individual letters and connecting them into words; composition means thinking up the words, sentences, and paragraphs to form a story or essay. This stage is much too early for multitasking, so encourage your student to learn to read words without having to copy them perfectly, and encourage him to learn to copy sentences without having to think up his own sentences. Focusing on each of these skills separately will prevent over-emphasizing handwriting during any composition activities, a distraction that can stifle the creative process that you would much rather inspire.

There’s an important difference between everyday handwriting and special occasion handwriting—I love this analogy. We all have good clothes, and we have play-in-the-mud clothes. We have inside voices and outside voices, and we have indoor toys and outdoor toys. We have our very best handwriting that we use on Grandma’s birthday card, and we have everyday handwriting that we use for the grocery list—just take a peek at Mom’s grocery list! Allow your child to use “everyday” handwriting on daily worksheets that don’t matter as much, and then specify when his “best” handwriting is required, to take the emphasis off of perfection. Discuss with your child how he outgrows clothes quickly and how you can show him that he will outgrow his current handwriting, too. Saving a few copies of both his everyday and his best handwriting will show him that his handwriting is improving over time.

Helpful Tips and Techniques:

  • Start to teach handwriting with all upper-case letters to reduce the likelihood of letter reversals, since there are no b-d-p-q similarities within the upper-case letters. Once the child is confident in all the letters, the lower-case letters can be introduced as the “little brothers” of the capital letters. By that stage, your child will understand which letter is which and be able to discern which sound is needed.
  • When you want your child to copy a word onto paper, try showing her one letter at a time. For example, to write “DADDY,” you write the first letter, D, on the left side of a paper, and have her copy it exactly (both of you should have identical papers at first, to make it even more clear that she is to mimic every action of yours). Then you write the A next to the D, and have her copy it onto her paper. Continue one letter at a time, Mommy writes it first, then child copies. Letter by letter, copying each action individually, your child will learn to reproduce words correctly on the page.
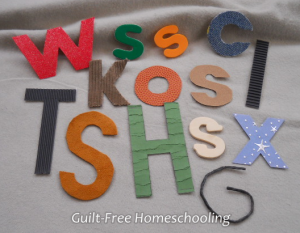
  • Letter cut-outs are an excellent teaching tool for tactile learners. The shape speaks to fingers and transfers the message to the brain in a way that goes far beyond the simple visual connection. Textured cut-outs are even better: sandpaper, textured scrapbooking papers, corduroy or other textured fabrics, foam or chipboard letters, wooden cut-outs, and more can either be made at home or found at craft stores. Some harsh textures may produce a negative reaction, so experiment to find what your student really likes. No matter what texture your student prefers, feeling the outline shape of the letter makes a deeper mental impression than just looking at a letter printed on a flat surface.

  • Students who have hit a roadblock with letter recognition will benefit from using materials other than pencil and paper. Try some of these options for drawing or shaping letters: finger-writing in dry cornmeal, sand, or shaving cream smeared on a window, patio door, or cookie sheet; Wikki Stix; pipe cleaners (chenille sticks); Pla-Doh or modeling clay; Lego bricks; pennies lined up on the table; or lying on the floor and bending their arms and legs into letter shapes (reasonably close, anyway). The important thing to learn is whether a letter uses short sticks or long sticks or half-circles or whole circles and where each of those parts goes. It doesn’t matter as much if they can form the letter perfectly straight or perfectly round or perfectly connected, as long as they know which parts go where. Elegant penmanship is a different skill, and that can be developed later.
  • A great way to practice writing letters (or numbers) is to trace inside the fat letters of newspaper headlines (lots of wiggle room for shaky lines). Letters or words can be computer-printed in a jumbo font (use a light color and/or draft printing mode) for custom worksheets that use the same tracing technique. This is especially good for students who are having difficulty making steady lines or following connect-the-dots methods. Any thickness of writing utensil can be used with this method: pencils, crayons, markers, etc.

  • Encourage students to practice handwriting by copying a favorite storybook into a notebook (the child will already know the story and can focus on handwriting the words letter by letter and leaving spaces between words. No one has to see their work, unless they choose to show it off, and it won’t be graded, but they will learn a great deal about connecting letters into words and words into sentences, in addition to the spelling of the individual sounds that make up the words.
  • Allow rest breaks and hand exercises (like hand massage or squeezing a stress ball) to relieve sore or tired muscles. Imagine learning to play guitar or violin and how quickly your hands would tire—that’s what he’s going through with learning to write. Also let his legs have some exercise before trying to do writing assignments! Restless kids are much more cooperative for seat work when their bodies are worn out from running, jumping, and playing.
  • Pencil grips make pencils much easier for beginning writers to hold. My kids preferred the Stetro grips (see this link), available in educational supply stores or office supply stores. Stetro grips are adaptable for right-handed or left-handed use and teach kids the correct way to hold a pencil, reducing muscle fatigue, plus their jelly-like texture is fun to hold. We also used the foam core from sponge hair-rollers—cheap, easy to slip onto a pencil, and a pleasing texture. Fat pencils, triangle-shaped pencils, and other unique writing implements are also easier for kids to hold than the average pencil, which is awkward for young writers, just because it is so skinny.
  • Mechanical pencils require a lighter touch (or the lead will break) than standard pencils, which can help kids learn to draw the letters without as much fatigue. These helped my kids learn to let the lead do the work, instead of pressing hard and carving into the paper as often happens with a normal pencil.
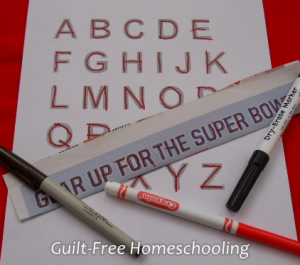
  • Smooth-flowing writing implements, such as a whiteboard and markers, are another way to make handwriting easier, since heavy pressure isn’t required to make a dark mark. Whiteboard markers can also be used directly on a cookie sheet—just wipe off with a dry tissue to erase and wash the pan well before the next batch of baking. Wet-erase markers write just as smoothly as the dry-erase whiteboard markers, but won’t disappear from an accidental touch (erase these marks with a damp tissue). Found at office supply stores, these are sometimes called “transparency” markers, since they are usually used on overhead projector sheets.
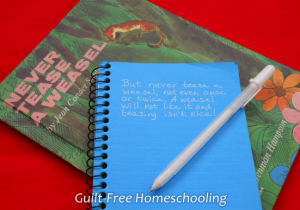
  • Using light-colored gel-pens on dark paper (see craft stores) changes the visual dynamic enough to get the child’s mind off the act of writing and keep him more focused on the subject matter.
  • Try having your student start with writing little bits instead of full sentences—have him fill in a blank in a sentence or write a brief “label” under pictures he’s drawn. He can write longer portions on a whiteboard (effortless surface) and copy a small portion onto paper. Then every other week (or appropriate interval), gradually increase the amount of writing on paper, until it’s no longer such a chore.
  • We had great results from Italic handwriting workbooks. My fifth-grader had learned the standard cursive at public school but didn’t like the way it looked, so she asked if she could learn to improve her handwriting at home. Italic handwriting was simple and beautiful, and to encourage my daughter, I practiced along with my kids and changed my own handwriting, too. My first-grader learned Italic manuscript first and had no difficulty transitioning into Italic cursive.

Handwriting is a skill that takes time to develop and shouldn’t be rushed. As with any other skill, students will get faster as they become more confident in using it. Give them good tools and plenty of opportunities for enjoyable practice, and you should see positive results.

See also:

Start with Reading, Handwriting, & Arithmetic, and Save the Rest for Later

Letter or Number Manipulatives (DIY)

Letter and Number Recognition 

Preschool Is Not Brain Surgery

When Is Reading NOT Reading?


Workshop Wednesday: Color-Coding As a Learning Tool

[This article was written by Jennifer Leonhard.]

Is your student attracted to color or motivated by markers? Does your student struggle with staying organized when studying? Color-coding is a great learning tool. Visual learners respond well to color as an organizational method, and non-visual learners can improve their visual skills by using color to organize information. As classes become more complex in high school and college, color-coding becomes an even more valuable organizational tool.

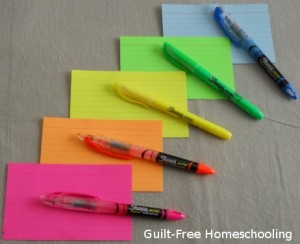
As a strong visual learner, I used assorted colors of index cards and highlighters to help me organize my thoughts and the material I was studying in my college classes. I used the order of the color spectrum as my color code whenever I needed to maintain a beginning-to-end, front-to-back sequence: red, orange, yellow, green, blue. My system always began with red (pink worked as the closest available color in note cards and highlighters) and proceeded through the spectrum to blue (violet/lavender was too hard to find in highlighters).

Here’s how I wrote the various parts of a speech or oral presentation: one pink card held the introduction, several orange cards for the information for Point 1, several yellow cards for Point 2, several green cards for Point 3, and one blue card held the conclusion. I could rehearse a presentation using these cards, and if I dropped them or they got mixed up in my backpack, I could easily put them into color spectrum order again. Any supporting quotes had their own index cards (using the appropriate color code for each point), and I would draw a squiggly outline on those cards to indicate that they contained the quotes. Each card had a topical title at the top and a number in the corner to indicate its order within each color group. I rarely ever needed to look at my note cards when giving a presentation, because I had them so well organized that I could easily see them in my head and go from there, but I did keep the cards with me in case of a blank-out moment. I could also turn them in to the teachers who asked for them as part of the assignment.

I also used this system for writing extensive research papers to create an outline in this format. I could put anything supporting Point 1 on orange cards and just go through all the orange cards later to put them in order for writing my paper.  When doing research papers and printing out a stack of articles for a 50+ page paper, I would use highlighters in the same colors as my note cards to circle significant points in the article. I could then grab all articles with orange outlines and work just on my first point without being distracted by all the other sections.  If an article had information for several points I would do a thicker outline in the color that it discussed the most and a thinner outline in the color of the point it discussed less, and then highlight or circle the section of text that pertained to each part in the appropriate color.  I could flip through my notes very quickly and efficiently in this way and find exactly what I was looking for at any particular moment.  I rarely had a “blanking” moment when writing, because I had a system that provided me with a place to start.  I didn’t have to write the individual sections of the paper in any particular order, and if I found myself overwhelmed by the sheer amount of research information I had printed, I could simply start color-coding instead of freaking out.  If I found myself unsure of where to stand on an issue or how to phrase my findings, I could simply grab all of the items outlined in orange and start highlighting, circling, or underlining the important sections that I wanted to use.  Stuck on what to write for orange? No problem! Just work on the yellow items for a while, and then come back to orange later.  I had no fear of getting confused or forgetting what I was doing next, because everything was very plainly color-coded for picking up where I left off.

Similarly, I would use this method to study complex material. I used the same color-code for highlighters, note cards, in my lecture notes, and in the text books, so that I could start the process while reading and know what to put on the index cards later. I used yellow as my color-code for keywords from the text. Pink was for any important dates to remember, green signified important people, and orange was for formulas and diagrams. Blue was for any other information I needed to make sure to remember. By categorizing things like this, I could pull out just my orange cards right before a test and review the formulas and diagrams, if I thought I was suddenly blanking on something. I’m bad at remembering specific dates, so I could grab the pink cards to quiz myself on those. This made it easier to categorize the test elements in my head, and instead of all the information being a blur of grey pencil notes on white lined paper, I could focus my memory on just the orange parts, or just the pink parts. The colors became just as important as the facts themselves, especially when trying to sort through all the facts in my head to find the one correct answer I needed on a test.

Whatever color-coding system you choose to use, the color significance can vary from subject to subject, but consistency within each subject is the key to making your system work. Yes, I bought a lot of index cards and highlighters, but they became valuable assets to my study habits, and the positive results proved their worth. Other colored items could also be added to a colorized system, such as colored pencils, file folders, pocket folders, notebooks, divider tabs, sticky-flag bookmarks, and whatever else your favorite office supply store has crammed into its aisles. Using color-coding is a great organizational and memory tool, and it strengthens your visual learning skills, even if visual skills are not your strongest learning style. And who doesn’t like playing with a whole rainbow of highlighters?

Workshop Wednesday: Freebie Magnets

Magnets are a wonderful learning tool for tactile learners. There is something about that magical, magnetic connection that appeals to fingers of all ages. Fortunately, most of us have a ready supply of free advertising magnets from the pizza place, the hairdresser, the auto mechanic, the new phone directory, and every politician who marches in a summer parade. Peel your collection off the refrigerator, and let’s turn them into some great learning aids. I’ll list several possible uses and some basic how-to’s for the magnets. You’ll want to analyze what topic your students are struggling with or where they need the most help, and then focus your efforts there. Students can also help make magnetic learning aids, and helping to make them means the learning begins right away.

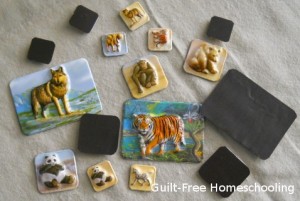
Stickers are probably the easiest things to turn into magnets, since you just have to stick them onto a magnet and cut around the stickers with scissors or a razor knife (such as an X-Acto). I have used scrapbooking stickers that looked like Scrabble letter tiles, foam letter stickers that were shaped like small jigsaw puzzle pieces, and 3-dimensional plastic stickers with raised animal shapes. The puzzle piece stickers were slightly tricky because of their irregular shapes, but I cut the magnets into squares small enough to fit in the center of each sticker, and then (after attaching the magnets) dusted the surrounding sticky edges with baby powder, using a dry artist’s paintbrush. It took two rounds of dusting powder to get the foam pieces to stop sticking to each other, but I’ve had no problems with them since then. With regularly shaped stickers, it is fairly simple to line them up next to each other (as many as will fit on the magnet), press them down securely, and then cut them apart. If your stickers have rounded corners, cut them apart as squares first, then round off each corner with scissors. There may be a strip of magnet left at the side that is too narrow to hold more stickers, but hang onto that piece—you’ll cut it up and use it later.

Once upon a time, my kids had some puffy stickers that they wanted to be able to save and reuse. Magnets to the rescue! I covered the backs of the stickers with adhesive plastic, then attached a magnet to each one. Those cartoon character magnets became a great quiet toy for imaginative play.

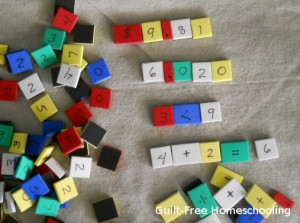
Craft foam sheets allow you to make your choice of subject matter by writing on the foam with a permanent marker, such as a Sharpie. (Some foam sheets can even be purchased with a magnetic backing already attached!) I had some magnetic strips that were adhesive on one side (leftovers from a weather-stripping project), so I cut squares of craft foam the same width as the magnetic strip, stuck them on, and cut the magnetic strip between the squares. Adding numbers to each square produced magnetic manipulatives for math! I drew arithmetic operation symbols on a few more squares to complete the set.

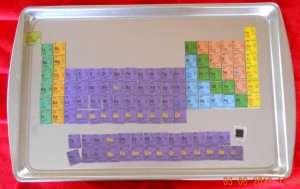
Laminated placemats have been featured in a previous Workshop Wednesday article, but I will mention them again here for good measure. That example showed a periodic table of elements placemat that I turned into magnets, but any subject matter will do. If a placemat doesn’t lend itself to a building block format (such as the periodic table) or a map (USA, etc.), perhaps you can cut it into a simple jigsaw-style puzzle to entice your kids to play with the magnetic pieces and learn the information.

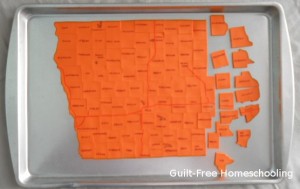
I have also used the plain (back) side of a thick foam-like vinyl placemat by cutting it into the desired shapes and attaching a small piece of leftover magnet to the back of each piece (formerly the front of the placemat). Adhesive squares made for scrapbooking, card making, and other popular paper crafts work great for attaching magnets (without the mess and hazards of hot glue guns). These vinyl-foam placemats are a bit heavier than craft foam and are made of a material that is not subject to the static electricity that can leave you covered in bits of craft foam for the rest of the day. Yes, that is a magnetic map of Iowa’s 99 counties, made from the backside of an orange jack-o-lantern placemat, but please don’t feel you have to try something quite so ambitious as your first project (that thing was tricky!).

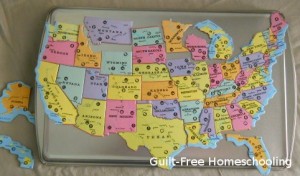
A USA jigsaw puzzle (cut on state borders) received new life as a magnetic puzzle with the addition of a magnet square to the back of each puzzle piece.

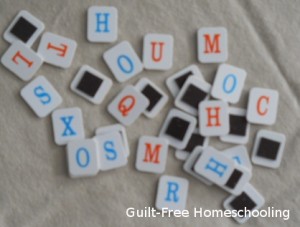
Letter game tiles were repurposed with the addition of a magnet on the back of each tile.

Sandpaper cut into small squares can be glued to cardstock for added strength and then attached to a magnet. Grab your Sharpie marker again and write or draw letters, numbers, symbols, etc. for magnetic manipulatives with a bonus tactile texture. I made some in 1” squares, but don’t let that limit your imagination!

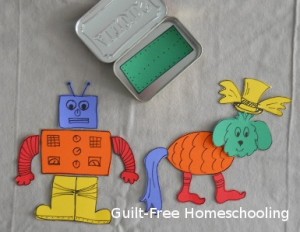
Funny facial features (eyes, eyebrows, noses, mouths, mustaches, ears, etc.) drawn on cardstock and attached to magnets become a fun game for preschoolers (I saw that idea on Pinterest, but I don’t know who originated it; someone deserves the credit!). Now what if you used the same principle for body parts and made interchangeable heads, bodies, legs, feet, arms, and tails for a magnetic build-a-monster activity? Build-a-bug, build-a-robot, build-a-car, build-an-animal, build-an-alien—the possibilities are endless! Your older students may have fun creating these magnets for their younger siblings, and they’ll learn some great problem-solving skills in the process. I wonder if we can make these small enough to fit in this empty Altoids tin? Hmmm… then Mom could keep it in her purse for Timmy to play with in church or while waiting in a restaurant!

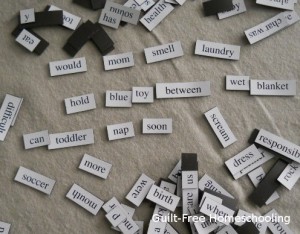
So let’s review: we’ve discussed making magnets for letters to use for phonics and spelling practice, numbers and operation symbols for math, chemical elements for science, and states for geography. Need more ideas? How about geometric shapes, colors, incrementally-scaled pieces for number value (make them match the size of other math blocks you may own), fraction pieces, or pattern blocks. Have a struggling reader? Use the “magnetic poetry” type of word magnets (purchased or home-made) to focus on reading one word at a time, then adding them together to build a sentence. Have a struggling writer? Those same magnetic words can help him write sentences, stories, or poetry, since it can be much easier to rearrange someone else’s words than it is to think up new words from your own head. Pick up a small, inexpensive, cardboard skeleton party decoration, cut it apart into individual bones or groups of bones (such as the rib cage, hands, feet, etc.), attach some magnets, and you have an anatomy learning aid. Plastic or cardboard coins can become magnetic money manipulatives (say that three times really quickly).

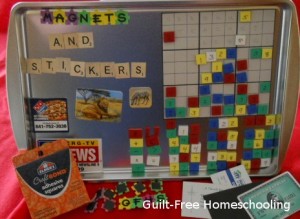
When you have accumulated a large supply of educational magnets, the traffic in front of your refrigerator may get overly congested. Solution: steel cookie sheets or steel pizza pans are lap-sized and much more portable than the refrigerator door. If you need to shop for steel pans, you may want to take along a small magnet in your pocket for testing purposes. (That nosy store clerk will leave you alone when you explain that you’re obviously shopping in the kitchen section for educational materials.)

Now before I forget, there is one other accessory that makes magnetic learning aids even more beneficial: paper. I drew a Sudoku grid large enough to hold our number magnets and placed it on the cookie sheet, using the magnets to hold it in place. Ta-da, magnetic Sudoku can take the visual puzzles from a book or newspaper and turn them into a tactile masterpiece. A worksheet with fill-in-the-blank problems could hold magnets on those blanks instead of written answers. Your kids might choose to color an underwater background picture to place behind their letter magnets, just because they are learning to spell the names of ocean creatures.

Learning isn’t limited to books, life doesn’t happen between the pages of a workbook, and we learn what we enjoy. Magnets get fingers involved, and fingers love to learn! So what are you waiting for???

See also:
What Is the Missing Element?
Placemats + Magnets = Educational FUN!

Workshop Wednesday: Macaroni as Manipulatives

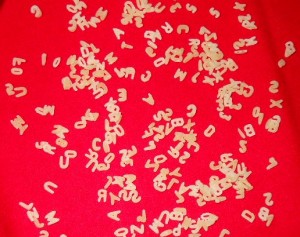
Have you ever found yourself wishing you could afford hundreds, or maybe even thousands of letter or number manipulatives? Head for the pasta aisle in your favorite grocery store—a bag of alphabet macaroni contains both letters and numbers! The pasta is low-cost, so if you have several children who would each enjoy their own supply, you can buy several bags. Letting each student store his macaroni in a large zipper bag will help to make clean up simple and easy.

I sorted through a bag just to see if all the letters and numbers were represented, and yes, they were. My adult-sized fingers found the task a little tricky, but a set of tweezers made it simpler. Children’s small fingers are much more suited to this assignment, and tactile learners will really love digging in. Muffin pans, egg cartons, or cookie sheets are great receptacles for sorting!

Let your students play with the uncooked macaroni at first, and see what activities they devise for themselves. If they need a little encouragement or a starting place, suggest sorting the letters, forming spelling words, making random words (like “magnetic poetry” but without the magnets), or writing sentences. If they’d like to save their work, the words can be spelled out on a line of white glue on a piece of cardstock or an index card. The glue will be invisible when dry, and the cardstock can then be cut into appropriate sizes, creating miniature word-cards (add small magnets to the backs of the cards for even more versatility; a steel cookie sheet makes a good lap desk). These cards can be arranged into sentences, poetry, or lists of rhyming words or spelling patterns, and saved in a zipper bag for another day. Be serious, get silly, have fun with nonsense words, or use the letters to form the answers to lesson worksheets, and the learning will take on a whole new dimension. Don’t stop with just phonics, spelling, and grammar, however. Use these letters to practice spelling place names for geography, complicated scientific words for science or chemistry, or important people, places, and events for history. The letters can easily be scooted apart to break words into syllables or prefixes, suffixes, and root words—a great method for word study, and it adds a memory link for better recall later.

The tiny pasta numbers can be used for sorting and matching or set up as math statements by writing operation symbols on paper, leaving blank spaces for the numbers. Select specific numbers or grab random pieces for a new twist on math problems. Younger students will enjoy the challenge of putting the numbers in order or experimenting to see how many different numbers can be formed from just a few digits. Keep the pasta dry and away from toddlers and the family dog, but rest assured that a new supply is readily available in case too many pieces get stepped on, eaten, or sucked up by the vacuum cleaner!

Workshop Wednesday: Play Money

Time to head for the game closet and dig out some play money! This stuff is a fabulous tactile learning tool that can be used for much more than just collecting $200 for passing “GO.” Use play money to practice counting by 1’s or skip-counting (by 5’s, 10’s, 100’s, etc.)with the littles,  demonstrate place value and the substitution needed for arithmetic with the middles (borrowing, carrying, trading, regrouping, swapping, bundling, or whatever you choose to call it in your lessons), practice making change, or discuss money management with the olders. You can get more creative and challenge your students to grab a handful of play money and calculate the amount, then write out the amount in both digits and words. Some of you may take up the challenge to grab several random amounts and use those for addition, subtraction, multiplication, or division problems. Here’s another challenge: let your students make up their own story problems for random amounts of play money—they’ll be getting math practice and writing practice at the same time.

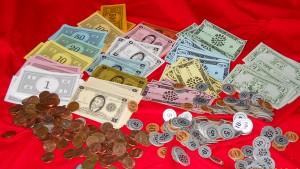
If you have several games that contain play money, pull it all out and pool it together: sorting by denomination is good math practice. As seen in the picture, not all games use the same denominations, so your students can learn to adapt their math practice to the supplies that are available. I even threw in a large handful of real pennies from the coin can that serves as a doorstop here—if you have a coin can or jar, you might want to borrow some of its contents for a little more math practice. (My kids paid much closer attention to math discussions if the problems involved money or food instead of just meaningless numbers!) When the math lesson is over, let the kiddies continue sorting and counting the play money: setting up a pretend “store” is great “stealth” learning! Maybe they’d like to invent a new game that uses all this play money, plus several other random pieces from a few games. Setting up the game instructions offers writing practice, determining the rules is problem-solving practice, and playing the game will give even more practice in counting, adding, subtracting, making change, and whatever other math skills their new game includes. When the time comes, sorting all those game bits and play money back into their respective games is excellent experience for the sorting required in algebra and other higher math studies, and it gets the kids involved in putting things away, instead of leaving all the clean-up to Mom.

For more tips, see also:
Building Blocks for Success in Math
Sorting Toys Is Algebra
Gee Whiz! Quiz

How to Adapt Lessons to Fit Your Student’s Interests and Make Learning Come Alive
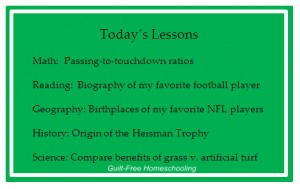
A GFHS reader wrote to me, concerned about her student’s lack of interest in doing homeschool lessons, although he showed a wide capacity for learning and retaining facts about sports. The mom was frustrated as to how to get any actual lessons accomplished, since their days were an endless series of disagreements and strife. This is when out-of-the-box thinking can really pay off. Taking the lessons out of the box and away from the textbooks can make a huge difference and ignite the spark of learning in a “reluctant” learner such as this student. The examples given here will relate to football (this particular child’s passion), but you can easily adapt these ideas to wherever your students’ interests lie.

When a child is keenly interested in football or other sports, that can be used as an “in” for other subjects. For instance, put a map of the USA on a bulletin board and have him stick a pin in the approximate places where his favorite NFL players were born. Then have him place another pin in the city where each player went to college and connect the two pins for each player with a piece of yarn. Suddenly he’ll be up to his elbows in a fascinating research project and geography lesson that doesn’t feel like schoolwork to him at all!

Take this in a slightly different direction by challenging him to do some research on the NFL teams, making a chart showing when each team was founded, where it began, and if or where it has moved. Have some of the teams’ names or colors or mascots changed throughout the years? Now he’s found a history lesson that he can really enjoy! Give him more pins for the map (and a different color of yarn) to show the movements of the teams. A little more research can reveal what important world events coincided with significant team events or crucial games for more history, this time linking football to other events. Find inventions or products that were introduced during the years that match up to his favorite events regarding games, teams, or players, and that can bring in some science lessons. Look at how football uniforms, pads, helmets, and other equipment have changed over the years and why for some more science and history.

Challenge him to research the backgrounds of a few favorite players and write “color commentary” that could be used by a sportscaster, and you’ll have a writing assignment he’ll be eager to do! Challenge him to write his own sports “column” or read and critique the sports columns or blogs by professional sports writers, and he’ll have reading material, comprehension studies, and analytical writing assignments that hold his interest. To round out the language arts lessons, focus on his content first, then work on helping him correct spelling, punctuation, and grammar — always examining the rules for each change, not just criticizing his writing without reasons. He may even learn to spot spelling and grammar errors in the professionals’ columns for an important lesson in why accuracy matters!

Players’ statistics can be analyzed for some practical, real-life applications in math. Calculate the total yards of passing or rushing, the percentage of completed passes, or how a player’s averages have improved or declined over his career. Math practice is math practice, regardless of whether it uses random problems on a worksheet or real-life statistics. When the real-life applications mean something to the student, he will have motivation to complete the work. Learning one fact will spur curiosity to learn more facts, and before long, the student will be knee-deep in new information and hungry for more.

The homeschooling mom mentioned earlier took this advice and began adapting lessons to her son’s interest in football. When his curriculum focused on poetry, they searched the internet for poems about football—and were delighted with their results. One poem prompted a discussion, which led to further studies and more topics. This simple substitution transformed a struggle over a single, uninteresting lesson into a day filled with curiosity, researching, exploring, and learning.

Lessons that are based on real-life interests will combine several academic subjects all at once, rather than following the institutional school model of working on each individual subject for forty minutes before switching to the next unrelated subject for the next forty-minute period. Your student can research a given topic, study and analyze the reading material, pursue more research as to the geography, science, or history related to the topic, perform some math calculations to gain better understanding of the data, create a timeline of events, and express his conclusions and personal opinions in a variety of formats. The analysis of the information is conveyed, whether it takes on the form of a formal essay, a news story, editorial column, a poem, song, or rap, or even a personal journal entry. My own student who was reluctant to read assigned stories outside his field of interest became a voracious reader when the subject matter fed his curiosity. (How many adults would waste valuable time reading things in which they have no interest?) Adapting lessons to your students’ interests teaches those students how to learn from every facet of life and sets them firmly on the path to life-long learning.

See also:
The Value of Supplemental Activities
10 Ways to Improve a Lesson
How Can I Teach Out-of-the-Box Thinking?
Is Learning Limited to Books?
Every Day Is a Learning Day, and Life Is Our Classroom

Verified by MonsterInsights