Regardless of what you’ve heard or read before about children, about how they learn, or about the things that influence learning, I ask you to put aside all those preconceived ideas and consider what you are about to read with an open mind. Based on these descriptions and what you already know about your own children, draw your own conclusions and make your own decisions. Note that this information applies equally to boys and girls; behaviors and fictional names are used for examples only. Let us begin.
Why “Learning Styles”?
I began studying learning styles when the teaching methods I was using did not work well at all with how my children actually learned. However, the learning style descriptions that I found in my studying also did not match the reality I was living. I read many scholarly-sounding explanations that looked very impressive on paper (or on-screen), but they failed to hold up in practice. I had two case studies sitting at my own kitchen table that disproved most of the things I was reading about how kids were supposed to learn and how they should be taught. Child “A” did seem to fit with several items on this checklist, but not that one or that one, and these three items she would never do in a million-billion years. Child “B” fit most of the descriptions from that list, but its suggested teaching methods didn’t interest him in the least. As I paid attention to what my kids did throughout their days (not just during school time), I began to spot some very consistent trends. Some of those trends were repeated in other kids (and adults) we knew, and I realized that learning styles are revealed more in the things we do away from the lessons, than they are in any particular learning situation, and the teaching methods that will be most effective will be tailored to match those preferred, leisure-time activities. I eventually wrote my own books on learning styles, and my methods have been proven successful over and over again in my own children, in the children of my friends, and in the children whose parents have attended my workshops or read my books and blog articles. (See the links at the end of this article)
Those scholarly works on learning styles either contained too few or too many categories. Many of them combined tactile (touching) with kinesthetic (moving), as though they were one and the same style of learning. However, my kitchen table was home to one very tactile child, who was not so very kinesthetic, and one very kinesthetic child, who was not so very tactile. Hmmm… a dilemma. Other learning style proponents created far too many divisions, leaving me even more confused, as my children seemed to fit some of the criteria from each and every category, without dominating any single one. I further read the descriptions of how these numerous categories were supposed to be utilized, and I again thought “Okay, this child does do this, but he/she would be totally bored by that method… and what about the other subjects that don’t work that way at all?” What to do… what to do?
I started making notes of how people acted and what people did that could be indicators of how they would learn best. I watched kids at our homeschool group activities and kids at play; I watched parents at the grocery store and people of all ages wherever I saw them. I saw four basic categories being represented: tactile and kinesthetic were there, but as two separate and distinct styles, plus visual (seeing), and auditory (hearing/saying). The more I watched and studied and observed and analyzed, the more these groups were confirmed. Sure, people applied those groupings in various ways, but touching was still touching, and moving was still moving, no matter how each individual performed it.
The next revelation for me was that different academic tasks require different learning methods. That told me that each person must be able to adapt to learning with other methods than the one that is most comfortable for him. Spelling requires visual skills more than anything else, but music must be heard, and handwriting requires muscle training. What happens to the child who is taught within one and only one style of learning (as advocated by many learning style authors)? I can tell you what will happen to him: he’ll slip through the proverbial cracks and fall behind in learning!
As I saw my four categories represent basic learning styles, I also saw the need to re-combine them for cross-over learning throughout all academic disciplines. Focusing on a single learning style was the error that I saw in most learning style philosophies, and that singular-focus seemed to be a guarantee for failure. No one learning style could work in all situations. The student who faithfully read every printed assignment from elementary through high school would become hopelessly lost in the college lecture hall. Those finely-honed visual skills would fail when non-existent auditory skills became vitally important. How could I bridge that gap?
Teaching to students’ learning styles is regarded as impossible in a single-teacher classroom of 20-plus kids. An efficient classroom model depends upon visual examples, auditory lectures, and abundant reading and writing assignments for every academic subject. Tactile and kinesthetic methods can be time-consuming, space-consuming, and are generally considered impractical in a large group. With standard classroom methods, any students who are dependent on tactile and kinesthetic methods are inevitably left out, or they must instinctively train themselves to adapt to visual and/or auditory methods. If self-adapting isn’t possible, or doesn’t occur rapidly enough, those same students begin to fall behind, and as the class moves on without them, falling behind turns into failing.
How Behavior Relates to Learning
Eye color has been used to show the folly of prejudices by segregating students by eye color and relegating approval or disapproval on that basis alone. But what if learning styles could be demonstrated just as simply? What if we began training tomorrow’s teachers by saying that only their brown-eyed students could understand certain lessons? And what if we further said that those with the darkest brown/nearly black irises would understand most easily, and those with lighter brown/nearly amber irises would catch on a little more slowly? Then suppose that the parents of any students whose eyes were shades of blue or gray or green or violet were later informed by these teachers that their students’ non-brown eyes were distracting to all of the brown-eyed students and therefore disrupted learning for the rest of the class. The suitable solution, the teacher would relate, would be for the parents to obtain a prescription for colored contact lenses from their eye doctor and for their children to wear those lenses every day, school day or not. What effects might this have on all the students? What effects would carry over to the other teachers or to the parents?
Now instead of eye color as our determining factor for who learns how and when, let’s use deportment, a good old-fashioned word that encompasses demeanor, conduct, and behavior. For Group #1, let’s take the students in a hypothetical classroom who are fidgeting with their pencils or drumming their fingers on the desk or chewing on their fingernails or twirling a lock of hair or doodling in the margins of their notebooks or doing anything at all with their hands or fingers. You’re not in trouble – you’re in good company. After all, Leonardo da Vinci was a great doodler! All Group #1 students may move to this corner over here.
Group #2 will consist of those remaining students who are wiggling in their seats, tapping their feet, crossing their legs, or doing anything at all with their feet or legs. Group #2 students, you may come and stand in this other corner, knowing that you belong with every Olympian throughout history.
For those who are left in the original group, any who are laughing, smiling, joking, or making comments (either saying them aloud or just thinking up good one-liners in their heads) may move to that far corner. This is neither a judgment nor a punishment for being off-topic or truly funny. We are merely grouping the more vocal students together as Group #3, along with every great philosopher and stand-up comedian who has ever lived.
Those who are left become Group #4 – the more reserved and quiet students, those who read without prompting, those whom teachers love to characterize as “cooperative” and “obedient.” Here, though, their only act of cooperation or obedience was to wait until we finally described all the other groups that they didn’t fit into. Group #4 may move to the last corner to continue analyzing this activity, because it’s about to take another sharp turn.
Students, you may now pick up a large, numbered card that matches your group number. If you feel that you belong in a different group, you may also take a smaller, numbered card for whatever group (or groups) that you feel describe your personal characteristics (which are listed on the back of the cards, in case you need to review). It doesn’t matter how many cards any student ends up holding – 1, 2, 3, or 4 isn’t important. As long as each of you has one large card, that is what counts. If you really feel strongly that your large card is the wrong one, you may exchange it, or you can just pick up a small card for the other number and hold onto both cards. I’ll explain the significance of the card sizes later.
Once everyone is reasonably settled on their cards, let’s regroup according to how many cards each student has. Those holding only one card may form a new group along that wall; those with two cards on this wall, three here, and four over there. Hold your cards with the numbers facing out, so that we can all see them, and take a look around at all the different combinations. These two students are holding the exact same combination of cards, both in size and number, but does anyone think these students are exactly alike? No, and that’s because even though their cards match, they will still act and behave and think in different ways, based on their individual interests.
This exercise is showing us how behaviors relate to learning styles. By behaviors, I mean the little things we all just naturally do without thinking, rather than consciously making an effort to be polite and follow the rules. Now I’ll tell you what behaviors are represented by the different numbers. Look at the numbers you’re holding while you think about these descriptions.
Card #1 is held by Tactile Learners, those who learn best from having their hands and fingers busy. If their hands and fingers can be involved in learning a lesson, they will learn that lesson much more quickly and more thoroughly than if their hands are empty and their fingers are held still. These hands and fingers are direct transmission lines to this learner’s brain and need to be involved in some way for learning to occur.
Card #2 is held by those who are Kinesthetic Learners, who love to be on their feet and in the game. Large muscle movement fuels their brains, so what will happen when we make these students sit still and quiet? That’s right – absolutely nothing. Well, nothing productive, that is.
Card #3 represents the fast-thinkers, the Auditory Learners, those who have such a deep need to share their thoughts that they blurt them out for all to hear. They ask questions because they can’t wait around to see if the answer will come later, and they answer both questions and un-asked questions because their brains are begging their ears for more information.
Card #4 marks our Visual Learners, the ones who observe and study and analyze and memorize, rather than jump in, grab hold, or speak up. These students will attempt new things, but only after they have assured themselves that they know absolutely every step required, the order in which those steps must occur, what things could possibly go wrong, and how to avoid making those mistakes in the first place. When they try, they will succeed. The first time. They have read, researched, studied, and acquainted themselves with all the information they could find – that is what kept them quietly busy while everyone else was volunteering to be the guinea pig, doing the experiments, or asking 1,427 questions.
The large number cards indicate a predominant learning style, the way the student will prefer to learn and experience new things. He knows he’s good at learning in that way, and his attention will always be captured by those methods. The smaller number cards represent learning styles the student uses less frequently, but often enough to know that he is somewhat comfortable with them. As I said before, no one learning style works in all situations. Focusing on a single learning style is the downfall of most methods that advocate learning styles, but by gradually expanding and increasing a student’s experiences in his weaker styles, he will become more comfortable with all styles of learning and learn how to learn in every situation.
The existence of a predominant learning style does not indicate a dysfunction or disability in the other styles. Oh, no, not by a long shot! The fact that I do not speak Mandarin in no way indicates that I am incapable of ever speaking Mandarin. It simply and profoundly means that I have never yet been taught to speak Mandarin, whether by learning it on my own or by being taught it by someone else. I could do it; I’m capable of doing it; it just hasn’t happened yet. This also applies to learning styles. Auditory learners prefer oral question-and-answer to written quizzes or being given oral instructions to reading the directions themselves, but they are fully capable of strengthening their reading comprehension and composition skills. It just hasn’t happened yet.
Tactile learners touch. They feel surfaces; they pick up objects; they rub textures. Their hands are rarely empty; their pockets are always full; their fingers are always busy. They think in 3-dimensions as though they can see all sides of a structure at the same time; they understand what they can’t see, based on what they can see; they are adept at building anything. They are mistakenly called grabby, distracted, or day-dreamers, because no one else can see the complex, invisible creations they are generating in their inventive imaginations. When their hands and fingers are involved, they learn and remember.
Kinesthetic learners move. They run; they kick; they throw; they cartwheel; they skate; they swim; they climb. They are rarely still; they are rarely bored; they rarely admit to being sleepy until the moment when they finally drop. They love the spotlight; they crave action; they thrive on motion. They are mistakenly called wiggly, restless, or hyperactive, because no one else can tell that movement means survival to them, since their thinking power gradually shuts down with inactivity. When their arms and legs and feet are involved, they learn and remember.
Auditory learners speak. When they are not speaking, they are listening intently, whether to spoken words or to the theories swarming around in their own minds. They dwell on every thought; they share every idea. They have never met a stranger; they are not afraid to speak up; they know their opinions are valid. They hum and sing and tap out the continuous rhythms in their heads. An outside source of sound or music can help to block out all the other sounds around them and allow them to concentrate on the words inside their heads. They are mistakenly called noisy, motor-mouths, tattlers, or disruptive, because no one else can hear the enchanting, internal music they hear or the clever thoughts and ingenious ideas that are bubbling up, ready to burst forth. When their ears and voices are involved, they learn and remember.
Visual learners read. They study details; they notice patterns; they spot things that are out of place. They thrive on order and consistency; they walk the line of perfectionism, often on the obsessive side. They keep their crayons in spectrum sequence; they erase too much, then begin again with a new sheet of paper; they sort and categorize and alphabetize. They may be good at drawing, but will vehemently deny it, finding some insignificant fault in every sketch. They are mistakenly called shy, nit-picky, reluctant, or hesitant, because no one else can see the infinitesimal details being analyzed in their mind’s eyes. When their eyes are involved, they learn and remember.
School Children, Their Behavior, & Their Underlying Learning Styles
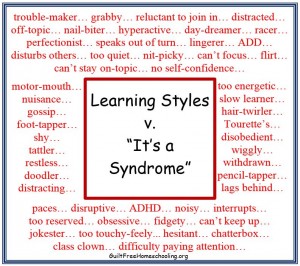
Now let’s look at how some behaviors have been mislabeled as “syndromes,” leading the parents and children to believe that physiological or psychological maladies exist, requiring medication to restore “normalcy.” This will not necessarily be the case in every circumstance, but in far too many situations, errant assumptions can create bigger problems than they purport to solve.
Marty’s permanent record says “trouble-maker” and “class clown” (but not in a fun way). He’s great at sports, because he is very skilled at handling whatever ball comes his way. He can even spin a basketball on his fingertip, but the faculty doesn’t appreciate that in the cafeteria. Marty has been called “slow” because sometimes he lags behind the rest of the group, touching and feeling things that no one else dared to touch and feel. On one field trip to a museum, Marty got caught balancing a banana on end on top of a globe. (Now really, it takes talent to stand a banana on a globe!) Marty got in trouble in that museum for other things, too. He touched the suit of armor (and the chain mail); he ran his hand along the textured plaster walls; he stopped to feel the tapestries (every one of them, as if they were all different); he lingered by the stained glass windows and traced the leaded panels with his fingers. By the end of the museum tour, he’d been scolded so many times to “keep your hands to yourself,” that he reached up in frustration and flicked a small sign sticking out over a doorway, making it flip around and around on its little pole. Marty’s tactile senses meant nothing to the group’s chaperones, even though he learned so much that even the tour guide doesn’t know (she’s never felt the tapestries); they just saw him as a disobedient, nerve-wracking nuisance.
Debbie’s teacher calls her a day-dreamer and says she has difficulty paying attention. Debbie’s records list ADD, claiming that she can’t stay on-topic with the rest of the class. If only we could see the ideas generating inside Debbie’s imagination, we would realize that the poster of a castle on the classroom wall is being transformed in Debbie’s tactile-learner mind into an intricate 3-D model, complete with moving drawbridge, pennants flying from the parapets, crocodiles swimming in the moat, and a lovely princess who has been unjustly imprisoned in the tower. Debbie is pondering how to glue sugar cubes together to build her own miniature castle… or does she have enough Lego blocks to do the job?
Next we have Matt, who can sometimes get stuck on math problems, but he knows that walking around helps him think things through. It has been determined that he has some physiological or psychological syndrome that compels him to move and pace, while his classmates are capable of sitting still and writing quietly. Remember what I said earlier about how kinesthetic learners’ thinking ability gradually shuts down with inactivity? Matt has instinctively adapted to his classroom situation by getting up from his desk and pacing to restore his energy and his thinking power. The “syndrome” notation in his records has merely made it permissible and acceptable for him to leave his desk and move around.
Now there’s Henry, an athletic, high-energy boy whose arms and legs never get tired. Every muscle movement of Henry’s seems to expand into something much bigger than is necessary for the circumstances, getting him into trouble with his teacher, who incorrectly believes that the only good child is a quietly seated child, one who only speaks when spoken to and only moves after receiving permission. Henry is another kinesthetic learner, one who charges through life at top-speed, one who sees no need to wait around for others to catch up, one whose goal is to be the first to cross every finish line. When Henry most needs a long play-break to expel some of his energy and wake up his mind, he is punished for his actions with remaining seated at his desk during the next recess.
Consider Andrew, who hums frequently. His mom apologized for his “disruptive behavior,” saying he’d been diagnosed with “Tourette’s” and just can’t help himself. She was sure we’d all noticed (and been bothered by) his incessant humming at a group event, but not a single person had noticed anything out of the ordinary. In my estimation, Andrew is an auditory learner. He’s humming the songs that naturally play in his head. He is probably a budding musician, who will need only minimal encouragement to attain proficiency.
Everyone calls Gloria a chatterbox. She talks all the time, about anything and everything. If she’s not quoting entire scenes from her favorite TV shows and movies, then she’s singing the latest hit song. Her classmates think she’s a flirt and a gossip, only because she has already talked to the new student and learned all about where he came from, what kind of job his dad has, how many siblings he has, and has told him something about each of the other students in the class and about the kids who used to live in the house that his family just moved into. The art teacher scolded Gloria for being “distracting,” but the silence was making Gloria forget what she was supposed to be doing. Talking aloud to herself actually helped Gloria’s mind focus on working the clay. Her records say “disturbs other students” and “is constantly disruptive,” when they should say “auditory learner.”
Rhonda is a proficient reader, reading and comprehending at a grade level far beyond her classmates. However, the fact that Rhonda is so easily bored with the level of lessons in her classroom has led her teacher to become frustrated and insist that Rhonda has a problem paying attention. Rhonda’s temper sometimes flares up over the puerility of her classmates’ responses to the lessons, resulting in outbursts or acting out (and an “ADHD?” notation in her records). If Rhonda were only taking medication to help her focus, her teacher reasons, teaching the entire class would be much, much easier. In reality, Rhonda is a very bored visual learner, who comprehends everything the first time it is presented and gets tired of waiting for the rest of the class to catch on. She was bored last week and read ahead in her textbook, which is why she is even more bored this week and why she’s now browsing the dictionary for words she doesn’t already know. There was a ratio problem in her math lesson yesterday, comparing the number of feathers to the number of fish hooks in a fisherman’s tackle box; Rhonda was curious as to why a fisherman would need feathers; her research last night left her with 38 beguiling facts about fly-fishing that Rhonda desperately wants to share with the class, but the teacher said “That’s science, and this is math class. Sit down and be quiet.” Rhonda’s greatest allies will be her family, who can praise her expanded learning efforts and encourage her to spend her free time researching every little thing her mind hungers to know. They can take her to visit Bass Pro Shops or another big sports emporium some weekend, where she could meet a real fly-fisherman and get her questions answered first-hand. Mom, Dad, and siblings can all appreciate Rhonda’s interests and “off-topic” discussions, because her interests can prompt delightful outings to museums, libraries, zoos, or other special trips that the entire family enjoys.
Sherry is also a prolific reader, but unlike Rhonda, Sherry is extremely quiet and withdrawn. When her teacher has the students gather to watch a science experiment, Sherry stays toward the back. She would much rather watch from a distance, than be dragged into participating in anything new. Sherry doesn’t like to be called on, never volunteers to help, and is never first in line for anything. Or second, or third. The teacher told Sherry’s mom about this “shyness” problem, and says she has tried coaxing, bribing, cajoling, and forcing, but Sherry just can’t overcome her shyness. Once, when the teacher finally convinced Sherry to try doing an experiment after all the other students had done it, Sherry did it perfectly. “SEE?? You could do it all along!!” Teacher thinks Sherry’s reluctance to join in is a serious psychological issue and has recommended counseling for Sherry, a visual learner who prefers quietly watching until she knows what to do and how to do it.
These children are but a few examples of what is too commonly occurring in today’s classrooms. If these same children could be allowed to follow their own instincts for learning, instead of conforming to the methods that are traditionally believed to cover the most students, they could be building complex models or standing up to do “seatwork” or talking through their thoughts aloud or whatever else might be needed for them to accomplish the lesson tasks more quickly, more easily, more interestingly.
Those who deny the validity of learning styles do so in some very interesting ways.
- They divide learning styles into too few or too many categories, thereby making it all too confusing, and also by mixing up the behaviors into unnatural groupings. Their classifications don’t make sense in practice, therefore they conclude that learning styles don’t exist.
- They deny concrete evidence and proof by claiming that “one more try” would have worked for the student anyway; changing the method to fit the student had nothing to do with it.
- They see preferred methods of learning as being completely separate and distinct from personality, interests, and behavioral tendencies, which ultimately invalidates the entire premise of learning styles.
Teaching Methods for Learning Styles
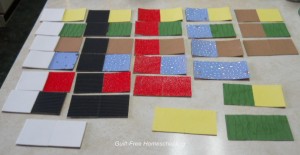
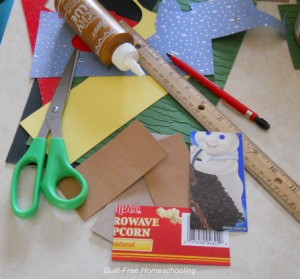
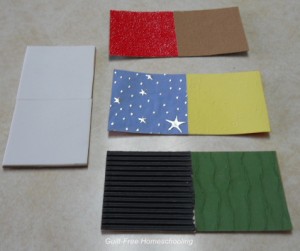
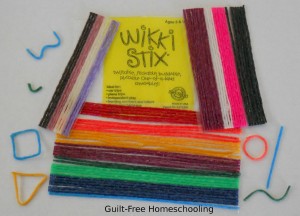
If your child reminds you of Marty or Debbie, try some of the following tactile solutions to encourage learning in an environment that welcomes their fingers and imaginations and delights their hands with finger-friendly textured surfaces. Because tactile learners depend on finger stimulation to learn, keeping their hands and fingers involved is vital. Let him use Scrabble letter tiles for practicing phonics patterns, forming spelling words, or breaking words into syllables. Calligraphy pens and alphabet rubber stamps are unique tactile methods for learning spelling words, since the student will spend more time focusing on phonics patterns, prefixes, suffixes, and root words while diligently printing out each letter, than he would if he was merely expected to copy the words over and over with a pencil. Let him regroup toothpicks as math manipulatives to physically prove to his eyes and his brain how multi-column addition and subtraction really work. Magnetic learning manipulatives have an adhesive feel that appeals to tactile learners, as do Velcro, vinyl clings, stickers, and sandpaper. Textured papers (scrapbooking supplies) are another great motivator for tactile students and can be used in place of or to enhance plain, boring notecards, flashcards, or writing supplies. Tactile students learn best when they are allowed to experiment freely and use manipulatives themselves, not just passively observe demonstrations that are done for them. If the child has a favorite “security object,” that item can be held or kept close during lessons as tactile stimulation during periods of thought and concentration. (It’s not that the object helps the child feel secure or avert fear, as much as the child enjoys handling the object for its tactile sensations that invigorate his mind.) Construction toys of all types are beneficial for tactile learners and will feed both their need for fine motor activities and their desire for 3-dimensional learning. Tactile learners may find certain textures displeasing, just as certain sights are deemed ugly by our eyes.
If your child reminds you of Matt or Henry, try some of the following kinesthetic solutions to encourage learning in an environment that welcomes their high energy and love for action and delights their muscles with ample physical challenges. Because kinesthetic learners depend on muscle stimulation to learn, keeping their arms and legs involved is vital. Let him take a play break before starting lessons, to warm up his large muscles (which activates his brain) and tire out his body enough to enjoy sitting for a little while. Let him do worksheets or other reading or writing assignments while standing at a kitchen counter, kneeling on a chair, or kneeling or lying on his tummy on the floor. These positions allow plenty of muscle movements for balancing and reaching, which keeps the muscles active, which keeps the brain active. Incorporate sports activities into lessons: oral Q&A or quizzing math facts while playing catch, jumping rope, or running laps around the house (ask a question, run a lap while thinking, answer the question, repeat). Let him take a brain-break between or during lessons, any time he feels his attention lagging or his thoughts getting fuzzy or his legs getting restless. That break can be anything from a few laps around the yard to ten push-ups right here, right now, to grabbing his basket of clean laundry and running it upstairs to his room before dashing back – it’s just enough exercise to restore ample blood flow to the gray matter. Kinesthetic learners often enjoy role-playing and drama, since it means being in the spotlight, at the front and center of the action. If he can’t think, take him out of the chair or outdoors, and find some way to use balls of every size and anything with wheels as props or prompts for reciting facts or to help illustrate lessons. Use sports equipment as large-scale math manipulatives in the backyard, or set up a multi-station quiz course: run to the tree, circle it twice, answer a question; run to the baseball bat, balance it on your hand, answer a question; run to the basketball, make a basket, answer a question. You get the idea, and your if-I-could-only-bottle-this-energy kid will love it.
If your child reminds you of Andrew or Gloria, try some of the following auditory solutions to encourage learning in an environment that welcomes their questions and discussions and delights their ears with enchanting sounds. Because auditory learners depend on sound stimulation to learn, keeping their ears and voices involved is vital. Let him use background music (headphones at low volume) as “white noise” to block out the distracting noises of foot-shuffling, paper-crinkling, throat-clearing siblings. Give him opportunities to read aloud to himself without bothering others. Encourage him to read instructions aloud, then discuss them to be sure he knows what to do. Auditory learners have very distinct opinions, but sometimes have difficulty turning those into written sentences. Help him “talk it through” first, then either jot a few notes to aid his memory or help him remember it all long enough to get it down on paper. Expect hundreds of interruptions, questions, comments, statements, explanations, discussions, jokes, funny stories, and mouth noises from an auditory learner – every hour of the day. Expect him to hum and sing and talk to himself aloud, and if that will be distracting to others, make some provision for allowing the auditory learner to be noisy while allowing the quieter learners to think in peace. I found it very helpful to let my budding comedian get the jokes out of his system first, then proceed with the lesson. I allowed my son to make notes of any off-topic story he wanted to tell me during lessons – the notes helped him remember it later, but jotting it down got it off his mind and let him move on with his lesson. Trying to keep an auditory learner quiet when he has thoughts to share (on-topic or not) is like trying to put a lid on an active volcano. Auditory learners may find certain sounds displeasing, just as certain sights are deemed ugly by our eyes.
If your child reminds you of Rhonda or Sherry, try some of the following visual solutions to encourage learning in an environment that welcomes their intense examination and delights their eyes with intricate details. Because visual learners depend on visual stimulation to learn, keeping their eyes involved is vital. Let him have ample time to study and observe and watch a demonstration before expecting him to try it. Visual learners benefit from seeing manipulatives and demonstrations, but they are not likely to join in. Ask what parts he’d like to see done over again. And again. He’s not shy: he’s analyzing and memorizing. Go beyond the basic reading assignments with posters, diagrams, charts, and maps, giving him plenty of time to study the intricate details of each. Show him how to use color-coordinated notecards, file folders, and highlighters to organize subjects, thoughts, and ideas. Making notes, highlighting them in specific colors, and re-copying and re-highlighting those notes helps the visual learner remember – and the colors are as important to the memory as the words are. Help your visual learner avoid falling into the perfectionism trap by comparing everyday play clothes and special-occasion nice clothes to everyday handwriting and special occasion handwriting: Mom’s grocery list is written much differently from Grandma’s birthday card, so please don’t encourage him to believe that every single word on every single worksheet should be written in perfect script. It can be helpful for the visual learner to look for imperfections in other areas of life, to help him understand that life is neither perfect nor ideal: typos and grammatical errors can be found in professionally published books, and artists simplify their paintings’ subject matter (paintings are not photographs, after all).
Combining Learning Style Methods for a Well-Rounded Experience
I mentioned earlier that focusing on a single learning style is undesirable, because it leaves the student at a disadvantage in many learning situations. Remember all the students in our classroom experiment who ended up holding multiple cards, representing multiple learning style groups? Those students have already recognized that they have some learning abilities in styles other than their predominant learning style. Whether we recognize it or not (like the children who were holding only one card), most of us do have skills to varying degrees in each learning style, but if the weaker skills can be strengthened, we could be adept at learning in any situation. That’s a very worthy goal, right?
As teaching parents, we can use the predominant learning style to grab and hold a student’s attention, then add subtle experiences with the other styles to expand and broaden learning abilities. This can be done as simply as letting the student read the instructions for a lesson by himself aloud, combining the visual experience of reading with the auditory experience of hearing the words from his own voice. A brief discussion of the lesson takes the auditory experience even further. Then some hands-on and moving-around activities can supplement the lesson to add experiences in tactile and kinesthetic learning. Students benefit from being allowed some time for free-play and unplanned experimentation with tactile learning aids, so don’t rush to put everything away as soon as the lesson is over.
Let’s suppose that our lesson is in geography, and we’re studying the state of Iowa. We’ve read the instructions to locate Iowa on a map of the United States. We’ve discussed what that means, and our student understands what he is expected to do. However, Frankie doesn’t live anywhere near Iowa and isn’t familiar with all of the states yet, so there is a bit of a challenge for him. And he’s starting to wiggle in his seat. Let’s have Frankie run upstairs to the game closet and bring back the USA jigsaw puzzle, then he can help move these chairs to make some room on the floor. (Now he’s re-energized and thinking clearly.) Frankie, you can start the puzzle by sorting through the pieces for states with names that might look or sound similar to Iowa. That’s right, Iowa, Idaho, and Ohio. (Trust me, I’m from Iowa, and there are people running around loose who think those three are all the same state. I could not make that up!) Frankie, you can set those pieces aside while you work on putting the rest of the puzzle together. (Working on the floor gives Frankie lots of reaching, stretching, and kneeling to keep his large muscles active, and fitting the puzzle pieces together gives his fingers some fine-motor involvement and connects the shapes of various states from his fingers to his eyes and his brain.) Now can you see where those three pieces you set aside will fit in? And where is Iowa? Correct! Now point to the state where you live. Correct again! Let’s count how many states are between where you live and where Iowa is. Very good! Can you go find the big atlas on the bookcase and bring it here? (More physical exercise for the energetic Frankie.) Let’s look in the atlas for a USA map, and you can try to find Iowa on that map, too. (This gives Frankie a visual workout, as he compares the map in the book to the puzzle on the floor.) Excellent! Great job today! Now I’m going to take a few minutes between subjects to start a load of laundry, while you take the puzzle apart and put it back into its box. If you’d like to play with it a little more first, that’s okay, too.
Mom scurries off to the laundry room, but takes her time coming back. She quietly peeks in on Frankie to see that he has taken the puzzle apart and is putting it back together again. Mom pours herself another cup of coffee, knowing that Frankie is not just playing, Frankie is learning numerous lessons: how puzzle pieces fit together very intricately, what shapes the various states are, which states are located next to each other, how the Eastern states are generally smaller in size than the Western states, and so on. Now Frankie is grouping the states by shapes: which ones are odd-looking rectangles, which ones are sort of triangular, which ones are rough combinations of wobbly rectangles and triangles, and an “Other” category for states that make no geometric sense whatsoever. As Frankie sees Mom peek in once more, he regales her with the extensive details of all the things he has discovered while playing with this puzzle. (To him, it’s no longer tedious learning; it has become discovery.) Mom can ask a few leading questions to show her interest and keep Frankie sharing: “Tell me more, Frankie. This is great!” Some puzzles have little pictures on each state, signifying the various products produced by those states, which can lead to more comparisons or more sorting (every piece in this pile has an ear of corn on it; now change the pile to match one of the other pictures on the Iowa piece). Sort the states by name and line them up in alphabetical order; if the state capitals are listed, the states could be re-sorted into the alphabetical order of the capitals’ names. States can be lined up in order of size, or (with a little research) by the year they attained statehood, or (more research) alphabetically by state nicknames. Are you beginning to see the possibilities for strengthening learning styles that have come from one formerly boring lesson? Every learning style has been used, our student has learned immeasurable lessons in just a few minutes’ time, and his ability to learn in his weaker styles has already begun to improve. His fingers were satisfied with manipulating the puzzle pieces over and over again; his large muscles were kept active with all the movements across the floor and around the room; he was able to talk about his various projects and share what he learned; and his eyes ranged from the small details of tiny pictures and letters to seeing the overall puzzle as a whole. Frankie was captivated by being allowed to play during school today (try not to spoil it, Mom), and the mundane puzzle has morphed into an amazing learning tool.
Anyone can conduct a study and skew the outcome to support their desired agenda, but that doesn’t mean the results are accurate. Compare what you’ve read here today about learning styles to how your children act and learn, then judge for yourself. Experiment with some of these suggested techniques the next time your student gets stuck on a lesson, and see if changing the presentation helps to dislodge the educational roadblock. Crossing the learning style boundaries will hone the skills in every style and result in a student who can fit his methods of learning to the circumstances.
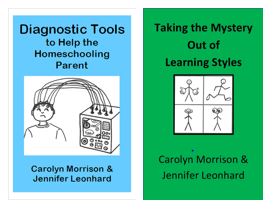
Obviously, the writers of this blog believe that homeschooling is the ideal environment for children who need understanding of their learning needs more than they need labels, but perhaps some of these tips can help you where you are right now. If this article has piqued your interest, our books offer even more on learning styles from the Guilt-Free Homeschooling perspective. They include simple, low cost/no cost, learning style teaching methods that often use items and materials you may already own. For much more insight into learning for all students, for all subjects, and for all ages, check out our books:
Diagnostic Tools to Help the Homeschooling Parent, and
Taking the Mystery Out of Learning Styles
Many more GFHS blog articles expand on the various learning styles and offer ideas in numerous subject areas. The tips, techniques, and ideas in our articles are not limited just to homeschooling – they work for helping your child understand his homework, too!
Applying Learning Styles with Skip-Counting
My “Rule of 3”
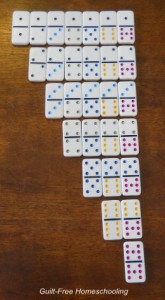
Texture Dominoes
Sugar Cube Math, Part 2
Dominoes Make Great Tactile “Flashcards”
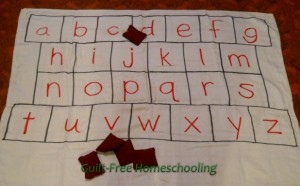
ABC Flashcards
Beanbags (No-Sew DIY)
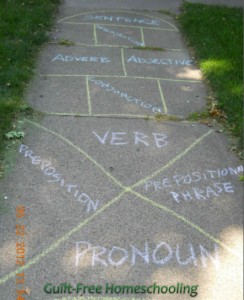
Hopscotch – A Powerful Learning Game
Jumpropes
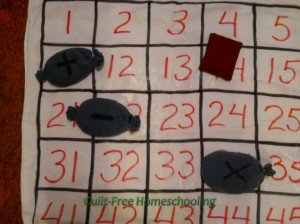
100-Grids & Flashcard Bingo
“Mystery Boxes” and the Scientific Method
Color-Coding as a Learning Tool
Untangling the Math Pages (with colored pencils)
“Stealth Learning” Through Free Play
“Tactile Learning” topic
“Kinesthetic Learning” topic
“Auditory Learning” topic
“Visual Learning” topic
“Learning Styles” topic
“Activity Ideas” topic
“Workshop Wednesday” topic


 Guilt-Free Homeschooling is the creation of Carolyn Morrison and her daughter, Jennifer Leonhard. After serious disappointments with public school, Carolyn spent the next 11 years homeschooling her two children, from elementary to high school graduation and college admission. Refusing to force new homeschooling families to re-invent the wheel, Carolyn and Jennifer now share their encouragement, support, tips, and tricks, filling their blog with "all the answers we were looking for as a new-to-homeschooling family" and making this website a valuable resource for parents, not just a daily journal. Guilt-Free Homeschooling -- Equipping Parents for Homeschooling Success!

Recent Comments