Magnets are a wonderful learning tool for tactile learners. There is something about that magical, magnetic connection that appeals to fingers of all ages. Fortunately, most of us have a ready supply of free advertising magnets from the pizza place, the hairdresser, the auto mechanic, the new phone directory, and every politician who marches in a summer parade. Peel your collection off the refrigerator, and let’s turn them into some great learning aids. I’ll list several possible uses and some basic how-to’s for the magnets. You’ll want to analyze what topic your students are struggling with or where they need the most help, and then focus your efforts there. Students can also help make magnetic learning aids, and helping to make them means the learning begins right away.
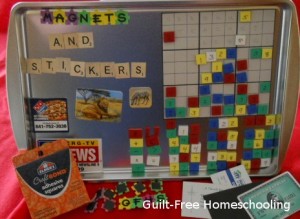
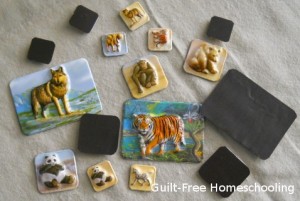
Stickers are probably the easiest things to turn into magnets, since you just have to stick them onto a magnet and cut around the stickers with scissors or a razor knife (such as an X-Acto). I have used scrapbooking stickers that looked like Scrabble letter tiles, foam letter stickers that were shaped like small jigsaw puzzle pieces, and 3-dimensional plastic stickers with raised animal shapes. The puzzle piece stickers were slightly tricky because of their irregular shapes, but I cut the magnets into squares small enough to fit in the center of each sticker, and then (after attaching the magnets) dusted the surrounding sticky edges with baby powder, using a dry artist’s paintbrush. It took two rounds of dusting powder to get the foam pieces to stop sticking to each other, but I’ve had no problems with them since then. With regularly shaped stickers, it is fairly simple to line them up next to each other (as many as will fit on the magnet), press them down securely, and then cut them apart. If your stickers have rounded corners, cut them apart as squares first, then round off each corner with scissors. There may be a strip of magnet left at the side that is too narrow to hold more stickers, but hang onto that piece—you’ll cut it up and use it later.
Once upon a time, my kids had some puffy stickers that they wanted to be able to save and reuse. Magnets to the rescue! I covered the backs of the stickers with adhesive plastic, then attached a magnet to each one. Those cartoon character magnets became a great quiet toy for imaginative play.
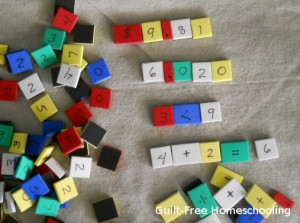
Craft foam sheets allow you to make your choice of subject matter by writing on the foam with a permanent marker, such as a Sharpie. (Some foam sheets can even be purchased with a magnetic backing already attached!) I had some magnetic strips that were adhesive on one side (leftovers from a weather-stripping project), so I cut squares of craft foam the same width as the magnetic strip, stuck them on, and cut the magnetic strip between the squares. Adding numbers to each square produced magnetic manipulatives for math! I drew arithmetic operation symbols on a few more squares to complete the set.
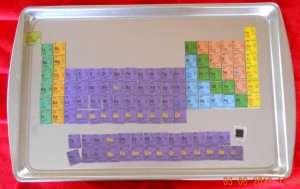
Laminated placemats have been featured in a previous Workshop Wednesday article, but I will mention them again here for good measure. That example showed a periodic table of elements placemat that I turned into magnets, but any subject matter will do. If a placemat doesn’t lend itself to a building block format (such as the periodic table) or a map (USA, etc.), perhaps you can cut it into a simple jigsaw-style puzzle to entice your kids to play with the magnetic pieces and learn the information.
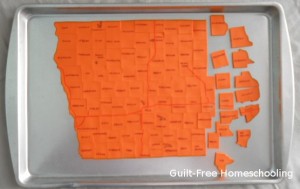
I have also used the plain (back) side of a thick foam-like vinyl placemat by cutting it into the desired shapes and attaching a small piece of leftover magnet to the back of each piece (formerly the front of the placemat). Adhesive squares made for scrapbooking, card making, and other popular paper crafts work great for attaching magnets (without the mess and hazards of hot glue guns). These vinyl-foam placemats are a bit heavier than craft foam and are made of a material that is not subject to the static electricity that can leave you covered in bits of craft foam for the rest of the day. Yes, that is a magnetic map of Iowa’s 99 counties, made from the backside of an orange jack-o-lantern placemat, but please don’t feel you have to try something quite so ambitious as your first project (that thing was tricky!).
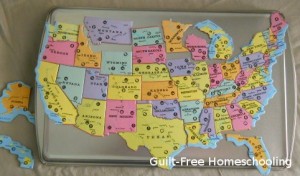
A USA jigsaw puzzle (cut on state borders) received new life as a magnetic puzzle with the addition of a magnet square to the back of each puzzle piece.
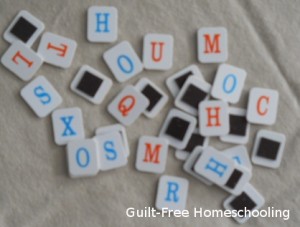
Letter game tiles were repurposed with the addition of a magnet on the back of each tile.
Sandpaper cut into small squares can be glued to cardstock for added strength and then attached to a magnet. Grab your Sharpie marker again and write or draw letters, numbers, symbols, etc. for magnetic manipulatives with a bonus tactile texture. I made some in 1” squares, but don’t let that limit your imagination!
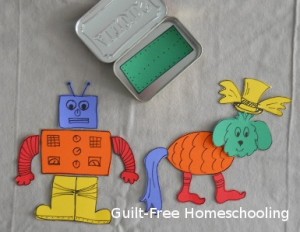
Funny facial features (eyes, eyebrows, noses, mouths, mustaches, ears, etc.) drawn on cardstock and attached to magnets become a fun game for preschoolers (I saw that idea on Pinterest, but I don’t know who originated it; someone deserves the credit!). Now what if you used the same principle for body parts and made interchangeable heads, bodies, legs, feet, arms, and tails for a magnetic build-a-monster activity? Build-a-bug, build-a-robot, build-a-car, build-an-animal, build-an-alien—the possibilities are endless! Your older students may have fun creating these magnets for their younger siblings, and they’ll learn some great problem-solving skills in the process. I wonder if we can make these small enough to fit in this empty Altoids tin? Hmmm… then Mom could keep it in her purse for Timmy to play with in church or while waiting in a restaurant!
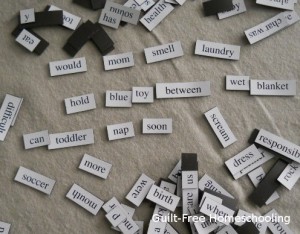
So let’s review: we’ve discussed making magnets for letters to use for phonics and spelling practice, numbers and operation symbols for math, chemical elements for science, and states for geography. Need more ideas? How about geometric shapes, colors, incrementally-scaled pieces for number value (make them match the size of other math blocks you may own), fraction pieces, or pattern blocks. Have a struggling reader? Use the “magnetic poetry” type of word magnets (purchased or home-made) to focus on reading one word at a time, then adding them together to build a sentence. Have a struggling writer? Those same magnetic words can help him write sentences, stories, or poetry, since it can be much easier to rearrange someone else’s words than it is to think up new words from your own head. Pick up a small, inexpensive, cardboard skeleton party decoration, cut it apart into individual bones or groups of bones (such as the rib cage, hands, feet, etc.), attach some magnets, and you have an anatomy learning aid. Plastic or cardboard coins can become magnetic money manipulatives (say that three times really quickly).
When you have accumulated a large supply of educational magnets, the traffic in front of your refrigerator may get overly congested. Solution: steel cookie sheets or steel pizza pans are lap-sized and much more portable than the refrigerator door. If you need to shop for steel pans, you may want to take along a small magnet in your pocket for testing purposes. (That nosy store clerk will leave you alone when you explain that you’re obviously shopping in the kitchen section for educational materials.)
Now before I forget, there is one other accessory that makes magnetic learning aids even more beneficial: paper. I drew a Sudoku grid large enough to hold our number magnets and placed it on the cookie sheet, using the magnets to hold it in place. Ta-da, magnetic Sudoku can take the visual puzzles from a book or newspaper and turn them into a tactile masterpiece. A worksheet with fill-in-the-blank problems could hold magnets on those blanks instead of written answers. Your kids might choose to color an underwater background picture to place behind their letter magnets, just because they are learning to spell the names of ocean creatures.
Learning isn’t limited to books, life doesn’t happen between the pages of a workbook, and we learn what we enjoy. Magnets get fingers involved, and fingers love to learn! So what are you waiting for???
See also:
What Is the Missing Element?
Placemats + Magnets = Educational FUN!

 Guilt-Free Homeschooling is the creation of Carolyn Morrison and her daughter, Jennifer Leonhard. After serious disappointments with public school, Carolyn spent the next 11 years homeschooling her two children, from elementary to high school graduation and college admission. Refusing to force new homeschooling families to re-invent the wheel, Carolyn and Jennifer now share their encouragement, support, tips, and tricks, filling their blog with "all the answers we were looking for as a new-to-homeschooling family" and making this website a valuable resource for parents, not just a daily journal. Guilt-Free Homeschooling -- Equipping Parents for Homeschooling Success!

Hello. It’s nice to meet you I am a homeschooling mom currently teaching high school, 6th grade and my ungraded special needs 13 yr old. I love your ideas! i will be sure to stop by often!
A large metal drip pan (the kind used to protect driveways from car oil drips) works well. It is found in the automotive section.