Have you ever wished you had a pocket chart for use with your homeschool lessons? Letting kids insert flashcards into a pocket chart or rearrange them to suit the lesson concept can provide a tactile element to phonics, reading, spelling, math, geography, etc. If your cards are large enough (3×5″) or if the chart is on the wall or across the room, it can become a kinesthetic method, too. Sometimes you may have just a few uses for a pocket chart in your schooling, but not quite enough to justify investing your hard-earned funds in the fancy teacher-supply-store versions. Try these suggestions for making your own pocket charts.
Secure any of the following to a bulletin board or large sheet of poster board:
Paper envelopes (recycle some junk mail!); the front of the envelope (the side where the address would be written) will be attached to the poster board, so trim the back of the envelope (which will be the front of your pocket) to about 1″ high or enough to allow a card to rest inside but still show the information (I trimmed off the flap, too)
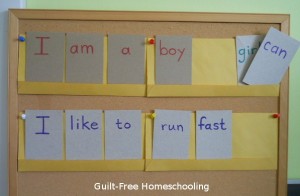
Photo album pages; these come in several sizes that can be carefully cut apart & taped down to poster board as needed (Consider the variety of special album pages made for film slides, baseball cards, etc.) I turned a trading card page sideways and used a razor knife to slit a side of each pocket open (to become the new top edge) and trimmed it lower (with scissors) for easy insertion of cards, then used clear tape to secure the former open/top edge (now a side).
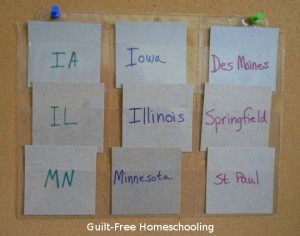
Plastic page protectors for 8 1/2x 11″ sheets of paper; can be cut down as needed
Clear Contact paper; stick to itself (sticky sides together) to make pockets larger or longer than album pages or page protectors
Clear vinyl zippered bags from sheets, blankets, or pillows; cut them up or use “as is” for jumbo pockets to hold large cards (imagine the possibilities: label the bags with parts of speech & toss a bean bag into the correct one when Mom calls out a word — oh, but we were supposed to be talking about pocket charts here)
Vinyl upholstery fabric can be taped, sewn, or stapled together (if not transparent, cut the front of the pockets low enough that the cards’ information can be seen easily, but the cards will still stay upright in the pocket)
If you don’t have a large bulletin board, you can use brass paper fasteners to secure the pockets to poster board or cardboard, or punch holes with a large yarn needle or awl and sew the pockets to the backing cardboard with yarn or string. Clear packing tape (2″ wide) can also be strong enough to hold the charts to poster board, but is not as easy to remove.
How to use–
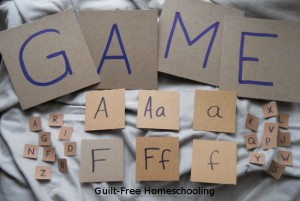
- Letter matching: upper/lower case
- Letters forming words (use game tiles!)
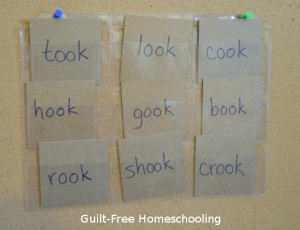
- Reading practice with phonics patterns or rhyming words
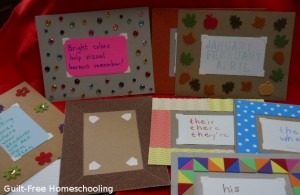
- Reading practice with words forming sentences (see photo above)
- Spelling practice (game tiles again!)
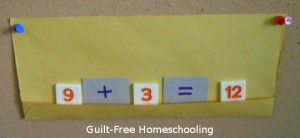
- Math problems: Insert some numbers and operation symbols, and let the student complete the problem, or let students try to build their own problems correctly.
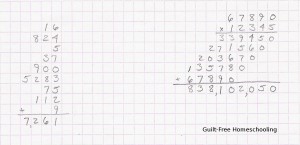
- Illustrate place value, borrowing, and carrying (regrouping) for understanding. The physical act of changing ten ones into a ten and moving it from the ones’ column to the tens’ column is a very powerful transformation in a young mathematician’s mind!
- Chore chart
- Calendar
- Matching states, capitals, & postal abbreviations (see photo above)
- Match vocabulary words with definitions
BONUS TIP:
Once you have made a few dozen word cards, a handy way to store them is in an index card file box. Add a set of ABC divider cards and teach your student how to sort the word cards alphabetically. Your student can even become the Official Keeper of the Word Cards, so he can pull out only the cards needed for each lesson, and then put them away again for next time. He’ll get the bonus activity of learning and practicing alphabetizing, and he’ll never realize that this fun activity is a great lesson in itself!





 Guilt-Free Homeschooling is the creation of Carolyn Morrison and her daughter, Jennifer Leonhard. After serious disappointments with public school, Carolyn spent the next 11 years homeschooling her two children, from elementary to high school graduation and college admission. Refusing to force new homeschooling families to re-invent the wheel, Carolyn and Jennifer now share their encouragement, support, tips, and tricks, filling their blog with "all the answers we were looking for as a new-to-homeschooling family" and making this website a valuable resource for parents, not just a daily journal. Guilt-Free Homeschooling -- Equipping Parents for Homeschooling Success!

Recent Comments