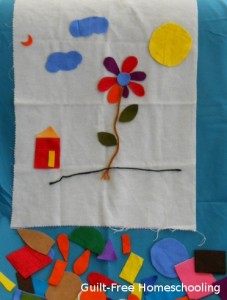
Felt Shapes

Do you need a new idea for keeping the kiddies occupied indoors when it’s too hot to play outside? Are you looking for a “down time” activity? Have you had it with the constant noise of TV and kids and more TV? Here is something that will occupy their minds as well as their hands, stir their imaginations, and give your ears a few moments of blissful solace: a box of felt pieces.

This was a favorite activity for my tactile child. It makes a great “lap toy” for quiet time. I started with some leftover pieces of craft felt, cutting them into geometric shapes and random shapes. A piece of flannel fabric (approx. 18″ x 24″) served as a background and could be spread over a sofa cushion, the carpeted floor, or a bed pillow, then folded up easily to fit into the storage box when playtime was done. [Hint: cut up an old flannel shirt, nightgown, or pillow case.] I used felt in bright colors, pastels, neutral colors, and black and white for squares, rectangles, triangles, circles, and ovals in a wide range of sizes. [Note: thin sheets of craft foam can be used, but the foam pieces tend to jump or cling from static electricity, and they lack the softer flexibility of the felt cloth.] The child makes “pictures” and patterns with the felt shapes on the flannel, stacking or layering pieces as desired. Smoothing the pieces in place provides an important tactile connection for a touch-feely child.

It works best to keep the smallest pieces larger than a coin — anything smaller will be difficult to cut. The largest pieces do not need to be bigger than your hand, since larger pieces will be more difficult to store flat. (An older child may enjoy cutting the pieces for younger siblings to play with, but remember the size limitations.) If you are feeling especially creative, add some half-circles, crescents, teardrop/petal shapes, stylized leaf shapes, and a few 4″-10″ strands of yarn (useful for flower stems, kite strings, and other necessary lines). Pinking shears can add variety to some pieces, but will be difficult to use on smaller pieces; the shears must also be quite sharp to produce a good zigzag edge. (Optional: applying iron-on interfacing will stiffen the felt, making cutting easier and the pieces more durable.)

Remember that this project will be a plaything, so your shapes do not have to be exactly measured or accurately cut. Keep it simple: free-hand cutting is adequate. Circles do not have to be perfectly round, and squares, rectangles, and triangles do not need perfectly straight sides or precise corners. Your child’s imagination will be broadened through playing with the felt shapes, and imagination is a great substitute for precision.

Quick trick for cutting triangles: cut squares or rectangles in two diagonally.
Quick trick for cutting petal shapes: cut a rectangle in two diagonally, making two long triangles, and round off the short end opposite the long pointy tip, producing the stylized silhouette of a single-scoop ice cream cone.
Quick trick for cutting leaves: round opposite corners of a square or rectangle, leaving the uncut corners as the pointy ends of the leaf.

Don’t feel that you need to make shapes that look like real objects. Your child’s imagination will take over, transforming those simple rectangles, circles, and triangles into wonderful things. A child who has always relied on printed coloring pages for “art class” may need some time and a little help to activate his imagination, stop depending on literal representations, and begin developing creative thinking skills.

Store the pieces as flat as possible in a box large enough to make clean-up easy for the child, and a container with a tight-fitting or locking lid will prevent accidental spillage. Any pieces that are wrinkled or folded when put away will be wrinkled and folded at the next playtime, so try to smooth each piece out as flat as possible. (The tactile child will actually enjoy this step.) Badly wrinkled pieces can easily be ironed flat again.

A solid felt board or “flannel-graph” can be made by covering heavy cardboard or a bulletin board with a large piece of felt or flannel fabric. The board requires more storage space than just a loose piece of cloth, but the board can be useful for illustrating lesson concepts to more than one child at a time by propping it up where all can see it at once. A small strip of felt on the back of paper pictures will make them cling to the fuzzy board — the entire back surface of the picture does not need to be covered. Sandpaper can also be used as a backing by cutting thin strips of fine sandpaper (1/2″ wide by 1″ or 2″ long) and gluing the strips to the backs of cardstock pictures or word/number cards. Large cards may need wider or larger pieces of rougher sandpaper to help support their weight. All sorts of visual aids for lessons can be used with flannel boards. Christian bookstores usually carry Sunday School lesson materials for felt boards, including great pictures of Bible heroes or generic pictures of children and families.

Ideas for Lessons:
Sorting — Can you sort pieces by color? By shape? By size?
Counting — How many of each color/shape/size?
Matching — Can you find a piece that is the same color/shape/size as this one?
Patterns — Circle, circle, square… can you make a pattern that matches this one?
Sequencing — Red, red, blue, red, red… what comes next?
Explaining Processes (using flannel-graph letters or cards)– To make the word kitty work for two kitties, we change this y to an i and add es.
Phonics & SpellingC-a-t, b-a-t, r-a-t… can you make more words that end with -at?
Reading — Put these word cards together to make a sentence.
Fractions — Is this rectangle divided into halves or fourths? (Use several squares in the same size to form rectangles.)
Arithmetic — How many ways can you group these pieces? (Use matching sizes & shapes to teach addition, subtraction, multiplication, division, perimeter, and area. Ratios and percentages can be illustrated with a mix of colors, sizes, or shapes: 3 red squares and 1 blue square = 3/4 red and 1/4 blue, or 75% red and 25% blue.)

Felt shapes and felt-backed pictures can be used for just about anything you can think of. Let your creativity take over as you adapt the felt pieces and pictures to whatever lesson you are working on, and watch more applications come to mind the longer you use them. Whether you use this as an educational tool or a quiet-time toy, the learning possibilities will be unlimited!
Math Awareness: Tactile Counting

An interesting idea occurred to me when we were driving home late a few nights ago. My throat was dry, so I pulled a box of Tic-Tacs out of my purse, shook some pieces into my hand (without turning on a light), and popped them into my mouth. As I rolled the candies around with my tongue, I began trying to count them to see just how many there were. The box that usually releases only one or two pieces with a good shake had instead given me a mouthful in the dark. One, two. One, two, three, four. No. One, two, three… One… two… three… four… FIVE? Yes, Five. A number that would have been very simple to identify with my eyes in a lighted situation was suddenly very difficult to count with just my tongue!

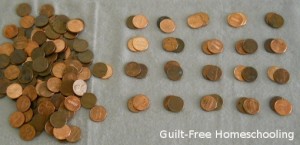
That experience set my mind to working overtime. How simple is it to count objects that I can see? How much more difficult is it to count objects that I can NOT see? The whole idea of blind counting made me consider the possibilities of math as a tactile experience. I have often carried coins in my jeans pocket and had to pull out a handful and look at them to select just one or two. If I was more adept at tactile identification, perhaps I could pull out only the coins I needed!

So here is my challenge for the day: experiment with tactile counting. I recommend trying it with fingers first, not letting your young children pop random objects into their mouths — although that can be an interesting lesson for more advanced students (who are less likely to swallow). Expanding the awareness of number values to tactile skills and not just visual skills will allow the student to count quickly and easily by touch, even when seeing the objects in question is difficult or impossible.

I tested my own tactile counting skills by spreading a towel on the table, folded in half, with the fold farthest away from me. Then I closed my eyes and grabbed a large handful of goodies from my Activity Jar and inserted the objects between the layers of the towel. (The towel kept balls, marbles, and other small, round objects from rolling away.) Carefully keeping the upper layer of the towel in place to conceal the objects, I slipped my hands underneath it and began feeling the hidden treasures. To my surprise, there were a lot of things inside my towel — many more objects than I expected to find.

I eventually pulled one hand out and began writing notes of what I had found, so I could record how many buttons and how many game tokens were included in this cache. I wrote down each basic category of items and used tally marks for the duplicates. When I was satisfied that I had sorted and counted everything successfully, I opened up the towel to check my accuracy. Oops. Close, but not perfect! I had miscounted the buttons: 14, instead of 15; but I had correctly identified five different types of game tokens: large, small, ridged, smooth, and cardboard (not plastic like the others). I had also correctly identified a coin as feeling different from the plastic game chips and accurately concluded (by touch only) that the coin was a penny, not a nickel or dime.

This was such a fascinating challenge that I repeated it several more times! Once, I purposely sorted out a large group of flat game tokens from my Activity Jar, some smooth and some with ridged edges. Placing those inside the towel, I attempted to sort them into two piles and count how many were in each pile. I accurately counted the ridged tokens, but I was off by two when I counted the smooth chips. My conclusion was that the thin, smooth chips could slip out of my hands unnoticed much more easily than the ridged chips could.

How about some other variations of this tactile math challenge?

  • Blindfolded; count objects with your fingers
  • Blindfolded; feel and count objects in a box on the floor with your toes
  • Use several sizes of the same shape, such as a variety of coins
  • Use a variety of shapes and sizes of different objects, such as buttons
  • Count behind your back, feeling objects placed into your hands by a helper
  • Feel objects placed inside a sack, box, or pillowcase (so you can’t see them)
  • For older or advanced students: tiny, hard candies in the mouth to count with the tongue. Tic-Tacs work well, since they are quite small and don’t melt quickly.

The variations using toes or tongue develop tactile skills beyond the usual finger skills. Even a student who can quickly count or identify with finger-touches will find it a challenge to repeat the assignment with toes. I suggest starting with fewer than ten objects for toe-counting and using 3-dimensional objects, not flat items like coins.

For tongue-counting, be sure the student is not likely to choke or swallow the candies, and start with fewer than five small pieces. Keeping the head tilted forward can also prevent accidentally swallowing the candies. I cannot recommend putting non-edible objects in the mouth, nor do I suggest using anything larger than a plain M&M candy. Hard candies work better for this experiment than do soft, chewable candies. Tic-Tac candies are ideal: small and solid.

One more variation would be to turn this into an auditory activity by counting sounds. Conceal your hands behind a large book or similar partition and tap quickly several times, while your student attempts to count how many taps he hears. A more complex version would involve listening to music and counting notes, beats, or instruments heard. Take this activity outdoors and listen for vehicles, horns, or bird songs.

Math is primarily a visual task, but stretching our abilities and learning to sort and count with our other senses will bring the benefits of increased skills and a related increase in thinking power. And just imagine the fun of impressing your friends with your ability to count the change in your pocket without looking!

The Activity Jar

**UPDATED** — See the photo link at the bottom of this article.

Homeschooling parents often lament that they lack the educational gadgets and fancy learning aids that students can benefit from in “real” school classrooms. The Activity Jar is a wonderful store of math manipulatives and assorted learning aids that you can assemble yourself from no-cost items readily available in your home. Gathering the items and filling the jar is as much fun as dumping the contents out again and playing with them.

How to Assemble an Activity Jar–
Begin with one rather large, wide-mouthed container, such as a gallon jar (unbreakable plastic, if possible). Use a small storage tub or cardboard box if you wish, but a secure lid is a must and see-through sides are a bonus. Now set out on a scavenger hunt through your home and garage, poking through the “junk” drawers and all of those little nooks and crannies that tend to collect odds and ends. Pick up those interesting bits of stuff and place them into your jar. Continue this process until you have unearthed all possible objects or until your container is approximately 75% full. Do not give in to the impulse to fill your container brim-full, or you will seriously impede the clean-up phase of using the Activity Jar. Close the lid and set the container aside for a rainy day or any other time when your children want something to do or need practice in sorting, categorizing, or math in general. Bear in mind that the jar will be shaken and rattled around often, so you may need to remove any objects from the jar that become broken with use and replace them with more objects as you find them to keep the Activity Jar’s contents new and interesting.

Be creative with what you select, thinking “outside the box” and including items from all areas of your home, not exclusively small toys. Do include tiny toys, coins, buttons, paper clips, nuts and bolts, and any other fascinating flotsam and jetsam. This is a great opportunity to recycle the remnants from incomplete, broken, or discarded board games. Be careful to select only larger pieces if toddlers may be at risk for swallowing the objects.

How to Use the Activity Jar–
Pour the contents into a large cake pan, unless your children can easily reach into the container to remove the items. Caution: unless your children are already skilled in sharing and showing patience, you will want to limit the Activity Jar to one student at a time. The discovery process can foster territorial feelings and selfishness, especially if two students are attempting to divide the contents without supervision or guidance. Encouraging your students to work together as a team toward a common goal can help them to overcome competition and rivalry.

Allow a student to begin with periods of free play with the objects, and watch him begin sorting without being prompted. When the student has exhausted his own ideas, challenge him to begin sorting the contents into 3 basic categories: Category A (such as round), Category B (such as not round), and Category C (for Other, or I’m not sure what to call this one, because one side of it is A and the other side is B). Other possible basic categories (for A & B) are flat objects and fat objects, single-colored objects and multi-colored objects, buttons and not buttons. Category C is always useful for speeding up the process, since there will usually be something that does not fall easily into the two main categories. Use more cake pans, cookie sheets, shoe boxes, freezer containers, bowls, muffin pans, egg cartons, paper cups, or any containers that will make the sorting process simple and easy.

Once Categories A and B have been sorted out, choose one of them and set the other objects aside for now. Further divide this selection of objects into more specific categories. Sort single-colored objects into individual color families; sort round or flat objects into disk-shaped objects and non-disk shapes; or sort the objects into general size categories of small, medium, and large before measuring them for more accurate classifications. Again, it may help your child to have an “Other” category for things that are difficult to categorize into his chosen groupings.

Preschoolers can enjoy digging through the contents of an Activity Jar (filled with toddler-safe objects) while Mom is helping their older siblings with lessons. Provide them with several empty plastic bowls or freezer containers, and they will have fun sorting and moving objects from here to there and back again.

How to Learn from the Activity Jar–

Sorting and categorizing are the most basic skills that can be learned. Since the jar contains a variety of objects, the student must make decisions for which category applies to each object. Begin with very basic categories (as described above) and proceed to more complicated descriptions later, as the student’s abilities advance. The more the student sorts and categorizes, the finer the details become that can be used for sorting as categories are divided and sub-divided into smaller and smaller groupings.

Even the youngest student can perform simple sorting tasks. Vocabulary and recognition skills are increased as preschoolers practice sorting to learn shapes: Let’s find all of the round things. Color names can be even easier to demonstrate with the jar’s goodies: Today, let’s find all of the blue things. Now let’s make another group of things that have some blue on them.

Students quickly learn that each object can be classified in numerous ways: a single button may be round, flat, pink, have a certain number of holes through its middle, and be an object that starts with the letter “B” or a color that starts with the letter “P.” It may have a design of squares on its top, and it may be made of wood. The student will expand his abstract thinking skills as he learns to look at each object in numerous ways and learns to see all of the various attributes of any given item. Sorting these same objects over and over (by colors, by shapes, by materials, etc.) will illustrate to your child how common objects can be anything but common.

As skill levels advance, so can the sorting criteria, as well as the mathematical applications. Students of all ages will benefit from practice in sorting and counting, resorting and recounting, but other skills can be improved as well: comparing, judging, and classifying; the basic arithmetic of adding, subtracting, multiplying, and dividing; illustrating fractions and percentages; taking measurements; and on and on.

Once your student has divided and sub-divided objects into satisfactory groupings, challenge him to count the total number of objects and count the number of objects in each sub-group. A student who can perform long division can calculate each smaller group as a percentage of the larger group. If the concept of percent is difficult for the student to grasp, try the exercise again, but this time limit the large group to exactly 100 objects, then repeat the sorting, counting, and arithmetic portions. After the student understands percentages of 100, he can try again with a different (larger or smaller) number of objects as the larger grouping. Fractions can also be illustrated with sub-groups: one student has sorted out 12 game tokens, 6 of which are red; therefore, one-half of the tokens are red. Notice that 2 of those red tokens have a pattern of ridges on them, representing one-third of the red tokens and one-sixth of the larger group of 12 tokens.

Algebra uses the concept of sorting with polynomials. An algebraic expression may contain many objects to sort and categorize, but instead of being red buttons and blue buttons, pennies and nickels, and yellow and white game tokens, they look like X and 2X, XY and 3XY, and 4Y and 2Y. A student who understands that buttons are buttons and that coins are not buttons can also understand that X and 2X are both X-objects, and that neither of them are XY-objects or Y-objects. That is the basis of algebra: sorting and grouping similar objects, while not grouping dissimilar objects.

The skills to be gained from an Activity Jar are nearly limitless. Classification is the basis of scientific research, sorting useful facts from insignificant facts. The plant and animal kingdoms are carefully sorted and classified into similar groups. Other applications of the Activity Jar cover many academic subjects. The visually-oriented student might make graphs and charts to show how many objects were sorted into each group or compile lists of attributes (color, size, shape, material, etc.) for some items. The tactile student might experiment with stacking objects to see which types of shapes can and cannot be stacked easily. You can spur your students’ creativity by them to invent a game using some of the objects. Sharpen your students’ tactile and memory skills by placing some objects inside a paper sack, then asking each student to reach into the sack and try to identify the objects by touch alone. To improve auditory skills, secretly place an object inside a box and challenge your students to listen closely as each one shakes and tips the box to see if he can determine what type of object is inside, just from the sounds it makes while sliding back and forth.

The more activities your students do with the Activity Jar, the more ideas you and your students will think of for new activities to try. Your applications for the Activity Jar will probably go far beyond the few simple projects that I have described here, making your jar one of the most valuable learning aids in your homeschool. And you thought this was just a jar full of useless junk.

Photos of my Activity Jar and some examples of sorting activities can be viewed HERE.

Applying Learning Styles with Skip-counting

I have often written about learning styles and how each person can relate to material presented in certain ways better than they can grasp the same material presented in other ways. Today’s lesson is for the parent who is saying, “Okay, I understand that this child is more auditory and that child is more visual, but what do I do with that information?” I will walk you through a basic lesson for early math, skip-counting. While giving you some tips for teaching skip-counting, I will also show you how to adapt any lesson to cover each of the various learning styles. Covering all learning styles in a lesson will enable all of your students to learn the material at the same time and give each student a more complete understanding of the material being presented.

Begin by explaining the principle of skipping to your child: walk across the room with him, then skip across the room with him to illustrate how skipping covers the same distance faster and requires fewer steps than merely walking does. Explain that skip-counting is a short-cut way to count things, by using fewer steps and skipping over certain numbers to cover the distance faster.

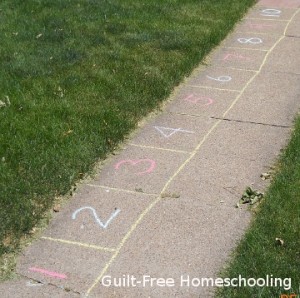
Children love kinesthetic applications, so if the weather allows, let’s take the math outside. Use sidewalk chalk to draw a long line down the sidewalk or driveway. Now mark the line off in reasonable increments (approximately the length of your child’s foot) and number each mark to create a number line so that your child can step from number to number. Drawing this as a long row of numbered boxes (instead of just a thin line) might make the concept easier for your child to understand, as it will resemble a giant game board where he can jump from box to box. Have him stand at the beginning (make a “start” or “zero” place), then have him step or jump to the “2” place, then to 4, and then to 6 to show him the concept of counting by two’s. Can he tell you where he should go next?

Once he is able to skip-count by 2’s, you can repeat the activity by having him skip-count by 4’s. If the increments become too large to step or jump to, he can run quickly across the “skipped” numbers and stop on the desired number, shouting the number loudly as he skip-counts the increments. If numbered boxes on the sidewalk do not work for your situation, try using kitchen floor tiles or stairs, or use masking tape to “mark” a line on your floor or carpeting.

Next, shift the concept from kinesthetic to tactile by drawing a series of smaller numbered boxes on paper and have him do “finger skipping” from one number to another, first by 1’s, then by 2’s. You may eventually want to let him use some game pawns, moving them from square to square while counting off the increments.

When your child understands the entire concept of skip-counting, you can pour out a large quantity of the substance of your choice onto the table (or a cookie sheet) and allow your student to start counting objects: M&M’s, oyster crackers, dry beans, buttons, Lego’s, or checkers. Count them by 1’s until he has the idea that counting them all individually will be a long process. Now have him move two at a time and try counting by 2’s. Allow him some time to practice this concept — it can be difficult to do any task until you are used to it. After he has the 2’s mastered, then you can move on to skip-counting by 4’s, 3’s, 5’s, 10’s, or any desired increment. (Counting by 4’s is an easy concept to follow counting by 2’s, since it is just a larger extension of counting by 2’s — counting just the even numbers by 2’s. I recommend doing the 4’s before the 3’s for this reason. In the same manner, follow counting by 3’s with 6’s, and follow 5’s with 10’s.)

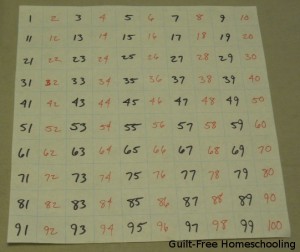
Another activity to help a student understand skip-counting by 2’s is to fill in a 100-chart with colored markers (adding a strong visual element). Draw* a chart of 10 x 10 boxes (10 rows of 10 squares each). Now alternate filling in the numbers: Mom writes an odd number in black, and the student writes an even number in red. Say each number aloud (here is the auditory part of the lesson) as you write them. Read the numbers over again when the chart is all filled in, alternating as Mom says a number she wrote and the student says a number he wrote — and suddenly the student is counting by 2’s! Then Mom can be quiet while he reads only his numbers aloud to reinforce his new skill. (Adapt this activity to other increments as needed for skill in skip-counting.) *Note: 1-inch graph paper is available at office supply stores in a poster-sized display tablet. I LOVE THIS STUFF! It is great for fast number charts — and hundreds of other homeschool uses. I rolled mine up and tied the roll securely with string for easier storage on a closet shelf.


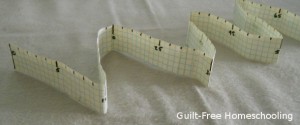
Graph paper marked with five squares per inch (also available in office supply stores) can be used to make a measuring tape for math as a good tactile and visual learning aid. Cut a few sheets into 1-inch wide strips and tape them together for the length you desire. This scale is compatible with the centimeter-scale Cuisenaire Rods: 2 graph-squares = 1 centimeter, so marking numbers on every other line produces a centimeter measuring tape. I used it to illustrate multiplication and division facts by accordion-folding the paper tape into 6 sections of 8 centimeters to show 6 x 8 = 48 and other facts, but a similar principle will work for skip-counting. Fold the tape on every other number, and then read off (auditory) the numbers at each fold for skip-counting by 2’s. Adapt and repeat for other increments.

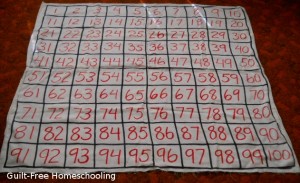
When your student has advanced to skip-counting by 10’s, draw a large 100-chart on the driveway, and your student can jump or run from box to box (kinesthetic), or have him fill in the numbers with colored chalk (tactile & visual). Do the 100-chart activity on paper with red numbers on the 10’s only (tactile & visual), but black numbers on the other squares. Then write 1-10 in a vertical column on paper, saying them aloud (auditory). Now add a zero to each number, and read aloud again to count by 10’s. Repeat, adding more zeroes, to count by 100’s, 1,000’s, 10,000’s, or as many zeroes as your child can handle.

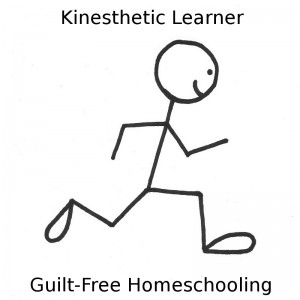
Kinesthetic teaching tactics will involve large muscle groups: moving arms from the shoulders or moving legs from the hips. Walking, hopping, running, and jumping, and throwing, catching, and reaching are excellent ways to teach a kinesthetic child. You want to have him move his entire body whenever possible. If a child is easily distracted while trying to sit still, he is probably a kinesthetic learner. If the lesson takes place while the student is seated, it is probably not a kinesthetic lesson. If you want a kinesthetic child to learn, do not try to keep his bottom stuck to a chair seat. Let him stand, let him walk around, let him throw a ball to you while reciting, if necessary, but incorporate his need for movement into your lessons. (Notice that this is not wiggling and moving around just for the sake of wiggling and moving and trying to disturb others. This is taking in information through well-coordinated muscles and reinforcing it through repeated muscular actions.)

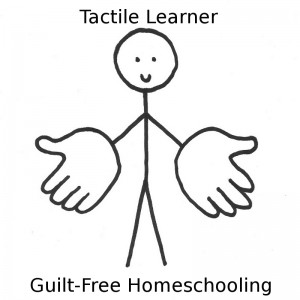
Tactile teaching tactics will involve small muscle groups: moving hands from the wrist, moving fingers, and touching, feeling, and rubbing with fingertips. Textures, from dramatic and rough to subtle and smooth, and finger and hand movements are excellent ways to teach a tactile child. You want to have him touching something related to the lesson whenever possible. If a child is easily distracted while trying to keep his hands still, he is probably a tactile learner. If the lesson takes place while the student’s hands are empty, it is probably not a tactile lesson. If you want a tactile child to learn, do not try to keep his hands empty and quiet. Let him touch things, let him make something, let him hold a toy while reciting, if necessary, but incorporate his need for touching into your lessons. (Notice that this is not touching and fiddling with things just for the sake of touching and fiddling and trying to disturb others. This is taking in information through an acute sense of touch and reinforcing it through repetitive touches.)

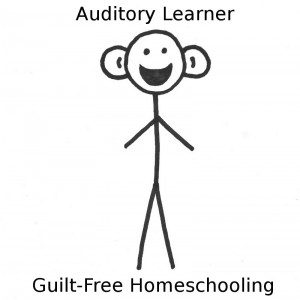
Auditory teaching tactics will involve sound: incoming sounds and outgoing sounds. Speaking, singing, and humming, and listening are all ways to teach an auditory child. You want to involve his ears and vocal chords whenever possible. If a child is easily distracted while the room is quiet, he is probably an auditory learner. If the lesson requires the student to read quietly, it is probably not an auditory lesson. If you want an auditory child to learn, do not try to keep him quiet. Let him hum, let him sing, let him read his assignments aloud, let him discuss the lessons with you, let him listen to music in the background, if necessary, but incorporate his need for vocalization into your lessons. (Notice that this is not making noise just for the sake of making noise and trying to disturb others. This is taking in information through highly sensitive ear-gates and reinforcing it through vocal repetition.)

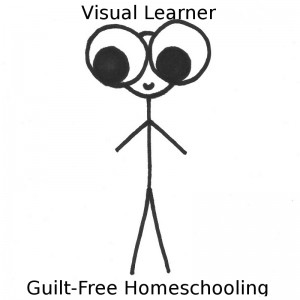
Visual teaching tactics will involve illustrations and colors: graphs, charts, and diagrams, and lots of bright, stimulating colors. Posters, maps, forms, and worksheets, and color-coding are excellent ways to teach a visual child. You want to involve his eyes whenever possible. If a child is easily distracted while listening, but is not bothered by sitting still, he is probably a visual learner. If the lesson takes place while the student has no examples to look at, it is probably not a visual lesson. If you want a visual child to learn, do not try to keep his eyes focused on you. Let him read, let him draw, let him color while you read aloud, if necessary, but incorporate his need for visual details into your lessons. (Notice that this is not looking around and daydreaming just for the sake of looking and daydreaming and trying to disturb others. This is taking in information through very observant eye-gates and reinforcing it through recalling memory-pictures.)

Any lesson can be adapted to include elements of the various learning styles. Do not be afraid to be creative in trying revolutionary approaches that seem to be unusual applications for the subject at hand. Your “crazy idea” may be the exact key that unlocks the door to learning for your students.

Goal: To Learn Equally Well in All Learning Styles!

Start with Reading, Handwriting, & Arithmetic, and Save the Rest for Later

If you are just beginning your homeschool journey with a Kindergarten student, you may be wondering how much to teach him (or her; I use “him” generically). Many Moms who are eager to homeschool are busily planning lessons far in advance for elaborate historical reenactments or highly involved scientific experiments. I have often advocated that families just beginning to homeschool their wee ones should focus on just the “Three R’s” of reading, ‘riting, and ‘rithmetic without worrying about supplemental subjects until the mid-elementary years. Incredulous teacher-moms let a gasp escape from their open mouths and ask me if I am serious. I am.

I am also assuming that you have not allowed the past five or so years to slip by in silent inactivity. I am assuming that you have read books to your child, colored pictures with your child, sung songs, made crafts, played with puzzles, gone shopping and baked cookies together, and had all manner of delightful experiences together. You have most likely already taught your child how to count to 10, print his name, tie his shoes, sing the ABC song, and identify the colors in a box of eight crayons. You taught these skills without even thinking about it being “formal education.”

Now that you are ready to tackle “school,” you may find yourself wondering if history should come in chronological or geographical order. I say wait on the history. Wait on the geography and the science, too. Wait until at least fourth grade before introducing these more complex subjects. Your child needs to have a foundation of learning skills to build his education upon. Those learning skills are what you need to teach first — now.

Reading
Teach the ABC’s, if your child does not already know them. Teach your child the sounds made by each letter, not merely the letter “names.” For example, the letter “H” makes a “hah” sound, which is not really apparent when you simply call it by its name. Once your student knows the basic sounds made by each letter, he can understand how to string those sounds together to form simple words. Phonics lessons (free, downloadable lessons are linked here) can help you start with a simple order and progress in a manner that is not confusing to your child. Small, short-vowel words are the typical starting point, since they have no silent letters or other complicated rules. After your child has begun to read simple, short-vowel words, he will be able to comprehend the complexities of silent letters, consonant blends, and diphthongs (the new sounds made by combining consonants, such as “th” and “sh”).

Do not over-simplify learning to read (from your child’s perspective, it is difficult), and do not become frustrated if your child does not catch on immediately. You have probably been reading for at least fifteen years, so you have likely forgotten what a stressful experience it can be if rushed. Take it slowly, allowing plenty of time for your student to grasp each step, and encourage him for each accomplishment. The confidence you instill at this stage will serve your child well as he tries to read each new word, page, chapter, and book. Readers are made, not born. A child who becomes discouraged while learning to read is not likely to become a bookworm. A few children are eager to learn to read at four years of age, but also a few children (most often boys) may have difficulty grasping the concepts until age seven, eight, or nine. If your child does not respond well, put the lessons aside and wait a couple of days, a couple of weeks, or a couple of months, then try again. When you teach at a pace which allows the student to fully understand each component before moving on, the student who is ready to learn will show quick results. (Remind yourself that one of the reasons why you chose to homeschool was this exact one of working at your student’s pace, not forcing your student to comply with a scheduled academic calendar.)

Once your child begins reading, continue to expand his reading ability through advanced phonics studies and vocabulary-building exercises. This is a good time to introduce the dictionary for any unfamiliar words he finds in his reading material. I preferred to teach this by example, looking up a word with my students at my side, showing them the entry, and briefly explaining it. After a few repeats of that, I switched to asking them to get the dictionary for me, and before long, they were flipping through its pages, racing to be the first to find the word. Handling the large dictionary was a privilege that instilled in my students a fondness and longing for the secrets of knowledge it held. I did not want them to view “look it up” as a punishment, so I made sure they saw me using the dictionary often for personal reference. (I also kept the dictionary on a bookshelf in the kitchen, since that was where we usually were when a question arose, and it helped to remove the stigma that can accompany large, imposing reference books.)

Encourage your young reader to explore a variety of subjects through reading and let trips to the library become adventures in exploration, but hold off on the formal lessons in other areas until he has a firm grasp on the basics of reading, handwriting, and arithmetic, usually around fourth grade. Allowing your student to read as much as he wants on a subject will only whet his appetite for more information, providing you with an eager student who is already learning how to teach himself.

Handwriting
Along with visual recognition of letters comes the child’s natural attempts to reproduce them, but do not expect shaky fingers to produce beautiful calligraphy with the first try. As with any other life-skill, practice is necessary to develop excellence. Once again, discouragement can be a confidence-killer, but the wise parent will praise every legitimate attempt to train those fine-motor muscles to accomplish this new task.

When my children were in public Kindergarten, it was a common practice of their educational establishment to have “mentors” visit from the older classrooms. Students from the third or fourth grades were paired with the youngest learners for the purpose of being scribes: the younger student dictated a story while the older student wrote it down. While that works well in theory, I felt it did not work well in practice; most adults cannot write (or even type) as quickly as someone can dictate. The activity was intended to link reading skills with handwriting skills, but often limited the imagination of the younger child’s mind to the note-taking ability of the older student and resulted in a story that the Kindergartner could not read for himself. I heard many youngsters proudly proclaim to their parents, “I wrote this story!” When the enthused parents asked, “What does it say?” the confused authors had to admit, “I don’t know,” because they could not read the words that had been written for them.

In my opinion, beginning students should have opportunities to practice handwriting that do not involve creating stories… yet. We allow children to learn to read each letter/sound before we teach them to string those letters/sounds together to be read as words. We teach them to put those words together into short, easy-to-read sentences before we assign entire books for reading. We provide them with many beginner books before we offer them their first chapter book to read. I think the same system should be applied to handwriting — copying many letters, and then words, and finally simple sentences to gain mastery of the physical skill of handwriting — before the brain-exercise of creative writing is added into the mix.

I remember taking one of my favorite storybooks as a child and copying word after word, sentence after sentence, page after page into my Big Chief tablet. It was not assigned homework; it was my own idea, in order to practice this new skill called handwriting. Thinking up an original story requires an entirely different set of skills than the ones needed to put that story onto paper. Attempting too many new skills at once can leave the student muddled in confusion.

Arithmetic
Children need to have a solid understanding of number concepts before adding and subtracting will make sense to them. Most adults can quickly recognize the amount of money represented by an assortment of coins, but few five-year-olds have achieved that ability. Your Kindergartner will benefit from much practice in counting and sorting, learning to associate digits with their values. Once the basic concepts of 1-10 are mastered, the average child is ready to understand eleven, twelve, and so on, and the foundation is laid for understanding our numbering system based on units of ten. Carrying, borrowing, and even decimals are merely extensions of the basic unit of ten. Addition and subtraction are easily mastered by the child who fully understands number values.

Continuing practice and expanding the skill levels in each of these areas will fill the majority of your homeschool day. Obviously, the child working on these skills does not need to spend hours and hours at them each day. Most public school kindergartens operate for 2 1/2 to 3 hours each day, and large portions of that time are spent in recess, bathroom breaks, learning to stand in line, being reprimanded for talking out of turn, and the other necessities of large-group crowd control. It is common for a five-year-old child to complete a full day of homeschool classes in under an hour, and that time can be divided up into smaller blocks throughout the day, depending on the child’s attention span and the other needs of the household (for example, if Mom’s attention must be shared with an infant sibling).

No one would consider building a house by starting with the roof: the foundation must come first. So it is with education: learning to read is the foundation for education. That base must be securely in place before other things are attached to it. Reading is the visual recognition of language; handwriting is the physical application of that language. Understanding the values represented by numbers and using them to count are the equivalents of understanding the sounds represented by letters and using those letters to form words. Patiently wait until your child is reading fluently to add other formal academic studies, such as history, geography, and science. Help your child develop a love of reading first, and then let the pleasure of reading lead him into other areas. And, by all means, please continue to read books to your child, color pictures with your child, sing songs, make crafts, play with puzzles, go shopping and bake cookies together, and have all manner of delightful experiences together.

The Beauty of Logic (and Sudoku Puzzles)

There are currently two distinct groups reading these words. The first group is those who are nodding their heads in agreement with the “beauty of logic” sentiment in the title and saying, “Yes, logic does have a certain beauty and precision.” The other group are non-math people who are wondering what in the world I could be referring to, while shaking their heads and thinking, “She has really gone off the deep end this time — logic is just painful and confusing!”

By “the beauty of logic,” I mean that there is always a right answer and a wrong answer in logical situations. You know where you stand with logic. Numbers, for example, are logical concepts with finite definitions: two always means exactly two; two never means three; two never means purple. Word meanings can become fuzzy and illogical, especially in the English language, where a word such as love can mean things as diverse as: 1) a deep emotional attachment [love my husband]; 2) nothing, such as a score of zero in a tennis game [two-love]; or 3) an intense desire for or appreciation of something [love this pizza; love that song].

I had tried to share my appreciation of math and logic with my children, but my young son’s distaste of anything math-related kept him from developing a similar emotion. Until now. The summer of his pre-calculus course revealed to him his true abilities in math, but his current semester of university math is opening the door to fun math and logic. And dragging him in. As a computer science major, he is taking a class with the tongue-twisting name of Combinatorics — an exploration of math as arrangements and patterns of numbers. That professor recently assigned some math puzzles of a sort that I have been doing for a long time just for fun. (Yes, I am a sick, sick person, and I do need to get out more often.) It seems that a large portion of the world is discovering these puzzles (now called “Sudoku”), as newspapers are adding them to their daily fare of crosswords and “Jumble” word puzzles.

My son was home for a weekend recently and inquired about these puzzles. He knew they were included in his upcoming assignments and wanted some inside information on how to solve them. Sudoku puzzles consist of a 9 x 9 grid in which the digits 1-9 are entered into each row, column, and 3×3-grid portion so that the digits do not repeat. Enter the Beauty of Logic concept. Logic dictates that the puzzles can be solved through systematic strategies, not merely through trial-and-error guessing. As I explained a few tips to my son for solving the puzzles, his admittedly-non-math-person girlfriend became interested and asked for a sample puzzle to try. When I headed to the computer to print some, my husband called after me, “Print one for me, too.” Our evenings since then have been consumed with clipboards, pencils, erasers, and puzzles as we compare notes on solving strategies and progress to higher difficulty levels.

Finding the one correct digit for any square of the puzzle should be done through a process of elimination: these could work, but those cannot work, so this one must work. I cannot arbitrarily decide that a three would look nice in this spot or that I have not used any fives lately, so I should give a five the opportunity to participate in this corner. The best digit for completing a row is not a matter for discussion: when the other eight digits have already been used, there can be only one possible choice for the final digit. The rules of the game specify that each of the digits must be used only once in each subsection. Therefore, if a digit appears twice, I must assume it is a mistake to be corrected, not something to be tolerated as an alternative solution. If you and I work at solving identical puzzles, our solutions should also be identical — if they do not match, we cannot both be right.

That is what I see as The Beauty of Logic: there are distinct strategies that can be employed to arrive at the correct answer; we do not have to stumble blindly, depending on guesswork and instincts to succeed. There can be many wrong answers, but there is one correct answer. Logic is not a matter of interpretation, nor is it different things to different people. A wrong answer is not open to debate. Incorrect answers must be changed, not tolerated or lauded as “diversity.” If only the rest of life could be so simple.

Homeschooling the Neighborhood

In my state it is not legal for me to officially homeschool children who are not members of my immediate family. However, we did sometimes include neighborhood playmates in our activities, particularly in the summertime when “just another day to play” can tend to be somewhat boring. We did not always do formal lessons through the summer, but we did incorporate fascinating, fun, and educational activities into the relaxed playtime of summer.

Summer was a time when I could devote more of my time to planning or preparing a study or activity for later use. I found that I could also give something a “test run” by trying it out on the kiddies — if they enjoyed a taste of it, chances are they would enjoy a more in-depth look during the school year, and perhaps even the children in our larger co-op group would be interested in it, too. So what do you do when your own children are not quite enough for the activity you would like to try out? Let the neighbors join in. Several times, I prepared a fun, yet interesting and educational activity for my own children to do on a boring summer day, only to find that their neighborhood friends were just as interested in breaking the monotony of swinging and bicycling.

Such was the case when I did extensive research and calculations to examine exactly what size an effective solar-system model should be. I have seen many of the science-fair-type of planetary exhibits made from Styrofoam balls, assorted fruits, or sports balls, but I had always felt that I was not seeing an accurate portrayal from those. While my children were spending their summertime swinging, roller-blading, or just relaxing with a novel, I was delightedly poring over scientific facts and punching furiously at my calculator — a welcome change for me from the usual Mom-fare of laundry and dishes. When I finally trooped outside with my notebook of figures, a large measuring tape, and crude signposts mounted on popsicle sticks, my participants were not merely my own offspring, but their eager friends as well, who jumped at the chance to be included in measuring our lawn and placing the markers for each planet’s orbit. Never was one of my summer projects met with an “I already learned that at school” or a “This is vacation — I don’t want to learn anything” response from the children who were not my regular students. Whenever we needed some extra “classmates” for our learning games, there were always ready and eager volunteers.

One day I prepared the “geeWhiz Quiz” for my children, intending it to double as both a math activity and a scavenger hunt. I also secretly hoped that their time spent searching through the game closet would spur some interest in long-forgotten table games and interest them in playing a few of those again. I explained the process of the activity to them while a friend from the neighborhood was present. She seemed deeply disappointed that I expected my children to do this activity later, after she would have returned home. I quickly copied another worksheet for her, and all three children happily spent the entire afternoon in arithmetical computations. My anticipated bonus also paid off: the trio did find several games that piqued their interest, and they kept themselves occupied for many days afterwards.

We often filled our front sidewalk with an extensive Dr. Seuss universe in colored chalk drawings or an ever-expanding circus train overflowing with acrobatic clowns and exotic animals (each new helper got to add his own train car). Our favorite cartoon book illustrations were faithfully copied over and over and over in sidewalk chalk creations. A cleansing overnight rain never brought disappointment, but instead it meant a clean slate for tomorrow. Time after time, the neighborhood children would see us sitting in the middle of the sidewalk and rapidly migrate to our front yard, picking up bits of chalk and asking what parts they could add to the growing mural. My children were not lacking in social contacts with age-mates, and they learned valuable lessons in teamwork and the sharing of ideas as well as supplies.

Being the only homeschool family in your area does not necessarily mean you will not have contacts with other students. We had many opportunities to share educational experiences with public and private school students who were eager to join us in doing things our way. The neighborhood parents knew they could expect our fun activities to have an educational benefit, and their children never seemed to mind it either.

Verified by MonsterInsights