Sugar Cube Math

Are you looking for some fun activities to keep your students’ math skills sharp over the summer break? Do your students need help to achieve mastery of math concepts? Sugar cubes can provide just what you need! One of these activities each week may be enough to boost their math thinking skills, but your students just might want to keep playing and experimenting on their own!

A friend once asked me how I used sugar cubes in math. She had visualized the children just eating the sugar and becoming too hyper for any actual learning! Math manipulatives are nothing more than little things used to illustrate a math lesson, and sugar cubes are fairly inexpensive things that just happen to come in perfect little cube shapes, making them ideal for stacking. However, sugar cubes must be handled with some special care to get them past more than one lesson: do not expose them to moisture (not even wet fingers) and keep them on a jelly-roll pan (large cookie sheet with sides) to collect the crumbs of sugar that will inevitably fall off. Handle the cubes gently to prevent crushing them, but do not be too alarmed when a few of the cubes crumble no matter how gently you touch them. (Life is like that: some of us just can’t take as much pressure as others can.) When lesson time is over, your students can carefully place the sugar cubes back into their box to use them again another day. You will probably want to reserve these sugar cubes for math lessons only — they can become a little too soiled with repeated handling for plunking into your morning coffee! The following suggestions will work with any cube-shaped objects (Cuisenaire Rod 1-units, ABC blocks, dice, etc.), as long as all of the cubes are the same size. A box or two of sugar cubes provides a large number of identical cubes for a small investment, and their plain white sides allow the student to focus on the cubes as units, rather than on any decorative details.

Stack them up, pile them up, square up the piles and see how much fun you can have building walls and tiny forts with sugar cubes. Make checkerboard designs or pyramids. Lessons can be much more than boring drill, and you can learn from play! Below are some more structured lessons to try after a free play session. Some parents may need to do these experiments with their children; other parents may need to get out of the way and just let their child experiment to his heart’s content!

Addition is very simply illustrated through counting the total number of cubes that results from combining this group of cubes with that group of cubes. Take this operation to its next logical level and un-do the addition of cubes for a simplified lesson in subtraction. A student who can see that subtraction is nothing more than backwards addition will not be confused into thinking that subtraction is a new and confusing mathematical concept. Illustrate how addition and subtraction are linked together by discussing both concepts with one set of math facts: 2 cubes in this group plus 3 cubes in that group equals 5 cubes all together: 2 + 3 = 5. Therefore, taking 3 cubes away from 5 cubes leaves us with 2 cubes again: 5 – 3 = 2. Switch the numbers around to show that 3 + 2 also equals 5, and 5 – 2 = 3. Experimenting with just those 5 cubes, the student will quickly see that 1 + 4 = 2 + 3, and so on. Repeat these experiments with other groupings of cubes, always focusing on undoing the addition to prove that the subtraction facts are just another way to state the matching addition facts.

An important part of math is learning about prime numbers. Start with just 1 cube and by adding 1 more cube at a time, we will experiment with making different arrangements of the cubes. Any number of cubes that can make only 1 row is called a prime number — it has multiplication factors of only itself and 1. (One by itself does not count as a prime, because it has no factors at all — it’s just one.)

If you have arranged cubes into two equal rows, that means you have at least 4 cubes. Those can be arranged into 1 row of 4 cubes (or 4 rows of 1 cube each), or 2 rows of 2 cubes each. These are also the multiplication factors of 4: 1 x 4, 4 x 1, and 2 x 2.

Add 2 more cubes, 1 to each row, for a total of 6 cubes. Those can also be arranged into 1 row of 6 cubes (or 6 rows of 1 cube each) or 2 rows of 3 cubes each. Now rearrange the cubes into 3 rows of 2 cubes each to prove that 2 x 3 makes the same size and shape of rectangle as 3 x 2, but just turned the other direction.

Add 2 more cubes, for a total of 8 cubes. Arrange these into 1 row of 8 cubes, then 2 rows of 4 cubes each, and also 4 rows of 2 cubes each. Factors of 8 are: 1 x 8, 2 x 4, 4 x 2, 8 x 1.

So far, an odd number of cubes has not been able to make any even arrangement of rows except for 1 row of cubes. Add 1 more cube to your grouping, for a total of 9 cubes. This is the first odd number that has other factors besides itself and 1: 1 x 9, 9 x 1, and 3 x 3. Arrange the 9 cubes into 3 rows of 3 cubes each.

Show your student that his experiments have now proved that an odd number times an even number equals an even number (3 x 2 = 6). An even number times an even number equals an even number (2 x 4 = 8), and an odd number times an odd number equals an odd number (3 x 3 = 9). Those principles will remain true no matter which odd or even numbers are used — encourage your student to experiment with his sugar cubes to prove this fact.

As the child continues adding more cubes and rearranging them into factor groups, have him make a list of the factors for each number, seeing how many different ways each number can be factored. Which number (of the ones he has tried so far) has the most factors? Multiplication is nothing more than a short-cut to addition, and multiplying can save a lot of time that would be spent adding. Multiplying with bigger numbers will be much faster than adding those numbers over and over and over.

This process can also be done in reverse to illustrate division. Take a random number of sugar cubes and arrange them into rows. Can you make several rows with an equal number of cubes in each row, or do you end up with a few leftover cubes? Try several different arrangements of rows and numbers of cubes in each row. Keep trying until 1) you can come out with a square or rectangular arrangement with no leftovers, or 2) you prove that you have a prime number of sugar cubes, with no other factors than this number and 1. Whether you are multiplying or dividing, the factors remain the same — proving that division is just un-doing multiplication. The only difference is that when dividing, sometimes you can end up with a few leftovers, called the remainder.

Area is basically the same as a set of factors. It can also be thought of as floor tiles by looking straight down on top of the cubes so that only their tops can be seen. By moving the cubes around, the student can demonstrate how 1 x 12, 2 x 6, 3 x 4, 4 x 3, 6 x 2, and 12 x 1 all have the same area (they all use exactly 12 cubes). Area of a square or rectangle is determined by multiplying two connecting sides together, just like the two factors.

Perimeter can be related to how many sections of “fence” it would take to go around the outside of a certain area. The cubes’ edges can be counted as individual fence sections for an easy way to prove how many fence sections are required. Notice that each corner-cube has two exposed edges for fences. Perimeter is usually determined by adding the totals of the sides together, but multiplication can be used as a shortcut for perfect rectangles: 2 times the shorter side, plus 2 times the longer side. (Note that in a single row of cubes, the cube at each end will have 3 exposed sides to be counted.)

Experiment with various arrangements of the same group of cubes and compare the area to the perimeter. Can you change the perimeter without changing the area? What is the largest or the smallest perimeter you can make while keeping the same area?

Volume can be thought of as area in several levels. First, think of area as being a flat concept, like floor tiles, and volume being a 3-dimensional concept, like the solid sugar cubes. Arrange 2 rows of 3 cubes each, making an area of 6. Now arrange 6 more cubes in exactly the same pattern. If you stack one group on top of the other group, you can easily see 2 layers of 6 cubes each. Two rows times 3 cubes times 2 layers equals a volume of 12 cubes: 2 x 3 x 2 = 12. Try this with other groups. Multiply to find the volume: the number of rows times the number of cubes in each row equals the area of that layer. Now multiply the area times the number of layers to find the volume. How many more cubes does it take to increase the total volume of the stack of cubes?

Once your student has mastered calculating volume, combine it with measurements. Have him measure the side of one sugar cube, and then substitute that measurement in his calculations of perimeter, area, and volume. Now have him measure the sides of the large stack of sugar cubes to see if his calculations were correct. Substitute 1 inch for the measurement: if the sugar cubes measured 1 inch on each side, how large would the stack be now? How large would a stack be with 10 layers of 10 rows of 10 sugar cubes in each row? How about a stack that had 100 cubes each direction? How about 1,000? Or a million? Or a billion? (This leads directly into the study of exponents, because a square of x-number of sugar cubes is x2 and a cube of x-number of sugar cubes is x3.) How many sugar cubes would it take to make a large cube (all 3 sides equal) the approximate size of a card table? Or as tall as your house? Or as wide as a football field? Your students may need to use a calculator to check their math on these problems, but getting to use the calculator is their reward for having fun with math!

By the time your student has completed all of the activities listed above, he has probably also thought of some other activities to try with the sugar cubes. Try them–experimenting is how we learn!

Preschool Is Not Brain Surgery

I have tackled the topic of homeschooling older students while you have preschoolers around several times before, but I’ve never yet directly addressed homeschooling for preschool itself, especially when preschool marks the official beginning of schooling for your oldest child. This changes now: I am here to encourage you that you can teach your own child for preschool. You do not need an advanced degree in education to be able to effectively teach your child at home for preschool.

I have prepared a list of things that my children and I did during their preschool years that cover all of the types of activities and subjects your child will need to prepare them for their future academics. These activities may be done in any order, corresponding to your child’s interests and abilities. Progress according to your child’s abilities: if your child has difficulty understanding any given concept, set it aside for two weeks or two months while you do other activities and see what a difference that makes. Pick it up again later, or set it aside a second time, if necessary. All children learn at different rates, just like they begin to walk or talk or get teeth at different times. Faster or slower is not better, it’s just different.

Multiple activities can be done each day, if it works with your schedule and with your child’s interests. Fifteen minutes at a time may be adequate for the average preschooler, but the child may enjoy several of these short sessions throughout the day. Focus on only one activity at each session, but if your child is really enjoying the activity, you can let him continue playing with it after the formal “lesson” time is completed.

Read books to your child. Snuggle up together for special Mommy-and-me time. Use funny voices for the characters. Vary your tone to match the scene: fast and loud for the exciting parts, slow whispers for the sneaky parts, sniffling when the character is sad, bouncy and happy when the character is happy. When the book is a familiar favorite, stop periodically to ask your child questions: Where is Papa Bear going next? Why is he doing that? What will he find there? These help build your child’s memory by asking him to recall details he has learned from all of the times you have read this story in the past. Which bear is wearing the red shirt? Point to the smallest bear. Can you find a bowl on the bears’ table? Questions of this type help your child notice details and learn to identify colors, sizes, objects, etc. Why did the bears leave the house? Where did they go? What is this little girl’s name? These questions teach comprehension: read a portion of the story, and then ask the child about key elements that were just read. At first, you may want to ask questions about one page at a time, but soon your child will be able to recall details from several pages back.

Include ABC books, even though they usually have no plot or story. As a child, my personal favorite was The Nonsense ABC by Edward Lear. For my own children, their favorite was The Dr. Seuss ABC. What those books have in common are fun, rhyming poems for each letter. Lear’s “A was once an apple pie” was just as easy to remember as Dr. Seuss and his “Aunt Annie’s alligator.” The delightful poems were much more enjoyable than a simple picture book of ABC’s, although those are useful, too, as you will see in a moment.

Learning letters. Gather all the ABC books you have, and compare the pages for the same letter in each book. Linger over one letter per week or a letter every few days, until you know for sure that your child knows that letter. Use sticky-notes or home-made flashcards to label objects in your home that begin with the letter of the week, and help your child make the letter’s sound every time you see one of those objects and say its name. Banana, B, buh, buh-nana. You get the idea — and so will your preschooler. You may need to get creative on a few letters, such as Q, unless you live with a queen in a home full of quilts and have a pet quail. For X, you may need to use words that have an X in them, such as fox. The picture ABC books will come in very handy now, especially if they use several items for each letter. Don’t overlook your public library — they may have ABC books for unique topics, such as animal ABC’s or around-the-world with ABC’s.

Help your child learn to recognize a letter, no matter what font it is written in. Making a Letter Recognition Notebook is an excellent method for this. Focus on the appearance of the letters themselves, instead of what objects begin with each letter. Do one page for the upper case of a letter and another page for samples of the lower case letter. The goal here is for your child to be able to spot an a, whether it looks like a ball against a wall or like an egg underneath a tiny umbrella.

Learning numbers. Repeat the activities from the Learning Letters section above, but do them for the numbers 1-10. Draw a group of dots on the page to correspond to the number represented. Use counting books for activities similar to the ABC book activities. Once your child knows 1-10, you may add numbers up to 20, if you’d like. Your goal here is for the child to recognize each digit and immediately know how many objects that number stands for.

Learn colors. Ditto. A color-of-the-week activity will show your child all the varieties of each color. Light blue, dark blue, bright blue, dusty blue, navy blue, sky blue. Blue jeans, blue socks, blueberries, blue blanket, blue water bottle, blue crayons, blue cars, blue blocks, blue game pieces. How many blue things can you find in your home? You may be surprised!

Learn shapes. Ditto once again. The variety within each shape can be confusing at first to little ones. Is a big circle the same thing as a small circle? Are a cookie and a ring both circles even though one has stuff inside it and the other one is empty? Rectangles and triangles can be particularly tricky. Use a dollar (kids love learning with real money) as an example of a rectangle, then turn it up on end to show the child how the dollar is the same shape as a door. No more tricky rectangles! Long and skinny or short and fat, rectangles will still look mostly like a door or a dollar. Triangles have 3 sides, no matter how long or short those sides may be, and once your preschooler can count to 3, he can begin to recognize triangles. Browse through the snack cracker aisle at the supermarket for some tasty, edible geometric shapes! Careful nibblers will transform one shape into another, naming the shapes as they admire their creations and then eating their artwork.

Fine motor skills. See Preschoolers’ Educational School-time Activities for a variety of helpful activities that your child will enjoy doing and learn wonderfully useful skills at the same time.

Gross motor skills. Let your child practice on a “balance beam” made by drawing a straight line with chalk on the sidewalk or driveway. Masking tape on the floor is a good substitute indoors. When your child can do it easily without stepping off the line, switch to using a 4″ x 4″ board (any length) lying directly on the ground. When the child can walk that board easily without losing his balance, prop the board up with a brick or concrete block (or other stable item) at each end — just don’t go too high, so that the child will not be hurt if he does fall. Please stay close by your child whenever he is practicing this.

Other useful concepts. Play. Notice the weather each day. Go to the park. Walk around the block. Smell flowers. Watch an anthill. Put a bird feeder or a bird bath near a window and keep it filled so you can watch the birds and learn to identify them. Make cookies. Add a set of measuring cups to the bath toys. Visit a zoo. Watch a construction site (from a safe distance) and talk about what each man or machine is doing. Learn from life every day.

Social Skills. See Social Skills — What Should I Teach My Preschooler? for a very complete explanation.

What about school questions? Preschoolers ask questions; it’s what they do, and it’s who they are. Your homeschooled preschooler will undoubtedly ask questions about going to school: Why does my friend go to school and I don’t? When will I go to school? Can I ride on a school bus? Can I play on the school playground? Why does my storybook show kids doing things at school, but I don’t have any stories about kids who homeschool? Ah, yes, those questions.

You can share as much as you think your preschooler will understand about why you chose to homeschool, but try not to make other families look bad for not homeschooling. One way around this is to point out what vehicles are owned by the families on your block or in your neighborhood. Some have small cars, some have pickup trucks, and some have minivans. They pick the type of vehicles that they want for the things they do. Some families send their children to public school, some go to private schools, and some homeschool. Each family picks the type of school that they want for their children. Each family can also decide if they want to plant flowers around their house or raise tomatoes in their garden. They can decide if they want to have a dog or a cat or tropical fish or no pets at all. Some families choose to eat in fancy restaurants, some families get burgers at the drive-through, and some families make all their meals at home. Every family gets to make choices, and homeschooling is one thing your family has chosen.

Sometimes the trickier part of answering these questions is to show that not following the crowd can be more fun. Because you are homeschooling, you can go to the park when the other children are stuck inside the school building. This is also a good way to bring weather (good or bad) into the conversation: you can play outside on nice days instead of having to sit at a desk all day long, or you can stay inside where it’s warm and dry all day long on the cold and rainy days. Perhaps you can visit the school playground after school is over for the day or on a weekend or during the summer. Perhaps you can ride on a city bus or a church bus. I have known preschoolers who begged and begged their parents to let them go to school, only to find out that school was not the fun experience they had imagined it to be. One little boy asked his mommy if he could be homeschooled again, because all he really had wanted from school was to play on the playground, and when he was in school, the teacher only let him go out to the playground at certain times and for very short periods. Being homeschooled with his brothers was much more enjoyable.

Many children (and parents) ask about the lack of homeschooling in storybooks. I agree that there are very few books that portray education at home, but I have a sneaky way around that, too. Not all storybooks show everything that a child does every day, and not all storybooks show children going to school. Therefore, maybe, just maybe, the children in some books are homeschooling, but the story is telling about some other part of their day. Our school books were not in every room of our house — ok, sometimes, but not always. When the Bear family went for a walk to let their porridge cool down, perhaps they had been doing their lessons all morning, and now it was lunch time, and they would continue their lessons after lunch. Stories are not always about what you can see — sometimes there are also lessons to be learned in what the pictures do not show. And finding those lessons also teaches your child to think about the story and what it does and does not say.

Do I need curriculum to homeschool preschool? No. If you don’t believe me, take this quick test:

  • Do you know the alphabet?
  • Can you count to 20?
  • Can you identify basic colors and shapes?
  • Do you know how to use a pencil?
  • Do you know how to use scissors?
  • Can you read a child’s storybook?

If you answered Yes to 3 or more of these questions, you will probably do just fine. Use the money you would have spent on curriculum for a family zoo pass or a storage cabinet for all of the arts and crafts supplies you will accumulate in the next few years!

Preschool-aged children need foundational skills: pre-reading (recognizing letter names and letter sounds; visual distinction: recognizing differences and similarities between objects), pre-writing (small muscle skills and coordination: using fingers), and body control (large muscle skills and coordination: using arms and legs). Children who are only three, four, or five years old do not need to be able to identify nations of the world, Presidents of the United States, or the life cycle of seahorses. These tiny tots will benefit much more from spending 15 minutes cutting colored paper into confetti than they would from endless coloring pages for geography, history, science, or social studies topics. I have probably just stepped on the toes of multiple eager teachers, but please understand that your little ones will not remember very many of these superfluous lessons until they are able to read fluently for themselves. Then you can turn them loose on the library shelves and get ready to hear them recount the myriads of fascinating facts they have read.

Once when I was selling some of our outgrown books at a used curriculum fair, my customer asked if I had the teacher’s manual for the 2nd grade reading text. “No,” I replied with a smile, “I thought if I couldn’t figure out the answers to the questions in a 2nd grade reading book, I had bigger problems than the teacher’s manual could fix.” She thought about that for a few seconds and began laughing along with me. “You’re absolutely right!” And she bought the book. Teaching preschool is even easier than teaching 2nd grade reading. And you will be able to do it just fine without a teacher’s manual or fancy curriculum.

More articles related to Preschoolers are listed in Topical Index: Preschoolers.

10 Fun Math Exercises from a BINGO Game

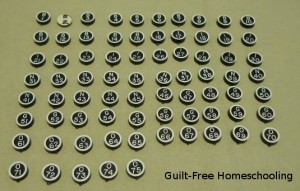
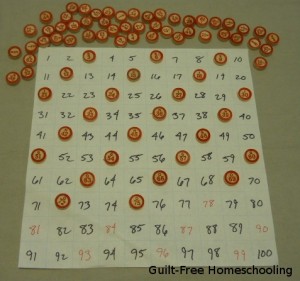
A standard Bingo game contains several printed cards with numbers arranged into a grid of rows and columns and tokens marked B-1 through O-75, used for calling the numbers when playing the game. These components can be used in other ways for some creative (and fun) variations on math practice.

  1. Play Bingo for number recognition practice and good, clean fun.
  2. Sort the number-tokens into odds and evens. Or sort out just the tokens needed to skip-count by 2’s, or 3’s, or 4’s, etc.
  3. Arrange the tokens into numerical order from 1-75.
  4. Sort the tokens into 1-10, 11-20, etc.
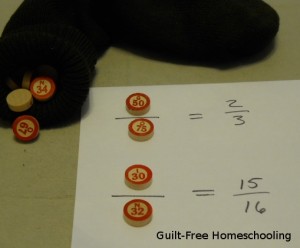
  5. Pick 2 (or more) tokens at random and add their values together. Now try subtracting them, multiplying them, or dividing them. [Hint: Place all of the tokens into a paper sack or a clean sock for ease of random drawing.]
  6. Pick 2 tokens at random and make fractions from their numbers — make both a proper fraction (numerator is smaller than denominator) and an improper fraction (numerator is larger than denominator). Simplify each fraction, if possible, or make a list of equivalent fractions.
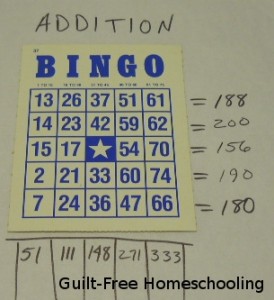
  7. Add the columns of numbers on the Bingo cards.
  8. Add the rows of numbers on the Bingo cards.
  9. Write the factors for each number on a Bingo card or for number tokens drawn at random.
  10. Practice rounding with the numbers on the Bingo cards or with randomly drawn tokens.

The Holidays Are Unit Studies — Learning During the Busy Season

[This article was written by Jennifer (Morrison) Leonhard: Guilt-Free daughter and homeschool graduate.]

The holidays are a hectic time: relatives are coming over, the house needs to be cleaned, presents must be bought and wrapped, and food must be prepared. The schoolwork either gets lost along the way or becomes an added frustration as we try to get everything done at once. Mom planned our school schedule with the knowledge that Dad would be home from work around this time and regular schoolwork wouldn’t get done, but the learning was just beginning.

Mom usually gave us a break from lessons during the entire week of Thanksgiving, and we often stopped our official schoolwork well before Christmas, since extra time before each holiday was more beneficial for Mom’s preparations than time off afterward. However, we found many opportunities for learning, even when the schoolbooks had been put back on the shelf.

Shop Class
Dad usually did some project around the house during his time off from work (after all, you can’t get Dad to just sit around the house doing nothing). We learned to fix cracks in walls, paint, and generally drive Mom crazy with home repairs, all while she was preparing to have people over. Creating homemade presents, like building blocks, picture frames, and ornaments, teach handcrafts while theoretically cutting down on the expenses for gifts.

Math
Mom has always used cooking as math. Make a recipe smaller or larger, and you are automatically learning fractions: 3/4 cup of flour times 2 equals 1 1/2 cups. (Sure you could just use the 3/4 cup twice, but then what are you learning?) The economics of having a budget for Christmas will never fail to provide an opportunity for learning. How about learning some geometry and spatial relationships when wrapping presents? A lesson in possibility vs. impossibility lurks in the concept of a jolly and fat Santa squeezing down a chimney (which also brings up the lesson of “don’t try this at home”) or reindeer in flight (although one can argue that bees are also supposed to be a flight impossibility, and yet they consistently defy logical aerodynamics).

Music
Obviously, Christmas includes music — but that can take on many different forms. You can find many genres of Christmas music, from a symphony orchestra to the sounds of animals barking and mewing Away in a Manger. The latter is rather amusing the first time, but it gets harder to appreciate with frequency. The library and your friends will likely have a variety of holiday music that you can sample. I found a simple song book and learned how to tap out a few tunes on the piano. I knew what Christmas songs were supposed to sound like, so they were easier to learn, and I got a small taste of playing the piano. Explore the lyrics of Christmas songs to learn a little about Christmas history — have you ever wondered why the lyrics to I’ll Be Home for Christmas talk about presents on the tree?

History
Beyond the lyrics of songs giving us a glimpse into Christmas Past, there are many other subjects you can study for history. Thanksgiving is a history lesson in itself, from the voyage of the Pilgrims to learning why we celebrate it in November. American history becomes an interesting pastime instead of boring history when reading a Pilgrim’s personal account of coming to this country. Do you know why we celebrate Christmas around a tree? Or who started the tradition of sending Christmas cards? Do you know how the first Christmas trees were decorated — or the stories behind your family’s favorite decorations?

Literature
From studying Christmases past to reading about the Ghost of Christmas Past, ample literature can be found about others celebrating Christmas. In the spirit of the season, reading holiday stories aloud by a fire while drinking hot cocoa certainly doesn’t feel much like schoolwork!

Spelling
The holidays can provide much inspiration for spelling, from Old World words in songs to sitting around after dinner, playing Scrabble with friends and family. Reindeer pulling a sleigh will provide you with more exceptions to the rule “I before E, except after C.”

Language, Geography & Social Studies
Research the different names for Santa Claus around the world. (And for math, estimate the number of stops he must make in a single night.) Various traditions surround Santa’s visit, from cookies and milk to leaving shoes instead of stockings to be filled. And don’t overlook the traditions of Hanukkah: many interesting studies reside in the holiday celebrations from other cultures.

Cooking
Besides being recruited to help Mom with preparations for large family dinners (and vying for turns at grinding the fruits for our traditional cranberry relish), we often made a variety of cookies and candies to have available during the season. Occasionally, we also made an assortment of mini-casseroles and other freezer meals as gifts for elderly grandparents. Perhaps you could experience popular foods from holiday celebrations in the past — and who doesn’t enjoy a chance to try yummy new foods? You may end up adding a new favorite to the season, or (if you don’t like the new dish) you can at least learn to be more thankful for the old standards your family regularly prepares for holidays.

Many more lessons can be found in the holiday seasons — just make sure to keep your eyes open for learning opportunities and your heart open to the most important lesson of all: being thankful for the Son.

Preschoolers’ Educational School-Time Activities

How much trouble can a bored preschooler get into while you are trying to help your older children with their lessons? Don’t answer that. Instead, let’s just focus on providing your preschooler with some fun activities as his own version of “schoolwork.”

Preschoolers can begin to learn school-time skills with a few simple projects of their own. Try some of these activities by setting up your preschooler with his own individual work area, just as though he were another “real” student, but your space allowances will determine whether your preschooler is seated near his siblings or in his own special location with plenty of elbow room. If it is possible to group your children together in the same area, your preschooler can begin to observe how his siblings sit and work independently, so that he can learn to duplicate their actions. Not every preschooler will be eager to sit still and “play” school for long periods, but for those who are determined to mimic their older siblings, these suggestions offer safe, semi-supervised activities that will develop essential skills. Activities can be changed periodically, just as your older students change subjects throughout the day. These projects can work to lengthen a short attention span, as well as keep your little one occupied in fascinating, educational activities while you explain a lesson concept or demonstrate a few math problems to your older students.

You will probably need to work back and forth, setting up the preschooler with his activity, then starting the older children on their lessons, checking back on the preschooler, following up with the olders, and repeating the cycle as often as needed. Yes, at first you will feel as busy as the old-time plate juggler who balanced spinning plates on tall sticks placed around a table, running and spinning and running and spinning and running to catch the far one just before it falls, but your diligence will quickly pay off with rewards of students who can work independently for a few minutes until Mom is available for help.

The following is a list of materials and activities to help keep your preschooler occupied and give him a boost in the learning department, beyond the usual board books and wooden puzzles. Whether these activities look educational or not, they do include getting-ready-for-learning skills, often disguised as creative fun. Reserving these materials (especially the scissors and glue sticks) and activities for use only during school-time or at the school table will help reinforce the idea of schoolwork in your preschooler’s mind and help him become accustomed to your family’s homeschooling routine. If the “fun” activities can only be done during school, it helps to plant the idea that learning is fun — plus it keeps those activities from becoming boring. Many other activities and playthings also have educational benefits, so please extend this list with your own activities and variations to fit your child’s interests and skill level. Be sure to swap ideas with your friends, no matter what the ages of the children, because ideas can be adapted to suit any age level.

“Sample” Notebooks
Materials: an assortment of old magazines, newspapers, greeting cards, sales ads, junk mail, etc.; spiral notebooks and glue stick, or magnetic photo album/pages. Store these in a specific box for the preschooler’s use, to prevent him from cutting up your newest magazines, unpaid bills, and expensive set of leather-bound first edition books.
Method:Let your child find and cut out pictures, letters, or numbers that fit certain criteria:

  • Objects matching a specific color (use basic colors to allow for variations in shading);
  • Objects starting with a certain letter of the alphabet;
  • Letters and/or numbers in a variety of fonts/typefaces.

Use each of the above groups to create individual “sample” notebooks, making 1-2 pages for each category: color recognition (separate pages for red, yellow, etc), letter-symbol recognition (separate pages for a/A, b/B, etc), letter-sound recognition (separate pages for things that begin with “a,” “b,” etc), number-symbol recognition (separate pages for each numeral, 0-9 or higher, if desired), number-value recognition (groups of 2 items for “2’s,” groups of 3 items for “3’s,” etc.), etc. (Recognition of the letter or number symbols is important because the variations in fonts and typefaces can be quite confusing to beginning readers.)

Keep the child busy looking and searching on his own for the needed samples and let him do the cutting, so that this activity lasts more than a few seconds. Samples can be glued into an old spiral notebook with a glue-stick or put into an old photo album or 3-ring binder with “magnetic” photo pages for minimal mess. The notebooks can also be “studied” for help in recognizing colors, letters, etc. Occasional supervision may be necessary to help the beginner understand the placement of the samples. A younger child may just enjoy cutting/gluing random pictures into a notebook without any specific categories. Pictures can also be arranged so as to tell a wordless story: This little girl went to this house to visit her grandmother
Skills Developed: visual recognition, cutting with scissors, glue-stick, fine motor skills
Mess Alert: paper scraps from cutting; glue-stick residue

Tangram Pictures & Patterns
Materials: felt pieces, flat craft foam shapes, colored paper or card stock pieces (cut into circles, squares, rectangles, triangles, parallelograms, etc.)
Method: free play; challenge student to duplicate patterns; challenge student to keep enlarging designs
Skills Developed: eye/hand coordination, fine motor skills, pattern recognition
Mess Alert: pieces to pick up (Store the pieces in a box large enough that your child can easily return the pieces himself at clean-up time)

Stringing Beads
Materials: wooden, plastic, or craft foam beads; empty thread spools; leather boot laces, shoestrings, or plastic laces
Method: Tip of shoelaces can be stiffened by wrapping with masking tape to form a child-safe “needle” about 3″ long. Free play, or challenge student to duplicate patterns.
Skills Developed: eye/hand coordination, fine motor skills, pattern recognition
Mess Alert: pieces to pick up (Store the pieces in a box large enough that your child can easily return the pieces himself at clean-up time)

Sewing/Lacing Cards
Materials: cardboard or poster board shapes with holes punched close to the edges; plastic canvas; yarn, heavy string, shoelaces, or plastic laces
Method: Sew through the holes to outline the shape or loop around the edges. (See above for creating a safe “needle” with masking tape) Plastic canvas can be “stitched” randomly or into any pattern desired; it can be cut into shapes or used as squares or rectangles (circles can also be found in most craft stores). Blunt yarn needles (metal or plastic) can also be found in craft stores, if desired.
Skills Developed: eye/hand coordination, fine motor skills
Mess Alert: strings to pick up (Store the pieces in a box large enough that your child can easily return the pieces himself at clean-up time)

Building Blocks
Materials: Cuisenaire rods, building blocks, etc. (may be interlocking or non-interlocking)
Method: free play; building/stacking; pattern matching (include paper patterns to reproduce with blocks); counting, matching, & sorting. Simple patterns may be drawn as a guide for the child to reproduce over and over: red/red/blue or square/rectangle/triangle, etc.
Skills Developed: eye/hand coordination, fine motor skills, pattern recognition, basic math awareness
Mess Alert: pieces to pick up (Store the pieces in a box large enough that your child can easily return the pieces himself at clean-up time)

Buttons
Materials: jar or box of assorted clothing buttons
Method: free play; sorting, matching, & counting
Skills Developed: eye/hand coordination, fine motor skills, basic math awarenes
Mess Alert: pieces to pick up (Store the pieces in a box large enough that your child can easily return the pieces himself at clean-up time)

Wikki Stix
Materials: Wikki Stix (like chenille sticks, but made of wax)
Method: free play; pattern duplication; shaping into letters or numbers
Wikki Stix may be stuck to windows, table tops, paper, or stuck to each other for 3-D creations.
Skills Developed: eye/hand coordination, fine motor skills, pattern recognition, creativity
Mess Alert: may leave slight waxy residue on surfaces, depending on brand used

Cutting Practice
Materials: child-safe scissors, construction paper or newspapers (Again, have a designated supply of papers for the child to use, avoiding accidental cutting of valuable materials.)
Method: Let child practice cutting photos or ads from newspapers, cutting along lines, etc.
Let child practice cutting by reducing construction paper to bits! Leftover scraps of paper, torn sheets, or less-pretty colors may be used up in this manner, giving valuable practice in scissor skills.
Skills Developed: eye/hand coordination, fine motor skills, cutting with scissors
Mess Alert: paper scraps

Handwriting Practice
Materials: newspapers, junk mail (Again, have a designated supply of papers for the child to use, avoiding accidental drawing on valuable materials.)
Method: Let child practice handwriting by tracing lines inside the thick lines of headlines and large font letters and numbers. The child may also like to copy letters or entire words onto blank sheets of paper or wide-lined paper.
Skills Developed: eye/hand coordination, fine motor skills, pre-handwriting basics
Mess Alert: paper scraps; marks from pencils or other writing implements

Activity Jar
Materials: Activity Jar full of assorted items
Method: (see this article for details)
Skills Developed: sorting, matching, counting, fine motor skills
Mess Alert: pieces to pick up (children can easily help toss pieces back into the large container). Pieces may be poured out onto a cookie sheet or cake pan to minimize scattering.

What Made This a “Bad” Homeschool Day?

This day started with such promise. You planned the lessons, and everyone took their places, but then something, somewhere went wrong. Very wrong. And you may have no idea why. Go fix yourself a refreshing beverage, and let’s see if we can analyze what happened.

In my personal vocabulary, a “bad homeschool day” has one basic meaning: We didn’t accomplish all of the lessons that I had planned for us to do. There can be multiple causes for this “failure,” which is probably not as much of an actual failure as it is just not hitting the bull’s-eye of your intended target of Lessons Mastered. To take this analogy just a bit further, think of your day’s homeschooling plans as a standard target of concentric rings. Landing an arrow anywhere on the target is a degree of success (a partially learned lesson), and even coming close to the target is still a degree of success (learning anything at all about any topic, but not necessarily the planned lesson). A complete and utter failure would mean that your arrow never even left the bow (although that in itself teaches a lesson, but we’ll get to that later*). Also notice that the bull’s-eye of that target is not a pinpoint. It is actually roomy enough to hold several arrows, meaning that two or three arrows can be separated by some distance while still occupying the official center of the target. Consider this for a moment: you can hit the bull’s-eye several times, with the arrows landing fairly far apart from each other. Different arrows in different parts of the bull’s-eye equate to different homeschooling days that reach the goal in different ways. You can achieve success while still not reaching pinpoint perfection. (Perfection and success are two entirely different things — and success is much easier to achieve than perfection!)

Now let’s look at some possible causes of today’s Bad Homeschooling Day.

1) A Family Emergency — File this under “Life Happens.” These often cannot be avoided. Emergency Room visits are often considered by active little boys to be sure indicators of bravery and manhood, veritable rites of passage. Other emergencies can come in the guise of a chronic illness, a death in the family, or an unexpected change in career or place of residence. Marriage, divorce, pregnancy, miscarriage, and many other events can have a resounding effect on homeschooling progress and for much longer than a single day. There is usually no way to schedule an emergency: it just happens. Please do not despair when some unexpected event disrupts your calendar. Do keep in mind that extremely valuable *life lessons will still be learned during family emergencies — lessons that do not come from textbooks and cannot be experienced in classroom situations.

2) Your Students Just Didn’t Get It — File this under “Not Unusual.” Students vary in how they learn: God made them that way. What bizarre sort of Stepford Wives-world would this be if everyone reacted exactly like everyone else? The lessons for today were probably not presented in ways that corresponded to your students’ learning styles. See the Titles Index and look for Alternate Methods of Teaching [for various subjects]. Even if the exact subject you need is not listed, the articles contain many suggestions for presenting material to the various learning styles, and you will find ideas that will help.

3) Your Students Would Not Stay On Task — File this under “Learning Styles.” Over there is a daydreamer, here is a wiggler, this one is a goof-off, and that one never stops talking. Sound familiar? This category can also be applied to your students’ styles of learning, but this, too, can be accommodated. It’s not that your students are trying purposely to ignore you; it’s just that they find other facets of life much more intriguing than the way this particular lesson is being presented.

A daydreamer may be thinking up a truly valuable invention, or mulling over a tidbit from a recent conversation or book or movie or song, or puzzling over why something works the way it does, and if that does then shouldn’t this be possible, too? Your daydreamer is very likely not dreaming at all, but thinking very deep and elaborate thoughts and ideas. Allow that child to keep an “idea notebook” handy for quickly jotting down thoughts to be explored more fully later, after the lessons are done. The journal will help the child remember those thoughts, and it just might help him get refocused on the lesson at hand. Plus, you get the bonus of voluntary writing: SHH — don’t let the child know that you are secretly counting this as a writing assignment! This is just a special, personal notebook that can be kept handy during any lesson and pulled out for scribbling a quick note without receiving a scolding for momentarily not paying attention. Assure him this journal will not to be corrected, graded, or even read by anyone else until he chooses to share his ideas. My son kept a notebook that we called his Invention Journal, which he filled with complicated drawings and detailed explanations for items he felt would be valuable, time-saving, or just plain fun.

A wiggler has a serious need to move, so use it to your advantage. Send him off to run an errand to the other end of the house or to run laps around the back yard before you begin presenting the lesson. Once his muscles are awake, he will be a much more attentive listener. Include stretch breaks between lessons or between sections of a long lesson. Hindering this child’s need for movement is equivalent to letting his brain run out of gas.

Talkers have just as great a need to express themselves as the wiggler has a need to move. These are the students who can easily be engaged in discussions, debates, and question-and-answer sessions about lesson concepts. They are not likely to read directions themselves: they are much more likely to ask you to tell them what to do. [See Teach Your Students to Teach Themselves for help with this.] A budding comedian needs to get the funny story out of his system before he will be able to concentrate on any academic input, so invite him to tell it, and enjoy a hearty laugh together. He will be much more attentive to your lessons when he knows you appreciate his humor. You can trust me on this one — by the time my son turned six, I had developed a great empathy for what Jerry Seinfeld’s mother must have endured.

A student who cannot keep his hands still is often accused of goofing off and delaying his work by fiddling with anything within reach. This one will drive you straight to the room with the thickly padded rubber wallpaper unless you realize that those busy fingers are the keys to his ears. Just like the wiggler who must move his legs to activate his brain, The Busy Fingers Kid must have something in his hands to stimulate his brain. Once again, you can use this to your advantage: let him hold a favorite toy or keep his special blanket folded underneath him on his chair or give him modeling clay to work with while you read aloud or explain a lesson concept. Do not insist on eye contact with this child to prove he is paying attention — his ears will only be able to listen to you if his hands are busy, and his eyes may or may not focus on you. This child will respond especially well to manipulatives, learning aids, and educational gadgets. It’s not that he wants something to play with, he just needs to feel something with his fingers to be able to learn.

4) A Defiant Student — File this under “Needs a Little More Time.” This most often occurs when a family is involved in a major change, such as the transition from public or private school to homeschooling, especially if the student is not completely thrilled with the idea. Students who have previously been in a classroom situation need time to decompress and shift gears into the more relaxed atmosphere of homeschooling. A good rule of thumb for the length of the transition is one month for every year the child spent in school, double that if the child went to preschool. That period will be a time of adjustment: expect to find and repair potholes, expect to share tears and triumphs, and be as patient, loving, and forgiving as you possibly can muster. Know that every rough patch you can bring your student through will lead to smoother sailing later on. Remember that this child’s entire academic world is undergoing dramatic changes, and your student has no idea what to expect next. Treat your defiant student with respect, and he will respect you in return. [See Troublesome Students for more specific suggestions.]

5) Using a Homeschooling Style That Is Counter to Your Family’s Lifestyle — File this under “Common Mistakes.” Many families who are new to homeschooling, especially families who are leaving public or private school, make the all-too-common-but-well-intended mistake of trying to duplicate a formal school routine at home. Reasoning that the children have been used to precisely timed periods, clocks and bells to signal those periods, structured lessons, and periodic tests, innocent first-time homeschoolers may think it is wrong to finish a subject in less than 30 minutes (or to extend it longer than 60 minutes), wrong to start the day’s lessons after 10 AM (or before 8 AM), or wrong to finish all of the day’s lessons in only 2 hours (or wrong not to have everything finished up by 3:15 PM). Let me assure you that you may use as much or as little time as seems fitting to your students’ abilities, and daily variances are not at all uncommon. Furthermore, it is absolutely permissible to take stretch breaks and play breaks and snack breaks as often as they may be necessary. You are allowed to teach students of close but differing ages as though they were in the same grade at the same time, if that fits well into your situation and their needs. You are allowed to skip a lesson now and then, spread a single lesson over several days, take a day off when you really need it, and choose educational materials that match your family’s values and interests.

If your students need structure and precise scheduling, then by all means use it. But if your family feels stifled and pressured by demanding schedules and tedious lessons, explore learning in a more relaxed, more motivating environment. Perhaps your plans have been too aggressive. Perhaps you do need more personal discipline. Whatever your family’s needs may be, find the combination of lesson materials and supplemental activities that works for your family and begin to thrive.

I cannot promise that you will never again have a Bad Homeschooling Day. I cannot promise that every Bad Homeschooling Day can be magically transformed into an Exceptional Learning Day. What I can guarantee is that you will get out of homeschooling exactly what you will put into it: if you work toward teaching your students in the ways they learn best, you will reap attentive, eager learners who may often be several steps ahead of you. When a student’s interest veers away from the planned lesson, do not be afraid to pursue his suggestion — you may both end up learning much more than the textbook’s authors intended.

The poet Robert Burns is often paraphrased, The best laid plans of mice and men often go awry. Proverbs 16:9 provides a more optimistic conclusion: The mind of man plans his way, but the Lord directs his steps. No matter what your plans may be, remember that they are only plans: ideas and intentions of what you hope to accomplish with your students during a set period of time. Some days are slow learning days — you know yourself that on some days you can think faster or more clearly than you can on other days, depending on the weather, a mild illness, or the unpredictable distractions of life. Your children are exactly the same: some days their progress will be slow, and on other days they will make up for lost time and amaze your socks off! Give yourselves time to adapt to learning at home, and experiment with schedule changes until you find the ideal solution for your family’s needs. Use Life’s interruptions to teach the lessons not found in books, and recognize the lessons your students are learning, whether or not the worksheets get completed today.

For further encouragement, please see these additional articles:
Redeeming a Disaster Day
Homeschooling Is a Choice
What Is Your “Best”?
Reschedule, Refocus, Regroup

Felt Shapes

Do you need a new idea for keeping the kiddies occupied indoors when it’s too hot to play outside? Are you looking for a “down time” activity? Have you had it with the constant noise of TV and kids and more TV? Here is something that will occupy their minds as well as their hands, stir their imaginations, and give your ears a few moments of blissful solace: a box of felt pieces.

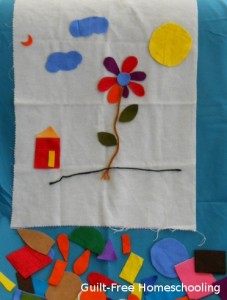
This was a favorite activity for my tactile child. It makes a great “lap toy” for quiet time. I started with some leftover pieces of craft felt, cutting them into geometric shapes and random shapes. A piece of flannel fabric (approx. 18″ x 24″) served as a background and could be spread over a sofa cushion, the carpeted floor, or a bed pillow, then folded up easily to fit into the storage box when playtime was done. [Hint: cut up an old flannel shirt, nightgown, or pillow case.] I used felt in bright colors, pastels, neutral colors, and black and white for squares, rectangles, triangles, circles, and ovals in a wide range of sizes. [Note: thin sheets of craft foam can be used, but the foam pieces tend to jump or cling from static electricity, and they lack the softer flexibility of the felt cloth.] The child makes “pictures” and patterns with the felt shapes on the flannel, stacking or layering pieces as desired. Smoothing the pieces in place provides an important tactile connection for a touch-feely child.

It works best to keep the smallest pieces larger than a coin — anything smaller will be difficult to cut. The largest pieces do not need to be bigger than your hand, since larger pieces will be more difficult to store flat. (An older child may enjoy cutting the pieces for younger siblings to play with, but remember the size limitations.) If you are feeling especially creative, add some half-circles, crescents, teardrop/petal shapes, stylized leaf shapes, and a few 4″-10″ strands of yarn (useful for flower stems, kite strings, and other necessary lines). Pinking shears can add variety to some pieces, but will be difficult to use on smaller pieces; the shears must also be quite sharp to produce a good zigzag edge. (Optional: applying iron-on interfacing will stiffen the felt, making cutting easier and the pieces more durable.)

Remember that this project will be a plaything, so your shapes do not have to be exactly measured or accurately cut. Keep it simple: free-hand cutting is adequate. Circles do not have to be perfectly round, and squares, rectangles, and triangles do not need perfectly straight sides or precise corners. Your child’s imagination will be broadened through playing with the felt shapes, and imagination is a great substitute for precision.

Quick trick for cutting triangles: cut squares or rectangles in two diagonally.
Quick trick for cutting petal shapes: cut a rectangle in two diagonally, making two long triangles, and round off the short end opposite the long pointy tip, producing the stylized silhouette of a single-scoop ice cream cone.
Quick trick for cutting leaves: round opposite corners of a square or rectangle, leaving the uncut corners as the pointy ends of the leaf.

Don’t feel that you need to make shapes that look like real objects. Your child’s imagination will take over, transforming those simple rectangles, circles, and triangles into wonderful things. A child who has always relied on printed coloring pages for “art class” may need some time and a little help to activate his imagination, stop depending on literal representations, and begin developing creative thinking skills.

Store the pieces as flat as possible in a box large enough to make clean-up easy for the child, and a container with a tight-fitting or locking lid will prevent accidental spillage. Any pieces that are wrinkled or folded when put away will be wrinkled and folded at the next playtime, so try to smooth each piece out as flat as possible. (The tactile child will actually enjoy this step.) Badly wrinkled pieces can easily be ironed flat again.

A solid felt board or “flannel-graph” can be made by covering heavy cardboard or a bulletin board with a large piece of felt or flannel fabric. The board requires more storage space than just a loose piece of cloth, but the board can be useful for illustrating lesson concepts to more than one child at a time by propping it up where all can see it at once. A small strip of felt on the back of paper pictures will make them cling to the fuzzy board — the entire back surface of the picture does not need to be covered. Sandpaper can also be used as a backing by cutting thin strips of fine sandpaper (1/2″ wide by 1″ or 2″ long) and gluing the strips to the backs of cardstock pictures or word/number cards. Large cards may need wider or larger pieces of rougher sandpaper to help support their weight. All sorts of visual aids for lessons can be used with flannel boards. Christian bookstores usually carry Sunday School lesson materials for felt boards, including great pictures of Bible heroes or generic pictures of children and families.

Ideas for Lessons:
Sorting — Can you sort pieces by color? By shape? By size?
Counting — How many of each color/shape/size?
Matching — Can you find a piece that is the same color/shape/size as this one?
Patterns — Circle, circle, square… can you make a pattern that matches this one?
Sequencing — Red, red, blue, red, red… what comes next?
Explaining Processes (using flannel-graph letters or cards)– To make the word kitty work for two kitties, we change this y to an i and add es.
Phonics & SpellingC-a-t, b-a-t, r-a-t… can you make more words that end with -at?
Reading — Put these word cards together to make a sentence.
Fractions — Is this rectangle divided into halves or fourths? (Use several squares in the same size to form rectangles.)
Arithmetic — How many ways can you group these pieces? (Use matching sizes & shapes to teach addition, subtraction, multiplication, division, perimeter, and area. Ratios and percentages can be illustrated with a mix of colors, sizes, or shapes: 3 red squares and 1 blue square = 3/4 red and 1/4 blue, or 75% red and 25% blue.)

Felt shapes and felt-backed pictures can be used for just about anything you can think of. Let your creativity take over as you adapt the felt pieces and pictures to whatever lesson you are working on, and watch more applications come to mind the longer you use them. Whether you use this as an educational tool or a quiet-time toy, the learning possibilities will be unlimited!

Verified by MonsterInsights