Workshop Wednesday: 100-Grids and Flashcard Bingo

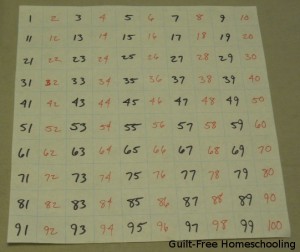
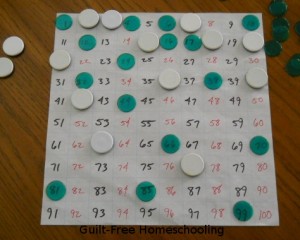
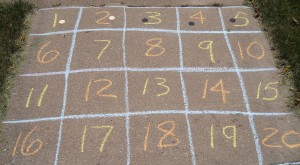
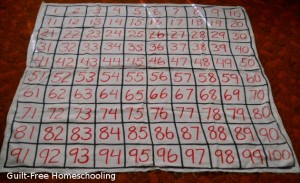
A 100-grid is another marvelous teaching and learning tool that can be made in numerous fun ways. A standard 100-grid contains the numbers from 1 to 100 (too obvious?) in ten rows of ten squares each, 1-10 in the top row, then 11-20 in the second row, and so on.

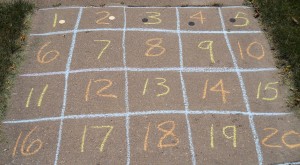
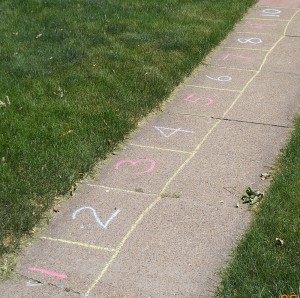
Draw the grid on the driveway with chalk; your kids may also get Dad’s permission to draw it on the garage floor if they promise to sweep it clean again when they’re done. I drew a 100-grid on an old tablecloth (you can also use an old bedsheet) with permanent markers for a reusable, storable, portable, floor-cloth version. These grids are big enough for your kinesthetic learners to hop around on for hopscotch-style, action learning!

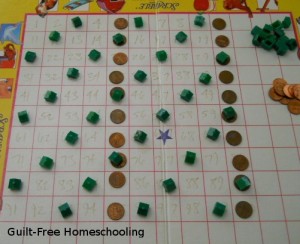
Draw a smaller 100-grid on paper or cover the blank-grid side of a Scrabble Junior game board with clear Con-Tact paper (to make it washable & more durable) and fill in the numbers with either wet-erase or dry-erase markers. These versions are more tactile, since your students can use game pawns, pennies, or dry beans for marking number squares in learning activities.

Add a visual learning element to your 100-grid activities by alternating colors of the numbers. To skip-count by 2’s, write the odd numbers in one color and the even numbers in another color. To skip-count by 3’s, use one color for the multiples of 3 and another color for all the other numbers. If you want to do this activity many times for many multiples, write all the numbers out in one color, then place a colored marker on the appropriate skip-counting intervals.

Do you have an auditory learner? Challenge him to say the numbers aloud while hopping or jumping from number to number, or while placing markers on the correct squares.

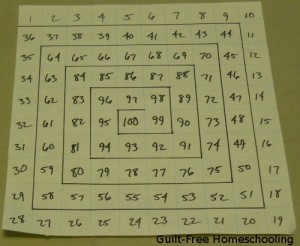
Try varying the arrangement of the numbers in your grid for some interesting game play. If you have a Chutes and Ladders game, you can see one simple variation of our grid — it starts in the lower left corner and zig-zags back and forth to the top. For another game board variation, start with 1 at an outer corner and spiral the numbers in toward the central 100 square–but you might want to outline the path to make it easier to follow.

For a very simple game to practice math skills using these novelty grids, remove the face cards from a normal deck of playing cards and use the remaining “math deck” for an addition game. Let each player select a pawn and set it just off the grid near the 1 square; on his turn, each player will turn up a card from the deck and move his pawn that many spaces. The first player to reach 100 wins that round. For more advanced play, let the black cards represent positive numbers (adding, or moving forward) and let the red cards represent negative numbers (subtracting, or moving backward).

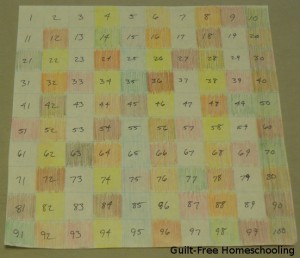
Another amazing math activity is the “Sieve of Eratosthenes.” This scholar from long, long ago created a fairly simple mathematical process for isolating prime numbers. On a standard 100-grid, have your students cover each multiple of 2, starting after 2 itself, to cover each number that has 2 as one of its factors. Since 2 has only itself and 1 as factors, leave it uncovered; it is a prime number. Now repeat with 3, covering each number after 3 that is a multiple of 3. Continue for 4, 5, 6, 7, 8, and 9. The numbers that are left uncovered are all prime numbers that have no other factors besides themselves and 1. This is fun to do on paper, using colored pencils to color in the squares and using a different color for each round. Starting with a light color and getting a bit darker on each round will show very plainly which numbers have the most factors — they will be very dark when you have finished.

Now for a bonus — here are the instructions for a game I call “Flashcard Bingo,” that is played on a 100-grid.

FLASHCARD BINGO

Equipment:

  • 1-100 chart
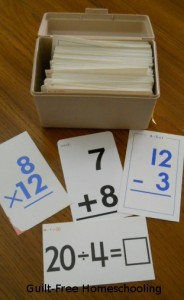
  • Math flashcards–combine addition, subtraction, multiplication, and division flashcards (The combination of cards used should be appropriate to the players’ skills.)
  • Several dozen markers for each player (colored paper squares, pennies, dry beans, etc.). If playing outdoors, larger objects, such as poker chips, can be used as markers.

Shuffle all the flashcards together and place them in an index card file box or other box that will hold all the cards and allow extra room for fingers to draw them out.

Use the honor system for not peeking at the answers if they are printed on the cards, or have players draw & hold cards for each other, covering answers as needed.

The first player draws a card at random and gives the answer to the problem. If he gives the correct answer, the player puts his marker on the answer number’s square on the 100-grid. If the card has two different problems on front & back, he may look at both problems and choose either side of the card for strategy: if the player already has possession of the square for that card’s answer, he may choose to answer the problem on the opposite side.

If the player gives an incorrect answer, the next player gets a chance to answer correctly and “steal” the square. If the second player cannot answer correctly, each player in turn is given a chance to answer and steal the square with the correct answer. The player giving the correct answer may not be holding the flashcard or may not have seen the answer on the flashcard.

At the end of a player’s turn, his card is returned to a random location in the box. Play proceeds to the left of the player who drew that card, even if he answered incorrectly, and even if the player who gave the correct answer is the next player in the circle.

If a player’s answer number is already covered by another player’s marker, the new player may “bump” the occupying player’s marker off the grid and place his own marker on the square, or the player may opt to take another card instead of bumping the occupying player’s marker.

If the player already has possession of the squares for both sides of the card, he may announce that he will combine both answers as desired (adding, subtracting, multiplying, or dividing) to achieve a hard-to-reach number square, such as prime numbers or large numbers. Paper & pencil may be permitted, but not calculators. If a player draws a flashcard with a correct answer of 0 or an answer larger than 100, and he is not able to combine the answers from both sides of the card, he may opt to draw again. There is no limit to how many cards a player can draw, as long as he already owns the squares representing the answers to the cards drawn, but he must use the first available square.

Winner is the first player to get 5 markers in a straight row, vertically, horizontally, or diagonally.

Advanced Option: Add a game die for another challenge. Players roll the die on each turn and add, subtract, multiply, or divide that number into the answer on the flashcard to determine which square to occupy on the grid.

Discussion Question: As your students play this game, ask them if they notice which part of the grid accumulates the most markers and if they can explain why that happens.

Younger Players Option—

Use only addition & subtraction facts from 1-20. Play on a 20-grid with 4 rows of 5 squares each (1-5, 6-10, 11-15, 16-20). Winner is the first player to get 4 markers in a straight row in any direction, vertically, horizontally, or diagonally.

For more ideas, see also:
Applying Learning Styles with Skip-Counting
Hopscotch–A Powerful Learning Game
Workshop Wednesday: Map Puzzle

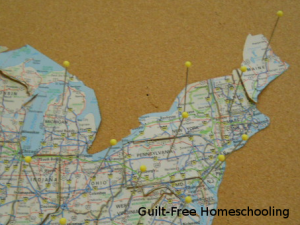
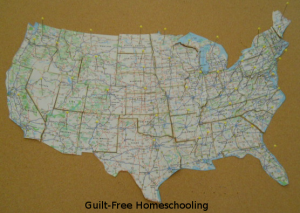
Take one large, atlas map of the USA (preferably an older one, not the one needed for an upcoming vacation or business trip). Cut it apart on state borders; mine was a 2-page map, so I taped the pages together before cutting the states apart. Optional: Leave the smaller states of Rhode Island, Connecticut, Massachusetts, Vermont, & New Hampshire together as one unit, making them slightly harder to lose. Using a large bulletin board and some long “quilting” pins (mine are approx. 1 5/8″ long), reassemble the map by pinning the state puzzle pieces in place on the board, forming the contiguous 48 states.


This puzzle can take students further than traditional USA jigsaw puzzles, since the pieces are not different colors and the highway markings can be used as clues for lining up the pieces. State borders become less noticeable, and major cities, highways, lakes, rivers, and other geological features are included on an atlas map, taking this from a simple puzzle activity to a fascinating exploration. The learning continues after the puzzle is assembled, by following the interstate highways from state to state, coast to coast, or border to border. Students can trace the route of a past family vacation or plan another, perhaps even evaluating various paths of travel across the country. Select two states at random and plot the most direct route from one to the other or the most scenic route or the best route to use during summer or winter driving for avoiding super-hot weather or snowy/icy roads. Older students who are nearing driving age may find this activity particularly interesting.


The map puzzle in these photos does not include Alaska or Hawaii, since they are usually not represented on maps in the same scale as the other states. The state of Hawaii consists of more than 100 islands, not just the eight larger islands we usually see on maps. The total land area of the Hawaiian islands is less than the area of the state of New Jersey, but greater than the area of the state of Connecticut. Alaska has more than twice the land mass of Texas, but Alaska’s boundaries and archipelago islands stretch its dimensions to massive proportions (see link below). Other state-to-state comparisons can easily be made with these puzzle pieces. A globe or world map is also helpful in comparing size and location of the various states, using latitude and longitude lines as guides.

Another way to supplement your explorations is with Google Maps. Use the satellite views to zoom in on tiny islands or coastal details, or visit the Grand Canyon, Mount Rushmore, Niagara Falls, or New York City’s Central Park (or anywhere else!) with Google Street View to take a virtual field trip! Many locations include a selection of up-close-and-personal photos from previous visitors to enhance your “travels.”

Here is a map showing the full size of Alaska as compared to the continental USA — http://www.tongass-seis.net/media/images/AK-USA.jpg

Other topics could be explored with a little extra research, then compared to today’s highways on this puzzle map:
The Appalachian Trail
The Lewis & Clark Expedition
The Oregon Trail
The Santa Fe Trail
…and many others!

Similar puzzles can be made from other maps for more fun geography — state road maps cut on county lines; a Canadian map cut on province boundaries; a map of Mexico or Australia cut on state borders; a map of South America, Europe, Africa, or Asia cut on borders between countries.

Workshop Wednesday: “Stealth Learning” Through Free Play

“Stealth Learning” is my term for lessons that don’t appear to be lessons but can teach as much as or more than their formally planned and structured counterparts. A prime example is letting kids play with manipulatives or learning aids, instead of using them only to illustrate planned lesson activities. Kids will naturally use these materials in ways other than their formal use, but that’s where the stealth learning part comes in. Sneaky, right?

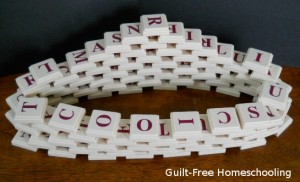
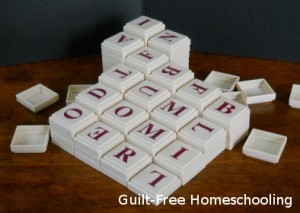
Suppose you subtly leave a set of Scrabble letter tiles lying on the table after the spelling lesson is done (yes, Scrabble tiles are fabulous as tactile spelling manipulatives), or you might casually place the tiles on the table well before they are needed, in anticipation of the spelling lesson (again, stealth teaching mode). Now excuse yourself to go shuffle the laundry, pull something out of the freezer for dinner, or some other valid excuse to leave your student in the same room as the abandoned manipulatives with no other planned activities to occupy his attention. A quick admonition to “wait here, I’ll be right back” may be necessary for some students, but the pile of pieces on the table will beckon to his fingers.

Feel free to delay your return as needed to give your budding explorer ample time to begin stacking, aligning, and organizing the pieces in patterns and structures that will teach him great stealth lessons in spatial math concepts such as height, width, depth, horizontal, vertical, parallel, perpendicular, area, perimeter, volume, and so on. He may not yet know all the proper terms for what he is learning, but those will come through formal lessons later. For now, let him play and experiment and learn through stealth methods.

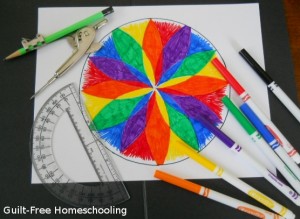
Lining up letter tiles or math blocks in a checkerboard design is valid learning. Stacking letter tiles in an attempt to create one very tall column is valid learning. Building forts or fences with dominoes is valid learning. Pouring water or cornmeal or rice from one measuring cup to another is valid learning. Drawing intricate designs with a compass is valid learning. Coloring the squares of graph paper to create elaborate patterns is valid learning. Borrowing parts and pieces from your collection of games is creative play and stealthy learning, and sorting them into their respective sources again provides even more stealthy learning. These lessons may not be what the designers of these items originally had in mind, but they are valid lessons, nonetheless.

Think for a moment about the lessons that are learned from the simple act of lining up dominoes on end into curvy rows that can be toppled in rapid-fire succession by one gentle touch on the first domino in the line. First, you learn that it requires a steady hand, precise fine-motor coordination, and siblings who won’t purposely jiggle the table. Second, you learn about spacing the dominoes accurately enough that each one strikes the next with precision when falling, and you learn problem-solving skills when things go awry, causing the process to stop before the entire row has gone down. Third, you learn whether you will experience that momentary thrill of watching your feat of engineering perform in exactly the manner you intended, or if you need to make a few more adjustments to your design and try again. Those are extremely important lessons in life, not just in dominoes. Who has not done this activity? How many of us have repeated it again and again and again until we finally achieved success? Has anyone given up domino stacking forever because of an initial, failed attempt? These are more than stealth lessons of observing physics in action. These are stealth lessons in precision and perseverance that no spelling workbook or math lesson can teach, even though precision and perseverance are required to succeed in both spelling and math. These are lessons of the kind that spurred the imaginations of Thomas Edison, Isaac Newton, and Benjamin Franklin, and caused them to wonder “what if…?”

Allow your students to combine components from a variety of learning aids and games, designing new ways to use them, and ultimately learning new lessons—stealth lessons. To restrict “learning aids” from being “playthings” is to limit learning. Another way to encourage further discovery-play is by innocently asking leading questions, such as “what would happen if you did this…” or “is it possible to stack those like this…?” You can take advantage of a teachable moment to add the appropriate vocabulary now, or you can wait until later, reminding them of their free-play adventures and relating those to the lesson concept of the day. Try not to spoil their fun by instructing your kids in how to play with these new-found toys, but let their imaginations drive them. Insisting they formally narrate what they’ve learned is another fun-killer, but do listen with interest as they excitedly volunteer details of their discoveries. By paying close attention to their stories, you’ll notice what they’ve learned—even if they don’t realize they’ve learned it.

Playing games requires some degree of thought, planning, or strategy, and that translates into stealth learning. Word puzzles based on quotations, axioms, and folk wisdom provide more stealth learning. Other types of puzzles teach logic, math, and other valuable skills through very stealthy methods. Play is learning, and learning can be play. Stealthiness connects the two.

See also:
A Day without Lessons
The Know-It-All Attitude
Homeschool Gadgets: An Investment in Your Future or a Waste of Money?
The Importance of Play in Education
The Value of Supplemental Activities
Is Learning Limited to Books?
Sorting toys Is Algebra
Gee Whiz! Quiz

Topical Index: Learning Outside the Books


Workshop Wednesday: Natural Science

Summer is a great time for science exploration. The backyard is the perfect location for mixing Diet Coke and Mentos (search You Tube if you don’t know what I’m talking about), and the weather is relatively cooperative for spending time outdoors. There are abundant species of plants, birds, bugs, and other critters just waiting to be studied, so by adding a few basic supplies, we can turn a boring afternoon into a great learning experience.

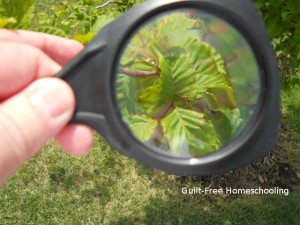
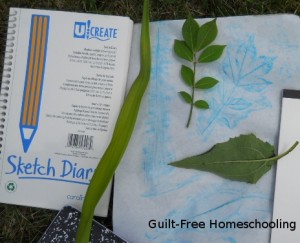
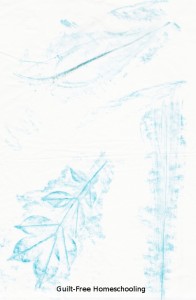
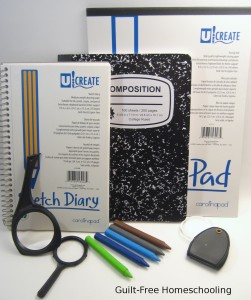
The required supplies may surprise you: a pocket-sized magnifying glass is good enough for this project, and some simple drawing supplies complete the list. A small sketchbook and pencil are good for making simple drawings, tracing paper and dark crayons work well for texture rubbings, and a notebook and pencil can serve as your journal for noting what species are found or recording any experiments you try. Toss these into a bag or backpack, along with some bottled water, snacks, bug spray, and sunscreen, and then head out on an exciting trek through the wilderness or a walk around the block, which can yield just as many thrills in the variety of species to be found!

We went on picnics and nature hikes in our favorite parks, but we also found that walking the same route through our neighborhood would reveal new discoveries each time. The trees bloomed and leafed out at different rates in the Spring, flower beds bloomed throughout the seasons, and weeds could be as much fun to identify as anything else. Birds were another category we learned to identify, both by sight and by their songs or calls. Fishing with Dad always gave us opportunities for seeing more natural wonders.

We made rubbings of leaves, we drew sketches of birds and bugs (not very artistic, but good enough to help us look them up later in wildlife reference books), and we studied all sorts of things through a magnifying glass. Sometimes we just sat in amazement and watched the miniature world of an anthill or a pond full of tadpoles. We watched bees and wasps diligently visiting every blossom on an apple tree. We giggled at the antics of squirrels burying acorns, then digging them up again only to bury them in another spot. We listened to the birds and learned to mimic them well enough to have them answer when we called. We sorted a handful of random pebbles into several types of rocks. We carefully pulled flowers apart, petal by petal, to study the intricate designs. The various categories of nature study could fill an entire summer by selecting a different interest each day!

When I was in high school, my science teacher required each student to compile an extensive collection of plants as a year-end project, and each year he increased the number of species! I think the final tally was 40 wildflowers, 40 trees, 10 grasses, and 5 mosses – all different, no duplicates, and we had to label each one with its correct name. My kids loved the idea of being able to identify that many individual species, so we hiked through some of the same areas that I had frequented during high school, just to see if we could find those same plants again. I wish that when I was making my high school collection that I’d had the book we used then. We had a wildlife reference book that covered everything from trees to mushrooms to wildflowers and more creepy-crawlies than you want to know about. There are now many websites for reference, and you can find apps for your smart-phones, too! If you don’t already own or have access to the supplies listed above, visit our Etsy shop to purchase the GFHS Natural Science Mobile Learning Lab, which includes a Usage Guide with many activity ideas.

Here are a few references to get you started:
“Natural Science Mobile Learning Lab” from Guilt-Free Homeschooling
What Bird Is That?
What Tree Is That?
North American Wildlife

Workshop Wednesday: Building Blocks for Success in Spelling

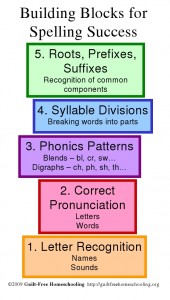
Spelling, like math, is a subject that requires several foundational skills learned in sequential order, as shown in the diagram, beginning at the bottom and building up, one skill upon another. No one is born knowing how to spell correctly, but the individual steps to spelling proficiency can be somewhat tricky to identify by those who have already been reading for many years.

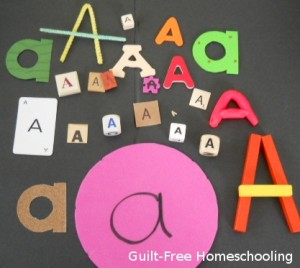
Skill #1 is the first building block: learning to recognize letters both by their names and by the sounds they represent. Since vowels can represent multiple sounds, depending on their combination with other letters, it is simplest to use their names and the short vowel sounds during the recognition phase. I preferred to teach my children upper case letters first, since that provides fewer opportunities for reversals (such as confusing b and d). Once the child knows the upper case alphabet well, the lower case letters can be introduced as the “little brothers” of the first set. Pairing the big brothers and little brothers together also helps avoid reversals, even when they don’t look that much alike—because kids easily understand the concept of siblings who belong together but aren’t identical.

Skill #2 is vital: correct pronunciation of each letter sound, leading to correct pronunciation of words as reading begins. A child must hear and speak the sounds correctly to be able to match those sounds to the appropriate letters. Some children may have already formed bad habits of mispronouncing certain sounds as toddlers (for example: difficulty with l’s, r’s, or w’s, lisping with a th-sound instead of an s, or dropping the initial s from sc-, sl- or sw-blends), but the visual application of learning the letters that represent those sounds can help straighten out the mistakes. However, if family members mimic the youngster’s incorrect pronunciation habits on a routine basis, confusion will follow, since the child who is learning to read won’t know which sound is correct! Take the time to instruct the child slowly and thoroughly so that he can learn to make the sounds properly. It is much better to learn correct methods in the loving security of home and family than to continue incorrect, juvenile habits into adulthood. Elmer Fudd’s manner of speaking may have been funny in cartoons, but if Elmer had been an actual person, his speech may have caused him to be taken less seriously in real life. Some local dialects can also twist the pronunciations of words away from their actual spellings, which is why television news reporters are encouraged to minimize regional forms of speech and learn to speak without a local accent.

Skill #3 consists of learning common patterns of letter combinations and the sounds made those combinations, known collectively as phonics. This level includes many different phonics patterns, from long and short vowels to vowel blends, consonant blends, and digraphs (the new sounds created by certain combinations, such as ch, ph, sh, th, and wh). Silent letters add another twist, but those are usually predictable, since they occur within specific combinations. (The ABC’s and All Their Tricks  is a wonderful reference book, explaining the origins of spelling patterns, giving examples of words using each pattern, and answering the spelling questions that had stumped my teachers throughout my education.)

Skill #4 comes after the phonics patterns are mastered: syllable division is the next logical skill to achieve. Knowing how words separate into predictable syllables helps the student tackle new, longer words and get the pronunciation correct, usually on the first try.

The #5 building block skill for spelling success is learning prefixes and suffixes and being able to recognize them from the root word. We kept our large dictionary handy that showed the meanings of the individual components of each word—a fascinating study. My students loved compiling lists of words that were all based on a common root and seeing how the prefixes related to the words’ definitions—instruct, destruct, construct, etc. We played the Rummy Roots card games to learn common Greek and Latin roots that have become part of our everyday vocabulary. The mastery of roots, prefixes, suffixes, and other syllables was proven by accurately reading the list of chemical ingredients on a shampoo bottle!

As my children conquered each of these skills, I encouraged them to “hear the sounds in order” in each spoken word, so they could then write those sounds in the correct order for accurate spelling. It takes careful listening to spell words correctly, and the visual skills attained through these building blocks will work together with the sounds heard to achieve success.

See also:
ABC Flashcards
Letter and Number Recognition
What Is the Missing Element?
When Children Mispronounce Words
A New Approach to Spelling-Word Lists

Workshop Wednesday: Hopscotch – A Powerful Learning Game
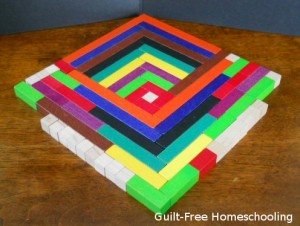
Who knew that a patch of concrete, some chalk, and a couple of rocks could produce a fun way to learn just about anything? When I was a little girl, I played hopscotch in the traditional way, tossing my stone and jumping from square to square, just as a game for practicing my tossing and balancing skills. Hopscotch can also be used as a kinesthetic learning method, involving the big muscles of arms and legs, pumping information through the blood vessels to the brain. I can see many other uses for the basic method of hopscotch, providing a great method for teaching preschoolers, kinesthetic learners, active children, or anyone else who just needs a break from sitting at a table for one more worksheet.

Let’s start by changing the standard hopscotch pattern to a row of 10 squares, numbered from left to right, and let your little ones practice counting as they hop from box to box and back again—tossing a marker stone or beanbag can be used later as their counting skills increase. Do the same thing with a row of ABC’s, first for letter recognition and later for reciting the sounds made by each letter or for a word beginning with that letter. Mom can say a word, and the child can hop to the letter that begins the word. For more advanced students, change the ABC’s to a grid pattern, and try “Twister Spelling” by putting hands and feet in the correct squares to spell the word. Use multiple beanbags, poker chips, or plastic yogurt lids for markers, and challenge your kiddies to spell out words by placing their markers on the correct letter squares.

You can also practice addition and subtraction facts with a hopscotch grid. Draw a 1-10 grid by making two rows of five squares each: 1-5, 6-10. Make these boxes large enough for your student to stand in, sort of like a hopscotch game. Start with simple addition problems by asking: If you put down [this many] markers, starting with Box #1 and putting one marker in each box, and then you add [this many] more markers, how many boxes will have markers in them? What is the largest number box that contains a marker? Repeat this activity with as many different number combinations as possible, until your student knows addition facts from 1-10 so well that he cannot be stumped. Then draw two more rows of boxes, extending the grid to 20 (11-15, 16-20), and continue the addition practice with problems up to 20. You can also work on learning doubles in the teens: 5+5=10, 6+6=12, 7+7=14, 8+8=16, 9+9=18, 10+10=20. These facts will help him with problems where the answer is between 10 and 20.

Does one of your students have trouble with subtraction? Using the 1-20 grid, pick a problem that may have stumped your child, like 13-9=? In this example, cover all numbers larger than 13. Ask: If you put down 9 poker chips, with one on each box, starting with 13 and counting down, what is the largest number box that will still be showing? If he’s already experienced at using the 1-20 grid of numbered boxes, he will be able to recognize the row of 6-10 as being 5 boxes. Then he can see that there are 3 boxes for 11-13, so those two rows will use 8 of his 9 poker chips; now he can put the last chip in the largest numbered box in the top row (the 5), and he’s left with 4 as the largest number box still showing: 13-9=4

Another helpful trick is to show your student how to work up or down from 10 when the answer to a problem doesn’t come to him immediately. For example, 13-9=? Let’s see, I know that 10-9=1, and 13 is 3 more than 10, and 3+1=4, so 13-9=4! How about 17-9=? 10-9=1; 17=10+7, and 1+7=8, so 18-9=8! Did you follow that? Children can get discouraged when they don’t know or can’t remember an answer immediately. Showing them several different methods for figuring out the answer helps them to see that they are smart enough to find the answer anyway. Working toward the answer from 10 or from the nearest double is a legitimate method of solving the problem and is actually a better way to learn than just rote memorization, since it uses more creative solving methods.

Are you ready to take this up one more notch? Help your students draw a 1-100 grid (10 rows of 10 squares each, numbered 1-100) and challenge your young mathematicians to toss two beanbags onto the grid and add the resulting numbers. Add more beanbags as their skills increase, or switch to subtraction or multiplication. Use beanbags in different colors (or marked with mathematical operation symbols) for students with appropriate abilities: Color #1 means add this number, Color #2 means subtract this number, Color #3 means multiply by this number, and Color #4 means divide by this number. Use several beanbags for each mathematical operation, drawing them at random from a bucket to create an amazing running math problem. Number squares can be chosen by random tossing or through careful aim. Challenging siblings to toss the beanbags and create problems for each other to solve may result in some serious stretching of math skills! Other possibilities are to toss two beanbags to create a fraction, then simplify it as needed—and more beanbags mean more fractions, which can then be added, subtracted, multiplied, or divided, always reducing the answer to its simplest form. The hopping part of hopscotch doesn’t come into play with this method (unless your kids figure out their own creative way to use it), but the tossing and retrieving of beanbags will still give your wiggly kids plenty of action.

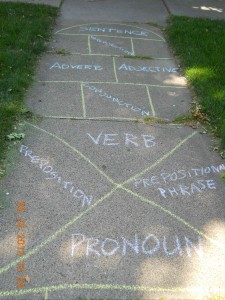
Now you think you’ve heard all of the possible ways to use hopscotch in learning, right? Not at all! Let’s go back to the original hopscotch pattern, but instead of numbering the squares, write in parts of speech: noun, pronoun, verb, adjective, adverb, conjunction, preposition,  prepositional phrase, and interjection.  Hopping through the boxes gives the student a chance to think of a correct example word to give when he stops to pick up his marker. Use more specific terms as your students’ grammar skills increase: irregular verb forms, verb tenses, plurals, reflexive pronouns, dependent clauses, and so on. I included a “sentence” space at the end, and students should make their example sentences match the level of grammar being studied.

If you have a student who is really interested in science, specifically chemistry, and if you have access to a large patch of concrete, consider helping him draw out the periodic table of elements and numbering the squares accordingly. Let him make simple flashcards for each element to fit the boxes on his diagram (cereal boxes are a great source for inexpensive flashcards; write on the back with permanent marker) and practice putting them in their proper places. Flashcards might include the atomic number, the element name and symbol, and the atomic weight. More advanced students may want to include more detailed information and use the jumbo flashcards for memory practice. Other hopscotch applications: a diagram of the solar system would provide practice at naming the planets, a simplified skeleton could be drawn for practice at naming the bones, or a map of the United States (or any geographic area) would provide practice at naming states, capital cities, or other geographic features. Coordinate planes with x- and y-axes provide a large grid for plotting specific points with poker chips. Students of advanced math can solve complex equations, plot the points from multiple solutions, and draw the curves with yarn or string.

Any of these hopscotch learning games may also be drawn with permanent markers on an old, discarded sheet or tablecloth (check local thrift stores), resulting in a reusable “game board” that can be folded up and stored between uses. Use the cloth on grass, carpeting, or other surfaces where it is less likely to slip underfoot. Beanbags aren’t required, but the “marking stone” needs to be something that won’t roll away when tossed—or blow away if used outdoors.

If the weather isn’t cooperating for outdoor activities, or if you don’t have a suitable surface for chalk, or even if your students are just not excited about going outside and jumping around where anyone in the neighborhood might see them, these activities can also be done indoors by using masking tape or sticky-notes on the floor. You can even draw the grids on a large sheet of paper and use coins or game pawns as markers.

See also:
What Is the Missing Element?
Building Blocks for Success in Math
Beanbags (No-Sew DIY)

Workshop Wednesday: Pipe Cleaners

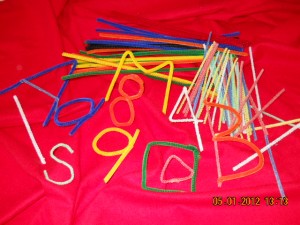
A supply of pipe cleaners, also called chenille sticks, in various sizes and colors provides a great quiet-time activity that will keep almost any child busy for a good, long time. For teaching purposes, pipe cleaners can be formed into a variety of shapes as versatile manipulatives for your tactile students who need to get their hands on something to be able to learn it. The activities listed below can be used interchangeably for letters, numbers, or geometric shapes. Some students may need to try just a few of these activities, while others may want to try all of them… repeatedly.

Bonus tip: It helps to store the pipe cleaners in a shoebox or other container that is large enough to hold several of your students’ artistic creations! You can also take pictures of the more complex creations, enabling the student to dismantle the project and straighten out the pipe cleaners for their next use, while still saving proof of his hard work and imaginative designs.

• Challenge an early learner to duplicate the letters made by Mom or an older sibling.

• Use multiple pipe cleaners to make bigger letters. Using several colors can help younger students recognize the various components of each letter as the separate pencil strokes required to write it.

• Make multiples of each letter in various colors and sizes, and then play a matching game by grouping all the matching letters together. Students can also match pipe cleaner letters to other sets of letters: magnetic letters, letter tiles from games, flashcards, ABC books, etc.

• Match upper & lower case letters together as big brother/little brother pairs.

• Make letters to match those shown on letter tiles from games or on letter flashcards (even home-made). Shuffle cards and place stack face down, turning up the top card for the challenge letter, or put letter tiles in a clean sock or paper bag, then draw one tile at random for the challenge letter.

• Another version of the letter challenge game is to make the opposite case letter of the challenge card or tile. If a flashcard shows a lower case letter, challenge the student to make the upper case version of that letter; if a letter tile shows an upper case letter, make its lower case counterpart.

• Show how flipping a lower case “b” can transform it into a “d,” “p,” or “q” to help children learn to differentiate between the letters. The same principal works for turning a lower case “n” over to become a “u,” or turning an upper case “M” over to look like a “W.” Demonstrating that certain letters do have similar shapes can help children understand which is which and be certain they are using the correct one.

• Twist the ends of several pipe cleaners together to make a long line of pipe cleaners and bend it into the shape of cursive letters or entire words in cursive script.

• FEEL the letters blind-folded or with eyes closed (no peeking!) and try to identify them correctly. This can be tricky if the letter is held upside down or backwards, but turning it over and all around will help students learn to identify and distinguish between similarly-shaped letters. Some students may enjoy the challenge of trying to identify letters that are purposely positioned upside-down or backwards.

• Challenge students to “reproduce this pattern” of geometric shapes, numbers, or letters, even repeating the same colors used. This same activity works well for teaching pattern recognition when stringing beads, but mistakes can be corrected more simply in this version by moving a few pieces around, instead of un-stringing the entire project, and can therefore be less stressful for a sensitive student.

• Numbers made from pipe cleaners can be used to illustrate early math problems in a fuzzy, tactile way, providing a helpful transition between the “counting beans” stage and doing written problems.

• Lay a sheet of paper over any flat pipe cleaner creation and rub across the paper with the side of a crayon to create a “rubbing” image of the letter, number, or shape.

See also:
ABC Flashcards
Letter and Number Recognition

Verified by MonsterInsights