Workshop Wednesday: Math Measuring Tape

Do you have a child who needs to see things for himself in order to understand lesson concepts? Have you used math manipulative blocks but he’s still just not quite getting it? Here’s a unique idea for a powerful math tool that you can make yourself from simple graph paper. By making a special measuring tape that exactly corresponds to the size of whatever math manipulatives you use, your students will have a customized tactile and visual learning aid.

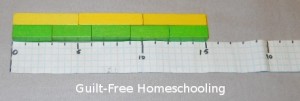
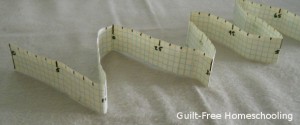
Cut 1 or 2 sheets of graph paper into 1-inch wide strips and tape them together for the length you desire (make sure that no strips end in a partial square). Graph paper marked with five squares per inch (available in office supply stores) is compatible with the centimeter-scale Cuisenaire Rods that we used: 2 graph-squares = 1 centimeter, so marking numbers on every other line produces a centimeter measuring tape. (Yes, centimeter graph paper would have been easier to use, but I couldn’t find any in my area — so I improvised!)

To illustrate skip-counting by 2′s, accordion-fold the tape on every other number, and then say (auditory) the number for each fold-increment. Adapt and repeat for other skip-counting intervals. (The measuring tape in the photo only has numbers at intervals of 5, but feel free to write on as many numbers as your children need.)

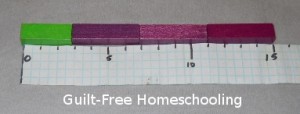
Your students can lay Cuisenaire Rods on the tape to demonstrate addition & subtraction facts. Arranging different length rods to equal the same total (1+5, 2+4, 3+3, etc.) helps them see by yet another method that different numbers can add up to the same total. The measuring tape becomes a learning aid for memorizing facts as your kids line up blocks or rods on it and see the resulting numbers.

Repeat the same process for multiplication & division facts: 3×5, 5×3 — both measure to 15.

This method can also help students understand uneven division problems. For 15 divided by 4, start placing 4-rods at the 15 and filling in backwards toward 0, but fill in the gap with a “remainder” rod, in this case a 3-rod fits as the remainder.

We used this measuring tape by itself to illustrate multiplication and division facts by accordion-folding the paper tape into 6 sections of 8 centimeters to show 6 x 8 = 48 and other facts. My origami-loving son really enjoyed this foldable number line, and he would take a few seconds during a math problem to fold it back and forth, just to be certain of his answers.

The measuring tape can also be used as your kids run around the house, measuring everything in sight (kinesthetic) for practice at measuring and estimating how large certain objects will be, according to the scale used by your math manipulatives. For instance, my sofa may be 86″ long, but measuring it with a centimeter scale makes it 215 centimeters. My kids liked the challenge of guessing how many centimeters first, then measuring an object to confirm the answer. This is also a great way to compare inches and centimeters, and they can use a ruler, yardstick, or measuring tape in inches to confirm their answers.

If you use another form of math manipulatives other than Cuisenaire Rods, you can adapt the size of the measuring intervals on this homemade tape to coordinate with your own manipulatives.  Graph paper with 4 squares per inch (1/4″ squares) can be marked for 1/2″, 3/4″, or 1-inch manipulatives. Remember the sofa we talked about above? It would be almost 115 connecting cubes long, when measured according to a scale for these 3/4″ cubes.

P.S. — We stored our measuring tape neatly by folding it up and using a large paper clip to hold it in place. ;-)
Workshop Wednesday: Patterns, Part 2 — Number Patterns

Are you ready for some more patterns? How about making them a little trickier? Our previous article on Patterns focused on learning to recognize patterns of colors or shapes and reproduce them accurately. This article steps that up a few notches with patterns of numbers.

We all learn a very simple number pattern when we first learn to count to 10: 1, 2, 3, 4, 5, 6, 7, 8, 9, 10 — a series that increases by one with each step. Skip-counting is increasing each step by an amount larger than one, whether counting by 2’s, 3’s, 5’s, 10’s, or 87’s.

We could even select our starting point and then add by a set increment for another variation of skip-counting:

What if we varied the increments with a consistent pattern? Suppose we started at 0 and added 1, then added 2, then 3, then 4, and so on. Our number pattern would look like this: 1, 3, 6, 10, 15, 21, 28, 36, 45, 55, and on and on. If our increment added only by even numbers, the pattern would look like this: 2, 6, 12, 20, 30, 42, 56, 72, 90, 110.

My kids loved to watch an old PBS television show called Square One TV that had a segment called Mathnet, where math “detectives” solved mysteries dealing with numbers. One episode of Mathnet (The Case of the Unnatural) involved a couple of friends who regularly challenged each other with a game they called “Guess My Rule,” where a player had to figure out what rule had been used to create a series of numbers and respond with the next four numbers in the series. The strings of numbers they gave were more complicated than simple skip-counting. For example, the series of 1, 3, 7, 15 is achieved by doubling a number and adding 1: starting at zero, double it (still zero), then add 1, gives 1 as the first number in the series; double it to 2 and add 1, equals 3; and so on. This rule is “double plus 1,” and the next number after 15 would be 31. To play it yourselves, have one player create a series of at least four numbers, and the second player has to determine the “rule” and give the next four number in the series. What number rules can you create to make interesting number patterns? Remember that the rule must be consistent throughout your series.

Another fascinating number pattern is called the Fibonacci series, in which the next number is created by adding the previous two numbers together, for as long as you’d like to keep adding.

Fibonacci numbers are found throughout nature in very intriguing places. You may already know that if you slice a banana and then break that slice apart, the banana will naturally separate into 3 segments. But notice the banana skin: there are 5 segments or sides to an unpeeled banana — 3 and 5 are adjacent Fibonacci numbers. Some very interesting Fibonacci numbers have been observed in nature — petals on some flowers, leaves and branches on some plants, scales on pineapples, bracts on pine cones, and seeds in sunflowers all occur in arrangements that use Fibonacci numbers. Just like the banana segments and the sides of an unpeeled banana, the numbers often show up as adjacent Fibonacci numbers. The Creator of the universe is not just an artist, He’s a mathematician, too!

Check out these websites for more fascinating info on number patterns:

Square One TV/Mathnet, The Case of the Unnatural

Fibonacci in Nature

Fibonacci Numbers, the Golden Section and Plants  — detailed site including do-it-yourself activity ideas

Who Was Fibonacci?  Leonardo of Pisa

See also:

Patterns


Workshop Wednesday: Patterns

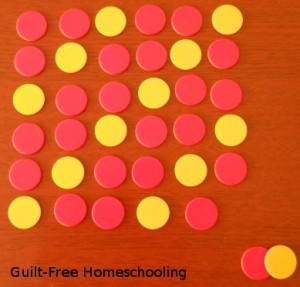
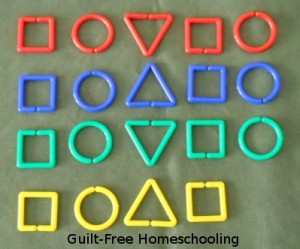
Patterns are everywhere! Patterns can be small, large, or in-between. Patterns can be simple or complex. Recognizing patterns is a fundamental math skill that we use everyday, from sunrise and sunset to left and right shoes. Patterns are not just what keeps the peanut butter on the inside of our sandwiches, they are also what makes life fun and interesting. Let’s explore some designs, just to see if we can spot the patterns (hold your cursor over each picture for a hint). Looking for patterns sharpens your visual skills!


Create a simple pattern of colors or shapes using game pieces, beads, coins, buttons, or anything suitable you have on hand, and challenge your students to repeat it. Beginners may need a little help with recognizing what makes the pattern, analyzing when and how it repeats, and the logic of what comes next, but they will catch on quickly. Some students may repeat a pattern accurately the first time, but may not catch a mistake if they are repeating it multiple times. Help them learn to check their own work for errors.

Anne Sullivan taught Helen Keller using this method and stringing beads.

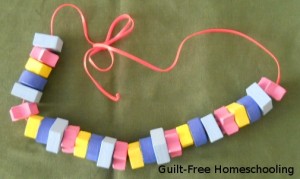
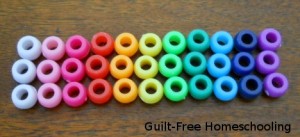
Beads can be strung in patterns on yarn, ribbon, shoestrings, leather boot laces, fishing line, pipe cleaners, toothpicks, etc. Use large wooden beads, plastic pony beads, Hama beads, tiny glass beads, etc. Slice pool noodles into jumbo beads to string onto heavy wire, garden hose, or a yardstick. Start a pattern, and let your kids finish it — or let them challenge themselves or each other in making patterns.
We make patterns when we set the table with plates and silverware. We make patterns when we match up socks in the laundry. We make patterns with our footprints when we walk through sand or snow.  Pattern recognition can be applied to all phases of life, from lining up toy trucks to analyzing when a machine can be expected to break down from wear. Yes, that’s another application of patterns! And now, just for fun, watch this crazy video from Weird Al, all about PATTERNS!  Want to grab some graph paper and colored pencils and make more patterns?

See also:
What Is the Missing Element?
100-Grids and flashcard Bingo

Workshop Wednesday: Letter or Number Manipulatives (DIY)

Have you ever found yourself wishing you had a whole big bunch of fancy-schmancy letter or number manipulatives to help your struggling learner? Well, don’t move, because you’re about to learn how to make them inexpensively for yourself!

A child who has difficulty learning letters or phonics patterns, identifying syllables, spelling words, or reading will usually benefit from using letter manipulatives, something he can move around and re-position himself. The struggling student might be any age, so using letter tiles is helpful for older students who already know the letters but struggle in spelling or syllable divisions.

Number manipulatives are helpful for the student who struggles with math, as are extra tiles with math operation symbols, to use them in building and solving equations. It’s one thing to use math cubes to illustrate 3 + 2 = 5, but it’s another thing entirely to use number tiles to solve 3 + 2 = 4 + y.

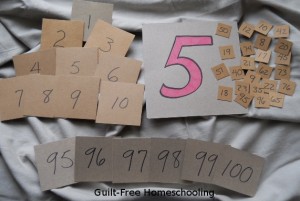
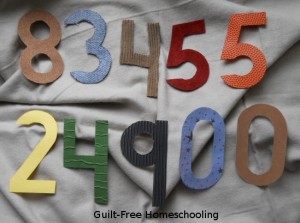
It’s fairly easy to cut out letter or number shapes by enlarging a simple font to super-size status, about 3″ tall (or around 350 points) on your computer’s word processor. Experiment to find a font you like, enlarge the letters or numbers, then print them on cardstock and cut out. These shapes can also be used as templates for making cut-out letters or numbers from materials that can’t be put through a computer printer, or to get more letters or numbers from a single sheet of paper.

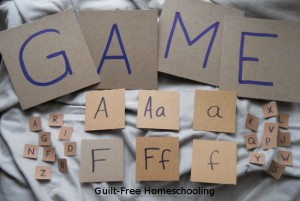
Squares or rectangles can be turned into cards or tiles by writing the letters or numbers on them with a Sharpie marker. I have used cardstock, sandpaper, and cereal box cardboard for these with great success. The sandpaper adds a nice tactile element for kids whose learning styles appreciate more texture. I have varied the sizes, depending on the age of the kids using them and the application they will fulfill — 6″ squares are great for matching games on the floor, but 1″ squares work great as tabletop tiles for spelling practice. We had a few hundred small letter tiles made from cardstock, which were great for building a list of spelling words.

For students who are just learning their letters, I highly recommend starting with upper case letters first, then once the student knows them without mistakes, introducing the lower case letters as the “little brothers” of the upper case. This results in less confusion and fewer possibilities for reversals.

These cut-out letter shapes are wonderful tools for teaching and learning recognition, matching, phonics, spelling, syllables, and so on, whether by themselves or in combination with cards, tiles, and a variety of sizes and font styles (especially helpful for learning to recognize all the different appearances letters can have). You could even make some in the exact same size and shape as the letter tiles from a Scrabble or Bananagrams game and combine them all for even more learning fun!

I have made letter and number shapes and cards from these materials:

  • Sandpaper (fine to medium texture works best)
  • Craft foam
  • Textured fabrics (corduroy, vinyl, fleece, denim, etc.)
  • Cardboard (including cereal boxes), poster board, etc.
  • Cardstock
  • Textured scrapbooking paper

Bonus Tips:

  • Sometimes I needed to glue an identical shape of cardstock or cardboard to the backs of some flimsy materials for stability and durability, especially with cloth or thin paper.
  • Wood or foam cut-outs can sometimes be found with craft supplies for a quicker start.
  • It can also be helpful to decorate the front side and/or bottom edge of letters and numbers to help kids learn to orient them correctly (even a line drawn with a marker can be enough to discern top from bottom or front from back).

Letter Activities:

  • Matching — sort lots of different letter shapes, tiles, and cards into separate piles for each letter. Alphabetizing — mix up one set of letters (A-Z) and put them into alphabetical order.
  • Phonics Practice — use letters to make short words (2-3 letters) and practice reading their sounds in order to read the words. Change one consonant and read again; repeat. Ditto for changing the vowel. Repeat for longer words as skills increase.
  • Spelling practice — use your supply of letter manipulatives to build spelling or vocabulary words. Add as many words as possible that use the same phonics patterns.
  • Syllables — build a vocabulary word, then scoot the letters apart to divide the word into its proper syllables. Compare to the dictionary entry to self-check.

Number Activities:

  • Matching — sort lots of different number shapes, tiles, and cards into separate piles for each number.
  • Numerical order — mix up a set of numbers (0-9 or 1-10) and put them into numerical order.
  • Number value — match the appropriate number shapes, tiles, and cards with the dots on dice or dominoes.
  • Double-digit numbers — combine digits to make teens, twenties, etc. and practice reading them. Ditto for three-digit numbers and beyond.
  • Arithmetic practice — build arithmetic problems using the number shapes, tiles, cards, and operation symbols, and put the correct numbers in place for the answers.
  • More operations — be sure to make some commas, decimal points, fraction bars, dollar & cent signs, percent signs, and anything else your student will encounter in his math lessons.


For more activity ideas, see also (in any order):

ABC Flashcards

Building Blocks for Success in Spelling

Building Blocks for Success in Math

“Stealth Learning” Through Free Play

What Is the Missing Element?

Letter & Number Recognition

Tactile Learners

Workshop Wednesday: Untangling the Math Pages

Do your student’s math papers sometimes look more like a tangled jumble of numbers instead of neatly arranged problems? Do you have a student who gets confused over complex math problems? Our old friends, graph paper and color, can come to the rescue once again!

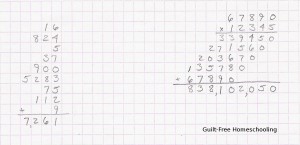
Graph paper was a blessing when my young students began writing math problems, but their numbers sometimes wandered aimlessly down the page, causing us to wonder which place value some digits represented. Using 1/4″ graph paper (4 squares per inch), I showed my son how to put one digit in each square and line up all of the ones’ column digits. That way, the tens’ digits ended up in the correct column, as did every other place value. It helped my student keep track of his math problems, which helped him perform the calculations correctly, which led to faster learning. It was a great benefit for the small price of a pad of graph paper.

Math function signs can be written in colors for kids who struggle with noticing which operation is required or in which order certain operations should be done. For example, parentheses in their favorite blue may catch their eyes first, and they know to do that before going on to the yellow plus signs later.

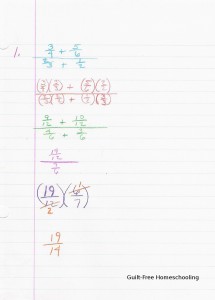
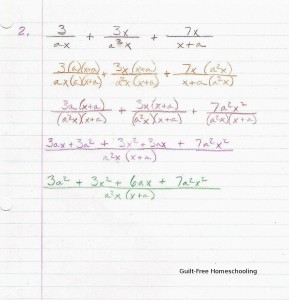
For particularly large and difficult math problems with complex fractions or higher math, I encouraged my kids to use an entire sheet of paper for each problem, if necessary. I told them they could make only as many changes per step as they were comfortable with and instructed them to leave a blank line after each step of the problem. That made it much easier for them to tell where they were and what they were doing. It also helped them to know they could use as much paper as necessary to be able to understand the steps and the transformations of tricky calculations (paper is cheap; understanding is priceless). Spread those numbers out so you can see exactly which digit belongs where, and skip a line between steps for amazing clarity in those super complicated problems.

Something my daughter Jen came up with on her own was to write each step with a different colored pencil. She is a strong visual learner, so color often played an important role in her schoolwork, and her set of colored pencils seemed like a natural tool to use for understanding the transitions in how each step changed from the one before it. The colors helped her eyes and brain differentiate one step from another, so the changes were much easier to see and understand. Using colored pencils can also work for students who get overwhelmed by trying to solve large math problems, helping them to focus on only one step at a time.

For those students who have difficulty understanding what is happening in each step, color can also be used to show the process of solving. The parent-teacher can write out everything in black pencil that remains the same for the next step, and use color only for the changing elements, to clarify what was changed in each step and exactly how it changed. Use a different color for each step to keep the transitions easier to follow.

Color can also make math more interesting for students who find math to be boring but find art to be all kinds of fun. Perhaps doing math in color is just the enticement little Billy or Sally needs! Bonus tip: Erasable colored pencils are well worth the slightly higher price!

Workshop Wednesday: Color-Coding As a Learning Tool

[This article was written by Jennifer Leonhard.]

Is your student attracted to color or motivated by markers? Does your student struggle with staying organized when studying? Color-coding is a great learning tool. Visual learners respond well to color as an organizational method, and non-visual learners can improve their visual skills by using color to organize information. As classes become more complex in high school and college, color-coding becomes an even more valuable organizational tool.

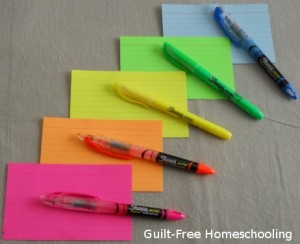
As a strong visual learner, I used assorted colors of index cards and highlighters to help me organize my thoughts and the material I was studying in my college classes. I used the order of the color spectrum as my color code whenever I needed to maintain a beginning-to-end, front-to-back sequence: red, orange, yellow, green, blue. My system always began with red (pink worked as the closest available color in note cards and highlighters) and proceeded through the spectrum to blue (violet/lavender was too hard to find in highlighters).

Here’s how I wrote the various parts of a speech or oral presentation: one pink card held the introduction, several orange cards for the information for Point 1, several yellow cards for Point 2, several green cards for Point 3, and one blue card held the conclusion. I could rehearse a presentation using these cards, and if I dropped them or they got mixed up in my backpack, I could easily put them into color spectrum order again. Any supporting quotes had their own index cards (using the appropriate color code for each point), and I would draw a squiggly outline on those cards to indicate that they contained the quotes. Each card had a topical title at the top and a number in the corner to indicate its order within each color group. I rarely ever needed to look at my note cards when giving a presentation, because I had them so well organized that I could easily see them in my head and go from there, but I did keep the cards with me in case of a blank-out moment. I could also turn them in to the teachers who asked for them as part of the assignment.

I also used this system for writing extensive research papers to create an outline in this format. I could put anything supporting Point 1 on orange cards and just go through all the orange cards later to put them in order for writing my paper.  When doing research papers and printing out a stack of articles for a 50+ page paper, I would use highlighters in the same colors as my note cards to circle significant points in the article. I could then grab all articles with orange outlines and work just on my first point without being distracted by all the other sections.  If an article had information for several points I would do a thicker outline in the color that it discussed the most and a thinner outline in the color of the point it discussed less, and then highlight or circle the section of text that pertained to each part in the appropriate color.  I could flip through my notes very quickly and efficiently in this way and find exactly what I was looking for at any particular moment.  I rarely had a “blanking” moment when writing, because I had a system that provided me with a place to start.  I didn’t have to write the individual sections of the paper in any particular order, and if I found myself overwhelmed by the sheer amount of research information I had printed, I could simply start color-coding instead of freaking out.  If I found myself unsure of where to stand on an issue or how to phrase my findings, I could simply grab all of the items outlined in orange and start highlighting, circling, or underlining the important sections that I wanted to use.  Stuck on what to write for orange? No problem! Just work on the yellow items for a while, and then come back to orange later.  I had no fear of getting confused or forgetting what I was doing next, because everything was very plainly color-coded for picking up where I left off.

Similarly, I would use this method to study complex material. I used the same color-code for highlighters, note cards, in my lecture notes, and in the text books, so that I could start the process while reading and know what to put on the index cards later. I used yellow as my color-code for keywords from the text. Pink was for any important dates to remember, green signified important people, and orange was for formulas and diagrams. Blue was for any other information I needed to make sure to remember. By categorizing things like this, I could pull out just my orange cards right before a test and review the formulas and diagrams, if I thought I was suddenly blanking on something. I’m bad at remembering specific dates, so I could grab the pink cards to quiz myself on those. This made it easier to categorize the test elements in my head, and instead of all the information being a blur of grey pencil notes on white lined paper, I could focus my memory on just the orange parts, or just the pink parts. The colors became just as important as the facts themselves, especially when trying to sort through all the facts in my head to find the one correct answer I needed on a test.

Whatever color-coding system you choose to use, the color significance can vary from subject to subject, but consistency within each subject is the key to making your system work. Yes, I bought a lot of index cards and highlighters, but they became valuable assets to my study habits, and the positive results proved their worth. Other colored items could also be added to a colorized system, such as colored pencils, file folders, pocket folders, notebooks, divider tabs, sticky-flag bookmarks, and whatever else your favorite office supply store has crammed into its aisles. Using color-coding is a great organizational and memory tool, and it strengthens your visual learning skills, even if visual skills are not your strongest learning style. And who doesn’t like playing with a whole rainbow of highlighters?

Workshop Wednesday: Tactile Card Holders, Version 2

Based on last week’s Tactile Card Holders, Version 1, this week’s version uses a few different supplies to create a similar product.

Equipment:
Cereal box cardboard
Photo corners for index cards
Glue (optional)

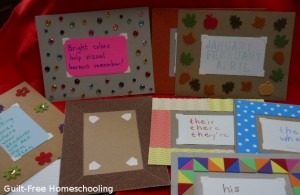
Yes, we are breaking out our old friends, the cereal boxes, to make yet another great learning tool. I cut the cardboard into pieces larger than my index cards and attached self-stick photo-corners in the middle for the index cards. You can use 3×5″ or 4×6″ index cards, depending on what you have available and how much information will be put onto the cards. Then I decorated the surrounding “border” with whatever was available (1 “theme” per card), using glue to attach the things that weren’t already self-stick.

Edges decorated with:
Ribbon
Sequins
Craft foam/felt stickers & shapes
Sandpaper
Acrylic rhinestones/gems
Textured papers

The examples in the picture show photo corners without an index card inserted, along with a few examples of spelling rules. As in last week’s article, these card holders can be especially helpful for older students who are trying to memorize more complicated information and formulas. Once learned, the note cards can be easily switched with new cards for studying new facts. The border textures work by appealing to tactile fingers and giving them something to focus on while the eyes are busy reading the facts on the cards. Later on, when the mind tries to remember the facts, the textures, patterns, and colors from the borders of each card holder will serve as markers on a virtual road map to help the brain find those facts and pull them up into view. Students who have had trouble memorizing dull, dry facts in the past will find these note card holders add some pizazz to the process and actually help stimulate their memories.

The borders of these card holders will offer even more tactile interest than the ones from last week that simply had their edges trimmed with special scissors. My favorites among these have to be the cards with sandpaper borders — I made several of those, each with a different level of coarseness. Satin ribbons offer a smoother texture, but grosgrain ribbon is different yet. I also found some wonderful textured papers at a scrapbooking supplies store to expand the variety of textures and visual appeal. Other cards had their borders adorned with thick felt stickers, craft foam shapes, acrylic “gems,” and other crafty materials to add texture and color. Let these examples spark your imagination and see what you can come up with!

Verified by MonsterInsights