Most children struggle with learning handwriting, and yours may currently be having trouble with it. Handwriting is a difficult task, especially in the very beginning. There are all those different letter shapes to remember, and trying to draw them with any consistency at all is tough. Children often wonder how adults write so effortlessly, because they don’t realize that those adults have had years of practice. Beginners can struggle just to hold on to the pencil or to draw the letters—doing both at once is a Herculean effort!
To begin with, young children who are just learning the skill of handwriting may not yet fully understand the need for letters and words to be written in a left-to-right orientation. They aren’t at the full reading stage yet, so (in their view of the world) they don’t yet see the need or importance of a left-to-right progression. Therefore, right-handed students are prone to begin writing on the right side of the paper, a more natural orientation to their pre-reading way of thinking. “Stealth learning” can help here. When reading favorite storybooks aloud to your child, place your finger underneath each word and move your finger smoothly across the page to reinforce the left-to-right movement, even if the child is not yet ready to read the words. Seeing the progression of your finger will help to build that left-to-right idea. You can hold her hand, too, and move her finger from letter to letter and word to word, again casually demonstrating the left-to-right progression as you read each word aloud. As your child learns to recognize individual letters, you can add “Find the letter B on this page” to your visual and comprehension activities.
Remember that reading and handwriting are two separate skills. Reading is much easier, since it’s all in the mind and doesn’t require any new muscle training. “Handwriting” and “composition writing” are also two separate skills: handwriting is the mechanical action of reproducing individual letters and connecting them into words; composition means thinking up the words, sentences, and paragraphs to form a story or essay. This stage is much too early for multitasking, so encourage your student to learn to read words without having to copy them perfectly, and encourage him to learn to copy sentences without having to think up his own sentences. Focusing on each of these skills separately will prevent over-emphasizing handwriting during any composition activities, a distraction that can stifle the creative process that you would much rather inspire.
There’s an important difference between everyday handwriting and special occasion handwriting—I love this analogy. We all have good clothes, and we have play-in-the-mud clothes. We have inside voices and outside voices, and we have indoor toys and outdoor toys. We have our very best handwriting that we use on Grandma’s birthday card, and we have everyday handwriting that we use for the grocery list—just take a peek at Mom’s grocery list! Allow your child to use “everyday” handwriting on daily worksheets that don’t matter as much, and then specify when his “best” handwriting is required, to take the emphasis off of perfection. Discuss with your child how he outgrows clothes quickly and how you can show him that he will outgrow his current handwriting, too. Saving a few copies of both his everyday and his best handwriting will show him that his handwriting is improving over time.
Helpful Tips and Techniques:
- Start to teach handwriting with all upper-case letters to reduce the likelihood of letter reversals, since there are no b-d-p-q similarities within the upper-case letters. Once the child is confident in all the letters, the lower-case letters can be introduced as the “little brothers” of the capital letters. By that stage, your child will understand which letter is which and be able to discern which sound is needed.
- When you want your child to copy a word onto paper, try showing her one letter at a time. For example, to write “DADDY,” you write the first letter, D, on the left side of a paper, and have her copy it exactly (both of you should have identical papers at first, to make it even more clear that she is to mimic every action of yours). Then you write the A next to the D, and have her copy it onto her paper. Continue one letter at a time, Mommy writes it first, then child copies. Letter by letter, copying each action individually, your child will learn to reproduce words correctly on the page.
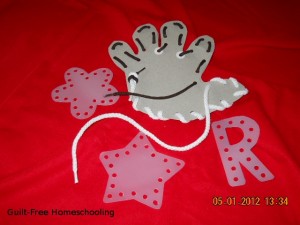
- Letter cut-outs are an excellent teaching tool for tactile learners. The shape speaks to fingers and transfers the message to the brain in a way that goes far beyond the simple visual connection. Textured cut-outs are even better: sandpaper, textured scrapbooking papers, corduroy or other textured fabrics, foam or chipboard letters, wooden cut-outs, and more can either be made at home or found at craft stores. Some harsh textures may produce a negative reaction, so experiment to find what your student really likes. No matter what texture your student prefers, feeling the outline shape of the letter makes a deeper mental impression than just looking at a letter printed on a flat surface.
- Students who have hit a roadblock with letter recognition will benefit from using materials other than pencil and paper. Try some of these options for drawing or shaping letters: finger-writing in dry cornmeal, sand, or shaving cream smeared on a window, patio door, or cookie sheet; Wikki Stix; pipe cleaners (chenille sticks); Pla-Doh or modeling clay; Lego bricks; pennies lined up on the table; or lying on the floor and bending their arms and legs into letter shapes (reasonably close, anyway). The important thing to learn is whether a letter uses short sticks or long sticks or half-circles or whole circles and where each of those parts goes. It doesn’t matter as much if they can form the letter perfectly straight or perfectly round or perfectly connected, as long as they know which parts go where. Elegant penmanship is a different skill, and that can be developed later.
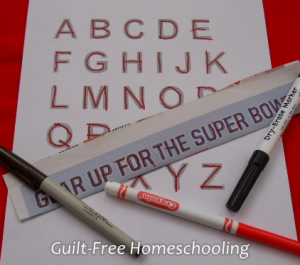
- A great way to practice writing letters (or numbers) is to trace inside the fat letters of newspaper headlines (lots of wiggle room for shaky lines). Letters or words can be computer-printed in a jumbo font (use a light color and/or draft printing mode) for custom worksheets that use the same tracing technique. This is especially good for students who are having difficulty making steady lines or following connect-the-dots methods. Any thickness of writing utensil can be used with this method: pencils, crayons, markers, etc.
- Encourage students to practice handwriting by copying a favorite storybook into a notebook (the child will already know the story and can focus on handwriting the words letter by letter and leaving spaces between words. No one has to see their work, unless they choose to show it off, and it won’t be graded, but they will learn a great deal about connecting letters into words and words into sentences, in addition to the spelling of the individual sounds that make up the words.
- Allow rest breaks and hand exercises (like hand massage or squeezing a stress ball) to relieve sore or tired muscles. Imagine learning to play guitar or violin and how quickly your hands would tire—that’s what he’s going through with learning to write. Also let his legs have some exercise before trying to do writing assignments! Restless kids are much more cooperative for seat work when their bodies are worn out from running, jumping, and playing.
- Pencil grips make pencils much easier for beginning writers to hold. My kids preferred the Stetro grips (see this link), available in educational supply stores or office supply stores. Stetro grips are adaptable for right-handed or left-handed use and teach kids the correct way to hold a pencil, reducing muscle fatigue, plus their jelly-like texture is fun to hold. We also used the foam core from sponge hair-rollers—cheap, easy to slip onto a pencil, and a pleasing texture. Fat pencils, triangle-shaped pencils, and other unique writing implements are also easier for kids to hold than the average pencil, which is awkward for young writers, just because it is so skinny.
- Mechanical pencils require a lighter touch (or the lead will break) than standard pencils, which can help kids learn to draw the letters without as much fatigue. These helped my kids learn to let the lead do the work, instead of pressing hard and carving into the paper as often happens with a normal pencil.
- Smooth-flowing writing implements, such as a whiteboard and markers, are another way to make handwriting easier, since heavy pressure isn’t required to make a dark mark. Whiteboard markers can also be used directly on a cookie sheet—just wipe off with a dry tissue to erase and wash the pan well before the next batch of baking. Wet-erase markers write just as smoothly as the dry-erase whiteboard markers, but won’t disappear from an accidental touch (erase these marks with a damp tissue). Found at office supply stores, these are sometimes called “transparency” markers, since they are usually used on overhead projector sheets.
- Using light-colored gel-pens on dark paper (see craft stores) changes the visual dynamic enough to get the child’s mind off the act of writing and keep him more focused on the subject matter.

- Try having your student start with writing little bits instead of full sentences—have him fill in a blank in a sentence or write a brief “label” under pictures he’s drawn. He can write longer portions on a whiteboard (effortless surface) and copy a small portion onto paper. Then every other week (or appropriate interval), gradually increase the amount of writing on paper, until it’s no longer such a chore.
- We had great results from Italic handwriting workbooks. My fifth-grader had learned the standard cursive at public school but didn’t like the way it looked, so she asked if she could learn to improve her handwriting at home. Italic handwriting was simple and beautiful, and to encourage my daughter, I practiced along with my kids and changed my own handwriting, too. My first-grader learned Italic manuscript first and had no difficulty transitioning into Italic cursive.
Handwriting is a skill that takes time to develop and shouldn’t be rushed. As with any other skill, students will get faster as they become more confident in using it. Give them good tools and plenty of opportunities for enjoyable practice, and you should see positive results.
See also:
Start with Reading, Handwriting, & Arithmetic, and Save the Rest for Later
Letter or Number Manipulatives (DIY)
Preschool Is Not Brain Surgery





 Guilt-Free Homeschooling is the creation of Carolyn Morrison and her daughter, Jennifer Leonhard. After serious disappointments with public school, Carolyn spent the next 11 years homeschooling her two children, from elementary to high school graduation and college admission. Refusing to force new homeschooling families to re-invent the wheel, Carolyn and Jennifer now share their encouragement, support, tips, and tricks, filling their blog with "all the answers we were looking for as a new-to-homeschooling family" and making this website a valuable resource for parents, not just a daily journal. Guilt-Free Homeschooling -- Equipping Parents for Homeschooling Success!

Recent Comments