Workshop Wednesday: Dominoes Make Great Tactile “Flashcards”

Wouldn’t it be wonderful to have a single set of simple math learning aids that could help your students learn everything from basic number values to fractions, decimals, and percentages? It already exists, and you may even own a set: dominoes. Ordinary flashcards appeal to the student who learns best through visual means: seeing and reading. Saying the flashcard facts aloud will work best with the student who learns well through auditory means: hearing and saying. For the student whose fingers must connect with the lesson in a tangible way for him to truly lock the facts away in the deep recesses of his mind, dominoes make ideal flashcards!
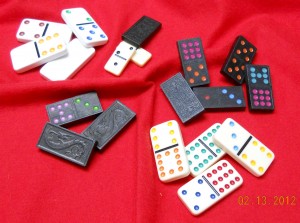
Dominoes make great tactile “flashcards”!

Dominoes are wonderfully tactile, whether they are the smooth, heavy plastic ones that look like imitation ivory or the pressed wood versions with a decorative design embossed on the back side. The dots are usually carved out, and the depressions are filled with bright colors of paint. There is also usually some physical attribute serving as a divider between the two halves of the domino, either a carved or embossed line. All of these features work together to provide textural interest to the fingers that get to hold them – much more interesting than flat, boring, cardstock flashcards. Flipping through a stack of thin cards is one thing; stacking up dominoes, as one masters the facts they represent, is quite another thing. Dominoes appeal to many senses and learning styles with their bright colors, heavy thickness, and the wonderful sound they make as they clink together.

Let’s look at the wide variety of math exercises, from beginner level to more advanced skills, that can be performed with a set of dominoes.

Number Value

Count the spots. Say the number, or write the number. Repeat as needed for practice until the student knows how many seven is and can identify a group of dots with the appropriate number. Substitute a matching number of candies, blocks, or toy cars for the dots and repeat the counting exercise until the student understands that numbers can apply to more than just small colored dots in orderly patterns. Once the student has mastered the number relating to each distinct pattern of dots, arrange the same number of objects in different patterns to show that each number can occur in various types of groupings (e.g. four objects in a straight line is still four, even though they do not form a square, as on the domino).

Smaller v. Larger

When the student understands the principle of assigning values to digits, that same student can begin to differentiate smaller groups from larger groups. Since each domino conveniently displays two number groupings, use them to practice smaller v. larger numbers: help the student decide which group of dots represents the smaller number and turn that side to be on the left, leaving the larger number group on the right side. Repeat as needed for practice until the student can tell at a glance which number is smaller and which number is larger. Practice saying the numbers and deciding which is smaller and which is larger, and then count the dots, if necessary, for confirmation.

Two-Digit Numbers

Once again, each domino represents two digits. Help the student learn to read and write the two-digit numbers shown on each domino’s face. For example, if a domino shows a two and a six, that domino may be read as 26 or as 62. Dominoes that have no dots on one side can be read as a one-digit number and a two-digit number (e.g. 3 and 30). The smaller v. larger exercise can then be repeated with these two-digit numbers.

Addition

Students can begin simple addition problems by adding the two numbers represented on a domino and then counting the total of all dots for confirmation.

Subtraction

By holding a domino vertically with the larger number on top and the smaller number on the bottom, the student can begin learning to write and perform subtraction problems. More advanced students, who have learned the concepts of positive and negative numbers, can reverse the domino, placing the smaller number on top, and proceed with the subtraction exercise.

Multiplication

Dominoes can be used as multiplication flashcards by attempting to multiply the two numbers represented. If the student is unsure of an answer, it is advisable to consult a reference chart for the correct answer, rather than merely guess. Seeing the correct answer time after time will help the student memorize it by sight, and the student will eventually trust his memory instead of taking the time to look at the chart for the answer. (A calculator may also be used to check answers, but pressing a wrong button can deceive the student into believing a wrong answer.)

Division

Holding the dominoes horizontally can represent the numbers in a division problem. The student can write those numbers down on paper to practice dividing. The beginning student should only divide small numbers into larger numbers, until his knowledge of decimals allows him to practice dividing larger numbers into smaller numbers.

Manipulatives

Turn the dominoes face-down, so the dots are not visible. Practice counting, adding, and subtracting. Subtraction is merely undoing the addition process, and this can be easily illustrated by grouping and re-grouping the dominoes. Arrange groups of dominoes into rows to illustrate multiplication facts, and discuss how dividing is just undoing multiplication, but sometimes with leftovers called “the remainder.”

Fractions: Proper & Improper, Simplifying

Holding a domino vertically, the two numbers can represent the numerator (top) and denominator (bottom) of a fraction. Proper fractions always have the larger number in the denominator, while improper fractions always have the larger number in the numerator and can be simplified into a mixed number fraction. When reading the domino as a fraction, the student can decide if the fraction can be simplified and what that new fraction should be. Advanced students may select two dominoes and attempt to add them together as fractions, converting them to common denominators as needed. Subtraction, multiplying, and dividing fractions may also be practiced by selecting random dominoes to use as the fractions in each problem. Students should always be encouraged to write math problems in a notebook — when needed for reference, the student can easily look back at his previous work to see how he solved similar problems.

Fraction, Decimal, & Percentage Equivalents

Students with a working knowledge of fractions may move on to the decimal equivalents of fractions. Percentages are another form of fractions. Fraction, decimal, percentage, and ratio can all be thought of as “nicknames” for equivalent amounts. Arranging face-down dominoes to illustrate the problem, writing out the problems, and drawing diagrams will all help the students understand how the amounts are equivalent. Then the student may wish to use face-up dominoes as flashcards again, using the two numbers shown as a fraction and determining the decimal and percentage equivalents.

Perimeter, Area, & Volume

Using the dominoes face-up, a student can build “fences” to illustrate perimeter, or the distance around the outside of a specific shape. Count only the edges of each domino, and count each half of the long sides as a separate unit: a domino at a corner would count as 3 units: one for the short end on one side of the corner, and two along the long side of the domino on the other side of the corner. Filling in that shape solidly with “floor tiles” relates to the concept of area. Again, count each half of a domino (each separate section of dots) as one “floor tile.” Stacking multiple layers of dominoes can illustrate the 3-dimensional concept of volume. For example, an area represented by two rows of three dominoes each will contain six dominoes. Stack up several identical layers to show that each layer contains six dominoes. Multiply the area of six times the number of layers to determine the total number of dominoes used.

Play Domino Games

What better way to show that math is valuable in everyday life than to play a game of dominoes? Advanced players might enjoy the competitive element of keeping score, but those playing just for the fun of the game can proceed more quickly by simply playing their dominoes on the matching numbers and moving on to the next turn. There are a variety of domino games, so expand your knowledge base and learn several.

Line Dominoes Up on Edge for Physical Science Domino Effect

No one should go through life without lining up dominoes in curvy lines or intricate patterns and then gently pushing over the first one in line to watch all the others tumble in turn. Setting up the dominoes on end is good for honing the fine motor skills of small hand muscles — great care must be used to ensure that the dominoes don’t fall too early! Repeat as often as possible and search You-Tube for massive domino displays to enjoy!
Taking the Mystery Out of Learning Styles

Our new book, Taking the Mystery Out of Learning Styles, is a big hit! Workshop attendees are snapping it up, and online sales are taking off. Take a look at this great review:

Carolyn, I got your books yesterday!! Thank you so much. I started to read Taking the Mystery Out of Learning Styles, and I only wish I had read this sooner!!! I’m only halfway through, but it has already affected how I see the kids, it just takes on a whole different dimension seeing their behavior as them trying to learn instead of just trying to be difficult. I had no idea. Thank you so much for writing this. I am looking forward to learning more and can’t wait to incorporate some of these ideas. We will be skip counting on the driveway this week!! :)

You know, I used to just think that all those “extra” learning activities were just for moms who had too much time on their hands and that they weren’t really necessary. Now, my eyes are opened that so many things I just considered extras (the chalk drawing on the driveway, the letter tracing in cornmeal, etc.) are absolutely essential to learning. I had no idea I was missing so many teaching opportunities. I am a very visual learner, and that was the only way I was taught. My oldest son is SUPER visual, although lately has been developing some auditory tendencies as well. BUT, [#2 son] is SO kinesthetic. Obviously this is the opposite of what I am, what I have taught and the only other student that I have taught. I feel so badly for all the times I corrected him for wiggling in his chair, or standing beside his chair, he was only trying to get his brain to work!! I’m so glad I am reading this now, and can start to incorporate these things with [him]. And I haven’t even mentioned my very strong-willed 5-year-old girl. I have been dreading making her do school because I know it will be a fight, but figuring out her learning style and catering to that will make it so much smoother for both of us. So, thank you again, and I have to go now so I can read more about Alternate Methods for Teaching Math. :)
–Charity from GA

If your students are wiggling, giggling, grabbing, and/or not paying attention, or if they are just not understanding as much as you think they should, order your copy of Taking the Mystery Out of Learning Styles today. Find simple, practical solutions for reaching your students through their learning styles — ideas that work for any age!

Felt Shapes

Do you need a new idea for keeping the kiddies occupied indoors when it’s too hot to play outside? Are you looking for a “down time” activity? Have you had it with the constant noise of TV and kids and more TV? Here is something that will occupy their minds as well as their hands, stir their imaginations, and give your ears a few moments of blissful solace: a box of felt pieces.

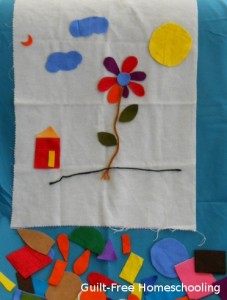
This was a favorite activity for my tactile child. It makes a great “lap toy” for quiet time. I started with some leftover pieces of craft felt, cutting them into geometric shapes and random shapes. A piece of flannel fabric (approx. 18″ x 24″) served as a background and could be spread over a sofa cushion, the carpeted floor, or a bed pillow, then folded up easily to fit into the storage box when playtime was done. [Hint: cut up an old flannel shirt, nightgown, or pillow case.] I used felt in bright colors, pastels, neutral colors, and black and white for squares, rectangles, triangles, circles, and ovals in a wide range of sizes. [Note: thin sheets of craft foam can be used, but the foam pieces tend to jump or cling from static electricity, and they lack the softer flexibility of the felt cloth.] The child makes “pictures” and patterns with the felt shapes on the flannel, stacking or layering pieces as desired. Smoothing the pieces in place provides an important tactile connection for a touch-feely child.

It works best to keep the smallest pieces larger than a coin — anything smaller will be difficult to cut. The largest pieces do not need to be bigger than your hand, since larger pieces will be more difficult to store flat. (An older child may enjoy cutting the pieces for younger siblings to play with, but remember the size limitations.) If you are feeling especially creative, add some half-circles, crescents, teardrop/petal shapes, stylized leaf shapes, and a few 4″-10″ strands of yarn (useful for flower stems, kite strings, and other necessary lines). Pinking shears can add variety to some pieces, but will be difficult to use on smaller pieces; the shears must also be quite sharp to produce a good zigzag edge. (Optional: applying iron-on interfacing will stiffen the felt, making cutting easier and the pieces more durable.)

Remember that this project will be a plaything, so your shapes do not have to be exactly measured or accurately cut. Keep it simple: free-hand cutting is adequate. Circles do not have to be perfectly round, and squares, rectangles, and triangles do not need perfectly straight sides or precise corners. Your child’s imagination will be broadened through playing with the felt shapes, and imagination is a great substitute for precision.

Quick trick for cutting triangles: cut squares or rectangles in two diagonally.
Quick trick for cutting petal shapes: cut a rectangle in two diagonally, making two long triangles, and round off the short end opposite the long pointy tip, producing the stylized silhouette of a single-scoop ice cream cone.
Quick trick for cutting leaves: round opposite corners of a square or rectangle, leaving the uncut corners as the pointy ends of the leaf.

Don’t feel that you need to make shapes that look like real objects. Your child’s imagination will take over, transforming those simple rectangles, circles, and triangles into wonderful things. A child who has always relied on printed coloring pages for “art class” may need some time and a little help to activate his imagination, stop depending on literal representations, and begin developing creative thinking skills.

Store the pieces as flat as possible in a box large enough to make clean-up easy for the child, and a container with a tight-fitting or locking lid will prevent accidental spillage. Any pieces that are wrinkled or folded when put away will be wrinkled and folded at the next playtime, so try to smooth each piece out as flat as possible. (The tactile child will actually enjoy this step.) Badly wrinkled pieces can easily be ironed flat again.

A solid felt board or “flannel-graph” can be made by covering heavy cardboard or a bulletin board with a large piece of felt or flannel fabric. The board requires more storage space than just a loose piece of cloth, but the board can be useful for illustrating lesson concepts to more than one child at a time by propping it up where all can see it at once. A small strip of felt on the back of paper pictures will make them cling to the fuzzy board — the entire back surface of the picture does not need to be covered. Sandpaper can also be used as a backing by cutting thin strips of fine sandpaper (1/2″ wide by 1″ or 2″ long) and gluing the strips to the backs of cardstock pictures or word/number cards. Large cards may need wider or larger pieces of rougher sandpaper to help support their weight. All sorts of visual aids for lessons can be used with flannel boards. Christian bookstores usually carry Sunday School lesson materials for felt boards, including great pictures of Bible heroes or generic pictures of children and families.

Ideas for Lessons:
Sorting — Can you sort pieces by color? By shape? By size?
Counting — How many of each color/shape/size?
Matching — Can you find a piece that is the same color/shape/size as this one?
Patterns — Circle, circle, square… can you make a pattern that matches this one?
Sequencing — Red, red, blue, red, red… what comes next?
Explaining Processes (using flannel-graph letters or cards)– To make the word kitty work for two kitties, we change this y to an i and add es.
Phonics & SpellingC-a-t, b-a-t, r-a-t… can you make more words that end with -at?
Reading — Put these word cards together to make a sentence.
Fractions — Is this rectangle divided into halves or fourths? (Use several squares in the same size to form rectangles.)
Arithmetic — How many ways can you group these pieces? (Use matching sizes & shapes to teach addition, subtraction, multiplication, division, perimeter, and area. Ratios and percentages can be illustrated with a mix of colors, sizes, or shapes: 3 red squares and 1 blue square = 3/4 red and 1/4 blue, or 75% red and 25% blue.)

Felt shapes and felt-backed pictures can be used for just about anything you can think of. Let your creativity take over as you adapt the felt pieces and pictures to whatever lesson you are working on, and watch more applications come to mind the longer you use them. Whether you use this as an educational tool or a quiet-time toy, the learning possibilities will be unlimited!

Math Awareness: Tactile Counting

An interesting idea occurred to me when we were driving home late a few nights ago. My throat was dry, so I pulled a box of Tic-Tacs out of my purse, shook some pieces into my hand (without turning on a light), and popped them into my mouth. As I rolled the candies around with my tongue, I began trying to count them to see just how many there were. The box that usually releases only one or two pieces with a good shake had instead given me a mouthful in the dark. One, two. One, two, three, four. No. One, two, three… One… two… three… four… FIVE? Yes, Five. A number that would have been very simple to identify with my eyes in a lighted situation was suddenly very difficult to count with just my tongue!

That experience set my mind to working overtime. How simple is it to count objects that I can see? How much more difficult is it to count objects that I can NOT see? The whole idea of blind counting made me consider the possibilities of math as a tactile experience. I have often carried coins in my jeans pocket and had to pull out a handful and look at them to select just one or two. If I was more adept at tactile identification, perhaps I could pull out only the coins I needed!

So here is my challenge for the day: experiment with tactile counting. I recommend trying it with fingers first, not letting your young children pop random objects into their mouths — although that can be an interesting lesson for more advanced students (who are less likely to swallow). Expanding the awareness of number values to tactile skills and not just visual skills will allow the student to count quickly and easily by touch, even when seeing the objects in question is difficult or impossible.

I tested my own tactile counting skills by spreading a towel on the table, folded in half, with the fold farthest away from me. Then I closed my eyes and grabbed a large handful of goodies from my Activity Jar and inserted the objects between the layers of the towel. (The towel kept balls, marbles, and other small, round objects from rolling away.) Carefully keeping the upper layer of the towel in place to conceal the objects, I slipped my hands underneath it and began feeling the hidden treasures. To my surprise, there were a lot of things inside my towel — many more objects than I expected to find.

I eventually pulled one hand out and began writing notes of what I had found, so I could record how many buttons and how many game tokens were included in this cache. I wrote down each basic category of items and used tally marks for the duplicates. When I was satisfied that I had sorted and counted everything successfully, I opened up the towel to check my accuracy. Oops. Close, but not perfect! I had miscounted the buttons: 14, instead of 15; but I had correctly identified five different types of game tokens: large, small, ridged, smooth, and cardboard (not plastic like the others). I had also correctly identified a coin as feeling different from the plastic game chips and accurately concluded (by touch only) that the coin was a penny, not a nickel or dime.

This was such a fascinating challenge that I repeated it several more times! Once, I purposely sorted out a large group of flat game tokens from my Activity Jar, some smooth and some with ridged edges. Placing those inside the towel, I attempted to sort them into two piles and count how many were in each pile. I accurately counted the ridged tokens, but I was off by two when I counted the smooth chips. My conclusion was that the thin, smooth chips could slip out of my hands unnoticed much more easily than the ridged chips could.

How about some other variations of this tactile math challenge?

  • Blindfolded; count objects with your fingers
  • Blindfolded; feel and count objects in a box on the floor with your toes
  • Use several sizes of the same shape, such as a variety of coins
  • Use a variety of shapes and sizes of different objects, such as buttons
  • Count behind your back, feeling objects placed into your hands by a helper
  • Feel objects placed inside a sack, box, or pillowcase (so you can’t see them)
  • For older or advanced students: tiny, hard candies in the mouth to count with the tongue. Tic-Tacs work well, since they are quite small and don’t melt quickly.

The variations using toes or tongue develop tactile skills beyond the usual finger skills. Even a student who can quickly count or identify with finger-touches will find it a challenge to repeat the assignment with toes. I suggest starting with fewer than ten objects for toe-counting and using 3-dimensional objects, not flat items like coins.

For tongue-counting, be sure the student is not likely to choke or swallow the candies, and start with fewer than five small pieces. Keeping the head tilted forward can also prevent accidentally swallowing the candies. I cannot recommend putting non-edible objects in the mouth, nor do I suggest using anything larger than a plain M&M candy. Hard candies work better for this experiment than do soft, chewable candies. Tic-Tac candies are ideal: small and solid.

One more variation would be to turn this into an auditory activity by counting sounds. Conceal your hands behind a large book or similar partition and tap quickly several times, while your student attempts to count how many taps he hears. A more complex version would involve listening to music and counting notes, beats, or instruments heard. Take this activity outdoors and listen for vehicles, horns, or bird songs.

Math is primarily a visual task, but stretching our abilities and learning to sort and count with our other senses will bring the benefits of increased skills and a related increase in thinking power. And just imagine the fun of impressing your friends with your ability to count the change in your pocket without looking!

The Activity Jar

**UPDATED** — See the photo link at the bottom of this article.

Homeschooling parents often lament that they lack the educational gadgets and fancy learning aids that students can benefit from in “real” school classrooms. The Activity Jar is a wonderful store of math manipulatives and assorted learning aids that you can assemble yourself from no-cost items readily available in your home. Gathering the items and filling the jar is as much fun as dumping the contents out again and playing with them.

How to Assemble an Activity Jar–
Begin with one rather large, wide-mouthed container, such as a gallon jar (unbreakable plastic, if possible). Use a small storage tub or cardboard box if you wish, but a secure lid is a must and see-through sides are a bonus. Now set out on a scavenger hunt through your home and garage, poking through the “junk” drawers and all of those little nooks and crannies that tend to collect odds and ends. Pick up those interesting bits of stuff and place them into your jar. Continue this process until you have unearthed all possible objects or until your container is approximately 75% full. Do not give in to the impulse to fill your container brim-full, or you will seriously impede the clean-up phase of using the Activity Jar. Close the lid and set the container aside for a rainy day or any other time when your children want something to do or need practice in sorting, categorizing, or math in general. Bear in mind that the jar will be shaken and rattled around often, so you may need to remove any objects from the jar that become broken with use and replace them with more objects as you find them to keep the Activity Jar’s contents new and interesting.

Be creative with what you select, thinking “outside the box” and including items from all areas of your home, not exclusively small toys. Do include tiny toys, coins, buttons, paper clips, nuts and bolts, and any other fascinating flotsam and jetsam. This is a great opportunity to recycle the remnants from incomplete, broken, or discarded board games. Be careful to select only larger pieces if toddlers may be at risk for swallowing the objects.

How to Use the Activity Jar–
Pour the contents into a large cake pan, unless your children can easily reach into the container to remove the items. Caution: unless your children are already skilled in sharing and showing patience, you will want to limit the Activity Jar to one student at a time. The discovery process can foster territorial feelings and selfishness, especially if two students are attempting to divide the contents without supervision or guidance. Encouraging your students to work together as a team toward a common goal can help them to overcome competition and rivalry.

Allow a student to begin with periods of free play with the objects, and watch him begin sorting without being prompted. When the student has exhausted his own ideas, challenge him to begin sorting the contents into 3 basic categories: Category A (such as round), Category B (such as not round), and Category C (for Other, or I’m not sure what to call this one, because one side of it is A and the other side is B). Other possible basic categories (for A & B) are flat objects and fat objects, single-colored objects and multi-colored objects, buttons and not buttons. Category C is always useful for speeding up the process, since there will usually be something that does not fall easily into the two main categories. Use more cake pans, cookie sheets, shoe boxes, freezer containers, bowls, muffin pans, egg cartons, paper cups, or any containers that will make the sorting process simple and easy.

Once Categories A and B have been sorted out, choose one of them and set the other objects aside for now. Further divide this selection of objects into more specific categories. Sort single-colored objects into individual color families; sort round or flat objects into disk-shaped objects and non-disk shapes; or sort the objects into general size categories of small, medium, and large before measuring them for more accurate classifications. Again, it may help your child to have an “Other” category for things that are difficult to categorize into his chosen groupings.

Preschoolers can enjoy digging through the contents of an Activity Jar (filled with toddler-safe objects) while Mom is helping their older siblings with lessons. Provide them with several empty plastic bowls or freezer containers, and they will have fun sorting and moving objects from here to there and back again.

How to Learn from the Activity Jar–

Sorting and categorizing are the most basic skills that can be learned. Since the jar contains a variety of objects, the student must make decisions for which category applies to each object. Begin with very basic categories (as described above) and proceed to more complicated descriptions later, as the student’s abilities advance. The more the student sorts and categorizes, the finer the details become that can be used for sorting as categories are divided and sub-divided into smaller and smaller groupings.

Even the youngest student can perform simple sorting tasks. Vocabulary and recognition skills are increased as preschoolers practice sorting to learn shapes: Let’s find all of the round things. Color names can be even easier to demonstrate with the jar’s goodies: Today, let’s find all of the blue things. Now let’s make another group of things that have some blue on them.

Students quickly learn that each object can be classified in numerous ways: a single button may be round, flat, pink, have a certain number of holes through its middle, and be an object that starts with the letter “B” or a color that starts with the letter “P.” It may have a design of squares on its top, and it may be made of wood. The student will expand his abstract thinking skills as he learns to look at each object in numerous ways and learns to see all of the various attributes of any given item. Sorting these same objects over and over (by colors, by shapes, by materials, etc.) will illustrate to your child how common objects can be anything but common.

As skill levels advance, so can the sorting criteria, as well as the mathematical applications. Students of all ages will benefit from practice in sorting and counting, resorting and recounting, but other skills can be improved as well: comparing, judging, and classifying; the basic arithmetic of adding, subtracting, multiplying, and dividing; illustrating fractions and percentages; taking measurements; and on and on.

Once your student has divided and sub-divided objects into satisfactory groupings, challenge him to count the total number of objects and count the number of objects in each sub-group. A student who can perform long division can calculate each smaller group as a percentage of the larger group. If the concept of percent is difficult for the student to grasp, try the exercise again, but this time limit the large group to exactly 100 objects, then repeat the sorting, counting, and arithmetic portions. After the student understands percentages of 100, he can try again with a different (larger or smaller) number of objects as the larger grouping. Fractions can also be illustrated with sub-groups: one student has sorted out 12 game tokens, 6 of which are red; therefore, one-half of the tokens are red. Notice that 2 of those red tokens have a pattern of ridges on them, representing one-third of the red tokens and one-sixth of the larger group of 12 tokens.

Algebra uses the concept of sorting with polynomials. An algebraic expression may contain many objects to sort and categorize, but instead of being red buttons and blue buttons, pennies and nickels, and yellow and white game tokens, they look like X and 2X, XY and 3XY, and 4Y and 2Y. A student who understands that buttons are buttons and that coins are not buttons can also understand that X and 2X are both X-objects, and that neither of them are XY-objects or Y-objects. That is the basis of algebra: sorting and grouping similar objects, while not grouping dissimilar objects.

The skills to be gained from an Activity Jar are nearly limitless. Classification is the basis of scientific research, sorting useful facts from insignificant facts. The plant and animal kingdoms are carefully sorted and classified into similar groups. Other applications of the Activity Jar cover many academic subjects. The visually-oriented student might make graphs and charts to show how many objects were sorted into each group or compile lists of attributes (color, size, shape, material, etc.) for some items. The tactile student might experiment with stacking objects to see which types of shapes can and cannot be stacked easily. You can spur your students’ creativity by them to invent a game using some of the objects. Sharpen your students’ tactile and memory skills by placing some objects inside a paper sack, then asking each student to reach into the sack and try to identify the objects by touch alone. To improve auditory skills, secretly place an object inside a box and challenge your students to listen closely as each one shakes and tips the box to see if he can determine what type of object is inside, just from the sounds it makes while sliding back and forth.

The more activities your students do with the Activity Jar, the more ideas you and your students will think of for new activities to try. Your applications for the Activity Jar will probably go far beyond the few simple projects that I have described here, making your jar one of the most valuable learning aids in your homeschool. And you thought this was just a jar full of useless junk.

Photos of my Activity Jar and some examples of sorting activities can be viewed HERE.

Applying Learning Styles with Skip-counting

I have often written about learning styles and how each person can relate to material presented in certain ways better than they can grasp the same material presented in other ways. Today’s lesson is for the parent who is saying, “Okay, I understand that this child is more auditory and that child is more visual, but what do I do with that information?” I will walk you through a basic lesson for early math, skip-counting. While giving you some tips for teaching skip-counting, I will also show you how to adapt any lesson to cover each of the various learning styles. Covering all learning styles in a lesson will enable all of your students to learn the material at the same time and give each student a more complete understanding of the material being presented.

Begin by explaining the principle of skipping to your child: walk across the room with him, then skip across the room with him to illustrate how skipping covers the same distance faster and requires fewer steps than merely walking does. Explain that skip-counting is a short-cut way to count things, by using fewer steps and skipping over certain numbers to cover the distance faster.

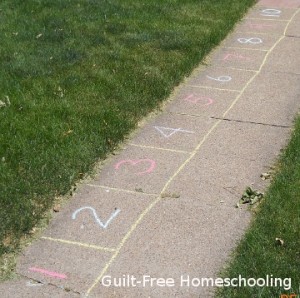
Children love kinesthetic applications, so if the weather allows, let’s take the math outside. Use sidewalk chalk to draw a long line down the sidewalk or driveway. Now mark the line off in reasonable increments (approximately the length of your child’s foot) and number each mark to create a number line so that your child can step from number to number. Drawing this as a long row of numbered boxes (instead of just a thin line) might make the concept easier for your child to understand, as it will resemble a giant game board where he can jump from box to box. Have him stand at the beginning (make a “start” or “zero” place), then have him step or jump to the “2” place, then to 4, and then to 6 to show him the concept of counting by two’s. Can he tell you where he should go next?

Once he is able to skip-count by 2’s, you can repeat the activity by having him skip-count by 4’s. If the increments become too large to step or jump to, he can run quickly across the “skipped” numbers and stop on the desired number, shouting the number loudly as he skip-counts the increments. If numbered boxes on the sidewalk do not work for your situation, try using kitchen floor tiles or stairs, or use masking tape to “mark” a line on your floor or carpeting.

Next, shift the concept from kinesthetic to tactile by drawing a series of smaller numbered boxes on paper and have him do “finger skipping” from one number to another, first by 1’s, then by 2’s. You may eventually want to let him use some game pawns, moving them from square to square while counting off the increments.

When your child understands the entire concept of skip-counting, you can pour out a large quantity of the substance of your choice onto the table (or a cookie sheet) and allow your student to start counting objects: M&M’s, oyster crackers, dry beans, buttons, Lego’s, or checkers. Count them by 1’s until he has the idea that counting them all individually will be a long process. Now have him move two at a time and try counting by 2’s. Allow him some time to practice this concept — it can be difficult to do any task until you are used to it. After he has the 2’s mastered, then you can move on to skip-counting by 4’s, 3’s, 5’s, 10’s, or any desired increment. (Counting by 4’s is an easy concept to follow counting by 2’s, since it is just a larger extension of counting by 2’s — counting just the even numbers by 2’s. I recommend doing the 4’s before the 3’s for this reason. In the same manner, follow counting by 3’s with 6’s, and follow 5’s with 10’s.)

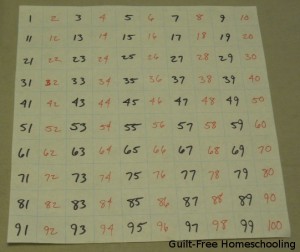
Another activity to help a student understand skip-counting by 2’s is to fill in a 100-chart with colored markers (adding a strong visual element). Draw* a chart of 10 x 10 boxes (10 rows of 10 squares each). Now alternate filling in the numbers: Mom writes an odd number in black, and the student writes an even number in red. Say each number aloud (here is the auditory part of the lesson) as you write them. Read the numbers over again when the chart is all filled in, alternating as Mom says a number she wrote and the student says a number he wrote — and suddenly the student is counting by 2’s! Then Mom can be quiet while he reads only his numbers aloud to reinforce his new skill. (Adapt this activity to other increments as needed for skill in skip-counting.) *Note: 1-inch graph paper is available at office supply stores in a poster-sized display tablet. I LOVE THIS STUFF! It is great for fast number charts — and hundreds of other homeschool uses. I rolled mine up and tied the roll securely with string for easier storage on a closet shelf.


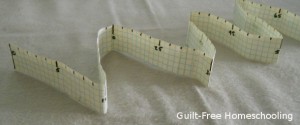
Graph paper marked with five squares per inch (also available in office supply stores) can be used to make a measuring tape for math as a good tactile and visual learning aid. Cut a few sheets into 1-inch wide strips and tape them together for the length you desire. This scale is compatible with the centimeter-scale Cuisenaire Rods: 2 graph-squares = 1 centimeter, so marking numbers on every other line produces a centimeter measuring tape. I used it to illustrate multiplication and division facts by accordion-folding the paper tape into 6 sections of 8 centimeters to show 6 x 8 = 48 and other facts, but a similar principle will work for skip-counting. Fold the tape on every other number, and then read off (auditory) the numbers at each fold for skip-counting by 2’s. Adapt and repeat for other increments.

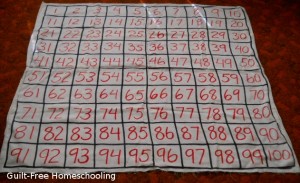
When your student has advanced to skip-counting by 10’s, draw a large 100-chart on the driveway, and your student can jump or run from box to box (kinesthetic), or have him fill in the numbers with colored chalk (tactile & visual). Do the 100-chart activity on paper with red numbers on the 10’s only (tactile & visual), but black numbers on the other squares. Then write 1-10 in a vertical column on paper, saying them aloud (auditory). Now add a zero to each number, and read aloud again to count by 10’s. Repeat, adding more zeroes, to count by 100’s, 1,000’s, 10,000’s, or as many zeroes as your child can handle.

Kinesthetic teaching tactics will involve large muscle groups: moving arms from the shoulders or moving legs from the hips. Walking, hopping, running, and jumping, and throwing, catching, and reaching are excellent ways to teach a kinesthetic child. You want to have him move his entire body whenever possible. If a child is easily distracted while trying to sit still, he is probably a kinesthetic learner. If the lesson takes place while the student is seated, it is probably not a kinesthetic lesson. If you want a kinesthetic child to learn, do not try to keep his bottom stuck to a chair seat. Let him stand, let him walk around, let him throw a ball to you while reciting, if necessary, but incorporate his need for movement into your lessons. (Notice that this is not wiggling and moving around just for the sake of wiggling and moving and trying to disturb others. This is taking in information through well-coordinated muscles and reinforcing it through repeated muscular actions.)

Tactile teaching tactics will involve small muscle groups: moving hands from the wrist, moving fingers, and touching, feeling, and rubbing with fingertips. Textures, from dramatic and rough to subtle and smooth, and finger and hand movements are excellent ways to teach a tactile child. You want to have him touching something related to the lesson whenever possible. If a child is easily distracted while trying to keep his hands still, he is probably a tactile learner. If the lesson takes place while the student’s hands are empty, it is probably not a tactile lesson. If you want a tactile child to learn, do not try to keep his hands empty and quiet. Let him touch things, let him make something, let him hold a toy while reciting, if necessary, but incorporate his need for touching into your lessons. (Notice that this is not touching and fiddling with things just for the sake of touching and fiddling and trying to disturb others. This is taking in information through an acute sense of touch and reinforcing it through repetitive touches.)

Auditory teaching tactics will involve sound: incoming sounds and outgoing sounds. Speaking, singing, and humming, and listening are all ways to teach an auditory child. You want to involve his ears and vocal chords whenever possible. If a child is easily distracted while the room is quiet, he is probably an auditory learner. If the lesson requires the student to read quietly, it is probably not an auditory lesson. If you want an auditory child to learn, do not try to keep him quiet. Let him hum, let him sing, let him read his assignments aloud, let him discuss the lessons with you, let him listen to music in the background, if necessary, but incorporate his need for vocalization into your lessons. (Notice that this is not making noise just for the sake of making noise and trying to disturb others. This is taking in information through highly sensitive ear-gates and reinforcing it through vocal repetition.)

Visual teaching tactics will involve illustrations and colors: graphs, charts, and diagrams, and lots of bright, stimulating colors. Posters, maps, forms, and worksheets, and color-coding are excellent ways to teach a visual child. You want to involve his eyes whenever possible. If a child is easily distracted while listening, but is not bothered by sitting still, he is probably a visual learner. If the lesson takes place while the student has no examples to look at, it is probably not a visual lesson. If you want a visual child to learn, do not try to keep his eyes focused on you. Let him read, let him draw, let him color while you read aloud, if necessary, but incorporate his need for visual details into your lessons. (Notice that this is not looking around and daydreaming just for the sake of looking and daydreaming and trying to disturb others. This is taking in information through very observant eye-gates and reinforcing it through recalling memory-pictures.)

Any lesson can be adapted to include elements of the various learning styles. Do not be afraid to be creative in trying revolutionary approaches that seem to be unusual applications for the subject at hand. Your “crazy idea” may be the exact key that unlocks the door to learning for your students.

Goal: To Learn Equally Well in All Learning Styles!

Tactile Lessons from Helen Keller and Anne Sullivan

In studying learning styles, I became intrigued by the example of Helen Keller. Born as a normal baby, young Helen lost her sight and hearing during a serious illness at the tender age of 19 months. Trapped in a now dark and silent world, Helen struggled to communicate her desires with her family, and they struggled just as much to communicate with her. By age 6, Helen was a wild child, practically undisciplined, and inevitably self-focused. Her desperate parents, grasping at every straw of hope as any of us would, made a series of contacts which finally brought Anne Sullivan to their home as a teacher for Helen. Anne had lost her own sight for a period of several years, but also had learned to communicate with another deaf and blind woman through the manual alphabet. Those who have seen the movie version of this story, The Miracle Worker, know basically how the rest of the story progresses. My interest led me a step further, to Helen’s biography, The Story of My Life, recently restored to its original 1903 content.

The recently released volume includes Helen’s story from several points of view: Helen’s own accounts, Anne Sullivan’s notes and letters, and further reports and insights from John Macy (Anne’s husband and partner in working with the adult Helen) and other close acquaintances. The result is a comprehensive look at communicating with and educating a student who does not respond well to visual or auditory stimuli. The methods used by Miss Sullivan confirmed my hypotheses: 1) some children do not respond adequately to simply seeing or hearing lesson material but can become enthusiastic about learning through other methods; 2) certain children may need constant tactile stimuli to “break through” into their worlds of thought; 3) as educators, we should set our expectations high enough that our students have a goal to reach for; and 4) language should not be “dumbed down” for children.

Teaching the Tactile Child

1. There is a world that can be discovered beyond the average student’s visual or auditory capabilities. Visually motivated students are a teacher’s dream: put the information in front of them, and they will learn. Auditory learners pick up information simply by hearing it — with certain things once is enough, but at other times, hearing something over and over will lock the information in their minds without their ever having seen the material in printed form.

Other students have tactile needs. They may find looking at a picture book mildly interesting, and listening to a story will barely hold their attention, but pop-up storybooks with interactive mechanisms and touch-and-feel books with textured surfaces will draw the tactile learner in a much deeper way. I was never as interested in the plot of my storybook about a misbehaving kitty as much as I loved that book for its large fuzzy pictures of the beautiful black cat. I remember being disappointed that not every picture of Miss Sniff was textured and fuzzy. I still own the book, and most of the fuzziness has worn off from decades of loving touches, but enough traces of the texture remain to intrigue any tactile child. The first time I encountered a pop-up book, I found myself transported to new heights of imagination and wonder. I remember carefully and delicately manipulating the pull-tabs and slide levers, studying the mechanics of how all of these things worked. If someone else could fold and glue paper in such a way as to transform two-dimensions into glorious three-dimensional marvels upon opening the book, then perhaps I could, too. The tactile qualities of these books held my attention much longer than mere words or pictures could have.

Helen Keller could not see anything, except for extremely bright lights, such as the sun’s rays reflecting off fresh snow. Helen could not hear any sounds at all. She did enjoy many physical activities (swimming, tandem-bicycling, and horseback riding) and probably had strong kinesthetic learning abilities, but those were also hindered by her blindness — it is difficult to run freely when you cannot see what you may trip over. Therefore, with her few remaining senses as her sole means for exploration, Helen became extremely adept at feeling textures, vibrations, and movements. After Helen had learned Morse code by having it tapped onto her hand, her teacher could communicate with Helen from across the room by tapping on the floor with her shoe. Helen identified flowers and other plants (and people) by their scents, but she could also describe the physical qualities in amazing detail. Those of us who function primarily with our visual and auditory senses tend to completely overlook the tactile characteristics of our everyday lives.

2. Idle hands can mean a disengaged mind. A child who just cannot seem to sit still and stop fidgeting during lessons may suddenly relax and become an academic sponge if allowed to draw, play with blocks, or hold a favorite toy while listening. To insist that students sit still with empty hands and give undivided attention to every spoken word is to hinder some students’ learning processes. Some children just cannot do that and learn at the same time: their movement is a vital part of how they take in information. Have you ever known a child who was so attached to his blanket or his favorite stuffed toy that he could barely endure the separation required for the laundering process? That child is most likely a tactile learner. His attachment is not emotional as much as it is necessary for concentration. Visual students absorb information through their eyes, auditory students absorb information through their ears, and tactile students absorb information through their hands. Giving their fingers something to “focus” on will stimulate their eyes and ears into “learning mode,” allowing their brains to absorb information through the other senses as well.

Upon meeting the unruly 6-year-old Helen, Anne Sullivan commented that Helen’s hands were untaught and unsatisfied, destroying anything they contacted, simply because they knew no other way. Anne’s greatest accomplishment, therefore, was in teaching the hands, and through them, she taught the mind. When Helen’s hands had interesting stimuli, Helen learned. Obviously, Helen Keller’s hands were the only portal through which knowledge could be imparted to her, but those of us with tactile children can learn from her example: gain the attention of the student’s hands and fingers and reach his mind through them.

3. Do not focus on what your child knows, but focus on what you want your child to learn. The break-through in teaching abstract concepts to Helen Keller came as Helen was stringing beads. Her teacher, Anne Sullivan, had started a pattern of beads for Helen to copy. When Helen’s attempts proved incorrect, Anne removed them and encouraged Helen to begin again. After several failed attempts, Helen paused to consider her mistakes, and Anne touched Helen’s forehead and then spelled the word t-h-i-n-k into Helen’s hand. Helen quickly grasped that words could relate to ideas and intangible concepts, opening a world to her far beyond the straightforward naming of physical objects. Miss Sullivan never assumed that Helen was unteachable; she saw only that Helen was inexperienced.

Educational scope-and-sequence listings have probably done as much harm as they have done good for some not-so-average children by convincing educators and parents alike that certain benchmarks should be reached at certain ages. We tend to rely on that information more than on our instincts and become unduly concerned when our students reach those goals either before or after the scheduled date. How silly. In the immortal words of my local meteorologist, “There is no such thing as normal; there is only average.” He was speaking of temperatures and weather patterns, but in educational terms, quicker learners and slower learners combine to create the scope-and-sequence averages.

Our tendency as parents is to fluctuate between only two reactions to our children’s accomplishments: “Not yet!” (meaning “you’re not old enough to do that yet”) and “Not yet?” (meaning “every other child has already done this”). As the educators for our children, we need to follow the lead of the child who wants to take on an ambitious project, though perhaps helping him to scale it back as needed in the beginning. The child who has already learned a lesson is ready to move on, and we must be careful not to bury the student with boredom who is eager for more. Too often we can bog the student down with what we feel is appropriate to his age (or grade level) and completely disregard what is appropriate for his abilities. Working with the child to set goals will give him something to reach for, something to stretch his current abilities and broaden them into his future talents, no matter which side of average he may be.

Setting goals that are too lofty can overwhelm the less gifted student, leaving him floundering at simple lessons that have become overshadowed by looking too far into the future. Careful attention to each student’s abilities and personality will tell you when to press on and when to linger a bit longer. Scope-and-sequence guidelines should be taken as just that: guidelines — a map for the journey, but not a day-by-day itinerary. Taking longer to learn a certain lesson does not mean that the child has learned less that the quicker student; in fact, they have both achieved the same goal (learning a particular lesson), just at different rates. The slower student may actually be absorbing more detailed information than the quicker child does. Helping your slower learner to break down his goals into doable steps will give him more occasions to celebrate and prevent discouragement along the way.

While students at schools for the deaf or blind struggled with learning even basic reading and writing techniques, Anne Sullivan insisted on teaching Helen Keller at home, feeling it was a more natural environment for learning and exploring. Anne abandoned scheduled lessons and simply led Helen on daily adventures through normal life, believing that “lessons” might limit the range of knowledge Helen could absorb. Her hunch proved correct, as Helen excelled far beyond what anyone dreamed possible and far beyond any progress made by previous deaf-blind students. Helen rapidly made up for lost time by learning to “read” lips with her fingers, learning to speak audibly, learning to read five different versions of Braille and raised print, and learning to write with pencil and paper, as well as with a typewriter and a Braille-writer. Helen learned to read and speak in English, French, and German — all before she entered a private high school to prepare for college. Helen had set attending college as her own goal while still a young girl just beginning to learn and accomplished her graduation from Radcliffe College under a schedule considered normal for hearing and sighted students. I think there is a tremendous lesson for all of us in this example, whether we are homeschooling or not. We should set our goals high enough to stretch our current abilities and see what those abilities can become in the future.

4. Language is the key to all learning. Anne Sullivan communicated with Helen Keller in complete sentences, even before young Helen understood all of the words in those sentences. Believing that language would be the magic that could bring Helen out of her prison of deafness and blindness, Anne strived for communication with Helen in as normal a fashion as possible. Once Helen had grasped the basic fundamentals of the manual alphabet and understood the words spelled into her hand, Anne began reading books to Helen, spelling word after word, sentence after sentence, and page after page into the eager hand of her knowledge-thirsty pupil. The resulting success was phenomenal: Helen’s dramatic progress astounded everyone as she quickly and easily surpassed the milestones of other deaf-blind students before her.

Miss Sullivan read book after book to Helen, whose mind soaked up the intricacies of language at an amazing rate. Having learned very little of spoken language before losing her hearing as a toddler and losing even that much in the years of silence that followed, Helen’s 7-year-old mind was virtually a blank page. However, she learned the grammar and sentence structure necessary for intelligent communication through the language of the books that were read to her. Later, as her writings were published in a children’s magazine, Helen’s command of language was so comprehensive that many skeptics viciously accused her and her dedicated teacher of fraud.

Time spent reading aloud to your children will never be time wasted. Their minds can comprehend the language far sooner than their eyes can read the words for themselves. Continue to read aloud to your students as they grow older, and enjoy a variety of books: poetry, such as Robert Louis Stevenson’s A Child’s Garden of Verses; mysteries and adventure stories, such as Treasure Island; and histories, such as The Little House series, as well as such childhood standards as Alice in Wonderland and Winnie the Pooh. The beautifully rhythmic language of older books will prove far more desirable to modern tales, even if you have to stop to define a word or phrase now and then. Discussing how some words have changed meanings over time will become a fascinating supplemental lesson. Your student’s vocabulary will be increased through read-aloud time, as well as through conversation. Whenever we encountered a word of vague meaning, we grabbed the dictionary. It seldom cost us our concentration on the book’s plot and always increased our knowledge. I often used words that my students were not familiar with, but in defining a word for them, rather than not using it, the words were quickly added to their ever-increasing vocabularies.

The tactile learner will be better able to absorb read-aloud stories if his hands are allowed to keep busy. Drawing, coloring, painting, modeling with clay, building with blocks or construction sets, stringing beads, or assembling puzzles are all activities that can be quietly performed while also listening to a book being read aloud. Too many of us have been conditioned to think that a student can only pay attention as long as constant eye contact is maintained. While that technique may be necessary in a classroom with dozens of students and may be somewhat true for the more easily distracted students, it rarely applies to most auditory or tactile learners.

Exploring the world through textures and movements adds another dimension for visual and auditory learners, but it may also be the key that opens the door of learning for the tactile student. If you are not sure if your student is a tactile learner, try some of these methods and see if they make a difference. Instead of nagging a child to “put that down” or “keep your hands in your lap,” working with his constantly active hands will allow his fingers to lead his brain in the search for knowledge. Remember that the tactile learner absorbs information through his fingertips, and we should strive to give those fingers plenty of “reading material.”

For more tips on teaching a tactile learner, see Topical Index: Learning Styles.

Verified by MonsterInsights