Back when I was a wee tot, every one of my Sunday School teachers used a flannel-graph to illustrate lessons. If you’re not sure what I mean, a flannel-graph was a board covered in fuzzy flannel fabric, usually made so it could fold in the middle like a book. Teachers opened it enough to stand it on a table or spread it wide open on an easel. Cut-out pictures made of felt could be placed on the flannel board and magically stayed where they were placed — well, it appeared to be magic to a small child in the Sunday School classroom. What really intrigued me was when the teacher would place a paper picture on the board, and it stuck, too! I remember watching those pieces of paper carefully, trying to see what gave them their magical sticking ability, finally noticing a small strip of fuzzy cloth glued on the back of each one. One summer, during Vacation Bible School, I got to make my very own set! Each student was given a set of pictures appropriate to whatever the lesson was that day, and we got to color them, cut them out, and glue a small strip of sandpaper on the back of each one. Many years later, I applied that same simple technology to making quiet toys and learning aids for my kids.
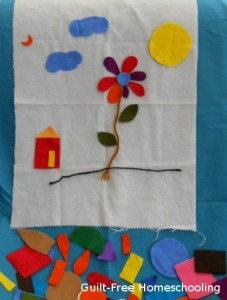
I cut a remnant of flannel cloth about the size of a pillow case, but I did not attach it to a board. Instead, we would spread it over a pillow or sofa cushion or any suitable surface and place felt shapes on the cloth. My tactile child loved to smooth out the pieces, rearrange them, and rub them with her fingers. She would use the random geometric shapes to make simple pictures or sort the pieces into groups of squares, rectangles, triangles, and circles. We had a storage box for all of the pieces that allowed them to be stored flat, since a wrinkled or folded piece does not make good pictures in the next session. Our flannel cloth was folded up and placed in the top of the box for the next use. I also added a few pieces of yarn at my daughter’s request, to use for flower stems, grass, fences, and other imaginative play. This was her favorite quiet-time toy, and she never ran out of ideas for pictures to make with the pieces.
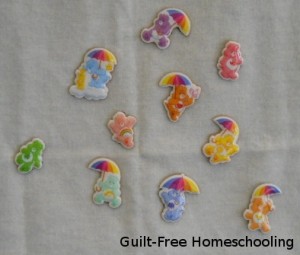
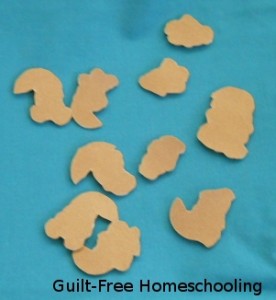
A sheet of Care Bear puffy stickers added another dimension to this set by sticking each one onto the back of a piece of sandpaper and carefully cutting around the sticker. Re-usable stickers!
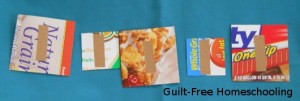
The more I thought about my old Sunday School lessons, the more I realized we could use this low-tech play set for some creative learning aids. I glued a small strip of sandpaper onto the backs of some cereal-box cardboard math cards for some magically-adhesive, tactile flashcards.
Colors, shapes, letters, words, numbers, and more — how will you use this idea? This activity can grow with your students and expand to fit their needs. How about lots and lots of sandpaper-backed letter squares for tactile spelling practice? Or lots and lots of little number squares and arithmetic symbols for tactile math practice? Ooooh, how about flannel-graph fraction pieces? Mix and match fractional segments to prove that three-quarters of a circle occupies the same space as nine-twelfths of that circle.
The tactile student who plays with a paper clip or twirls his pencil during lessons needs that finger interaction as much as a visual student needs to study the diagram or read the directions himself. Tactile learning aids work for any student who prefers to keep his fingers busy, not just for fidgety youngsters. Tactile fingers help the student absorb information, just as much as standing up and moving around helps a kinesthetic learner pay attention and concentrate. Older students can make their own flannel-graph states from a cut-up map for tactile, self-checking, geography practice. Use flannel-graph techniques to create a timeline of historical events. Even diagramming can be accomplished with flannel-graph word cards! If some lesson concept is giving your student trouble, try making some flannel-graph manipulatives for it. Brainstorm together, and let your imaginations run wild! The textures can be surprisingly helpful for learning — and a lot of fun, too!
See this article for more ideas: Felt Shapes


 Guilt-Free Homeschooling is the creation of Carolyn Morrison and her daughter, Jennifer Leonhard. After serious disappointments with public school, Carolyn spent the next 11 years homeschooling her two children, from elementary to high school graduation and college admission. Refusing to force new homeschooling families to re-invent the wheel, Carolyn and Jennifer now share their encouragement, support, tips, and tricks, filling their blog with "all the answers we were looking for as a new-to-homeschooling family" and making this website a valuable resource for parents, not just a daily journal. Guilt-Free Homeschooling -- Equipping Parents for Homeschooling Success!

A friend emailed me immediately this morning with even more ideas for this activity. She gave me permission to reprint her thoughts here:
“What a way to start the concept of a painting! Place shapes on the board and rearrange till you like what you have, then duplicate it in a painting!!! Another idea for your felt board is to use the computer iron on paper. You can print a whole sheet full of a child’s favorite cartoon characters or Bible figures (to play with in church). Then iron it onto white felt and cut out the pieces. I’ve done this to make iron on patches for a couple vests, so I know it works. Wouldn’t stick people be fun too??? You could create bodies standing, sitting, running. Then create heads with different expressions. Choose a body and a head and you could create a whole world of stories. How fun!” –Kim
Kim is an artist herself, so I know her great fine arts application will work well. Her characters/stick-people idea could also transition into writing prompts for students who have difficulty thinking up things to write — let them illustrate a scene first, then put it into words. Thanks for sharing, Kim!!