Workshop Wednesday: 100-Grids and Flashcard Bingo

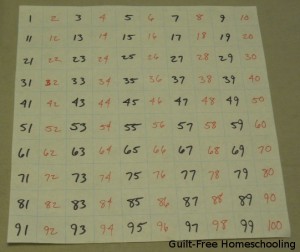
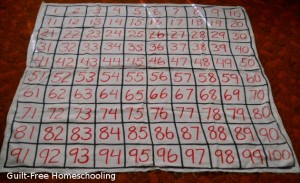
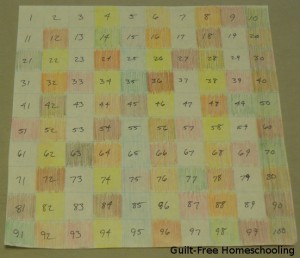
A 100-grid is another marvelous teaching and learning tool that can be made in numerous fun ways. A standard 100-grid contains the numbers from 1 to 100 (too obvious?) in ten rows of ten squares each, 1-10 in the top row, then 11-20 in the second row, and so on.

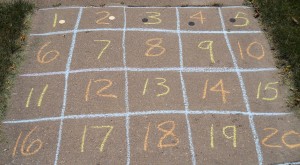
Draw the grid on the driveway with chalk; your kids may also get Dad’s permission to draw it on the garage floor if they promise to sweep it clean again when they’re done. I drew a 100-grid on an old tablecloth (you can also use an old bedsheet) with permanent markers for a reusable, storable, portable, floor-cloth version. These grids are big enough for your kinesthetic learners to hop around on for hopscotch-style, action learning!

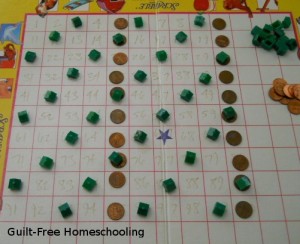
Draw a smaller 100-grid on paper or cover the blank-grid side of a Scrabble Junior game board with clear Con-Tact paper (to make it washable & more durable) and fill in the numbers with either wet-erase or dry-erase markers. These versions are more tactile, since your students can use game pawns, pennies, or dry beans for marking number squares in learning activities.

Add a visual learning element to your 100-grid activities by alternating colors of the numbers. To skip-count by 2’s, write the odd numbers in one color and the even numbers in another color. To skip-count by 3’s, use one color for the multiples of 3 and another color for all the other numbers. If you want to do this activity many times for many multiples, write all the numbers out in one color, then place a colored marker on the appropriate skip-counting intervals.

Do you have an auditory learner? Challenge him to say the numbers aloud while hopping or jumping from number to number, or while placing markers on the correct squares.

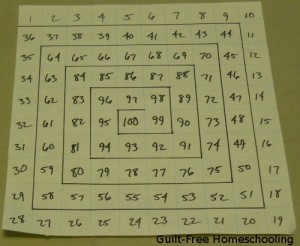
Try varying the arrangement of the numbers in your grid for some interesting game play. If you have a Chutes and Ladders game, you can see one simple variation of our grid — it starts in the lower left corner and zig-zags back and forth to the top. For another game board variation, start with 1 at an outer corner and spiral the numbers in toward the central 100 square–but you might want to outline the path to make it easier to follow.

For a very simple game to practice math skills using these novelty grids, remove the face cards from a normal deck of playing cards and use the remaining “math deck” for an addition game. Let each player select a pawn and set it just off the grid near the 1 square; on his turn, each player will turn up a card from the deck and move his pawn that many spaces. The first player to reach 100 wins that round. For more advanced play, let the black cards represent positive numbers (adding, or moving forward) and let the red cards represent negative numbers (subtracting, or moving backward).

Another amazing math activity is the “Sieve of Eratosthenes.” This scholar from long, long ago created a fairly simple mathematical process for isolating prime numbers. On a standard 100-grid, have your students cover each multiple of 2, starting after 2 itself, to cover each number that has 2 as one of its factors. Since 2 has only itself and 1 as factors, leave it uncovered; it is a prime number. Now repeat with 3, covering each number after 3 that is a multiple of 3. Continue for 4, 5, 6, 7, 8, and 9. The numbers that are left uncovered are all prime numbers that have no other factors besides themselves and 1. This is fun to do on paper, using colored pencils to color in the squares and using a different color for each round. Starting with a light color and getting a bit darker on each round will show very plainly which numbers have the most factors — they will be very dark when you have finished.

Now for a bonus — here are the instructions for a game I call “Flashcard Bingo,” that is played on a 100-grid.

FLASHCARD BINGO

Equipment:

  • 1-100 chart
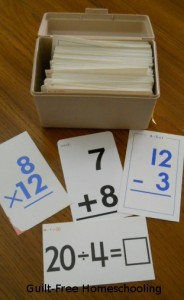
  • Math flashcards–combine addition, subtraction, multiplication, and division flashcards (The combination of cards used should be appropriate to the players’ skills.)
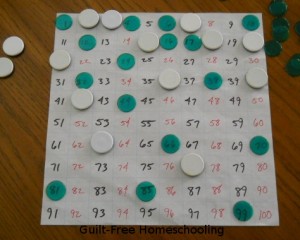
  • Several dozen markers for each player (colored paper squares, pennies, dry beans, etc.). If playing outdoors, larger objects, such as poker chips, can be used as markers.

Shuffle all the flashcards together and place them in an index card file box or other box that will hold all the cards and allow extra room for fingers to draw them out.

Use the honor system for not peeking at the answers if they are printed on the cards, or have players draw & hold cards for each other, covering answers as needed.

The first player draws a card at random and gives the answer to the problem. If he gives the correct answer, the player puts his marker on the answer number’s square on the 100-grid. If the card has two different problems on front & back, he may look at both problems and choose either side of the card for strategy: if the player already has possession of the square for that card’s answer, he may choose to answer the problem on the opposite side.

If the player gives an incorrect answer, the next player gets a chance to answer correctly and “steal” the square. If the second player cannot answer correctly, each player in turn is given a chance to answer and steal the square with the correct answer. The player giving the correct answer may not be holding the flashcard or may not have seen the answer on the flashcard.

At the end of a player’s turn, his card is returned to a random location in the box. Play proceeds to the left of the player who drew that card, even if he answered incorrectly, and even if the player who gave the correct answer is the next player in the circle.

If a player’s answer number is already covered by another player’s marker, the new player may “bump” the occupying player’s marker off the grid and place his own marker on the square, or the player may opt to take another card instead of bumping the occupying player’s marker.

If the player already has possession of the squares for both sides of the card, he may announce that he will combine both answers as desired (adding, subtracting, multiplying, or dividing) to achieve a hard-to-reach number square, such as prime numbers or large numbers. Paper & pencil may be permitted, but not calculators. If a player draws a flashcard with a correct answer of 0 or an answer larger than 100, and he is not able to combine the answers from both sides of the card, he may opt to draw again. There is no limit to how many cards a player can draw, as long as he already owns the squares representing the answers to the cards drawn, but he must use the first available square.

Winner is the first player to get 5 markers in a straight row, vertically, horizontally, or diagonally.

Advanced Option: Add a game die for another challenge. Players roll the die on each turn and add, subtract, multiply, or divide that number into the answer on the flashcard to determine which square to occupy on the grid.

Discussion Question: As your students play this game, ask them if they notice which part of the grid accumulates the most markers and if they can explain why that happens.

Younger Players Option—

Use only addition & subtraction facts from 1-20. Play on a 20-grid with 4 rows of 5 squares each (1-5, 6-10, 11-15, 16-20). Winner is the first player to get 4 markers in a straight row in any direction, vertically, horizontally, or diagonally.

For more ideas, see also:
Applying Learning Styles with Skip-Counting
Hopscotch–A Powerful Learning Game
Workshop Wednesday: Flannel-Graph

Back when I was a wee tot, every one of my Sunday School teachers used a flannel-graph to illustrate lessons. If you’re not sure what I mean, a flannel-graph was a board covered in fuzzy flannel fabric, usually made so it could fold in the middle like a book. Teachers opened it enough to stand it on a table or spread it wide open on an easel. Cut-out pictures made of felt could be placed on the flannel board and magically stayed where they were placed — well, it appeared to be magic to a small child in the Sunday School classroom. What really intrigued me was when the teacher would place a paper picture on the board, and it stuck, too! I remember watching those pieces of paper carefully, trying to see what gave them their magical sticking ability, finally noticing a small strip of fuzzy cloth glued on the back of each one. One summer, during Vacation Bible School, I got to make my very own set! Each student was given a set of pictures appropriate to whatever the lesson was that day, and we got to color them, cut them out, and glue a small strip of sandpaper on the back of each one. Many years later, I applied that same simple technology to making quiet toys and learning aids for my kids.


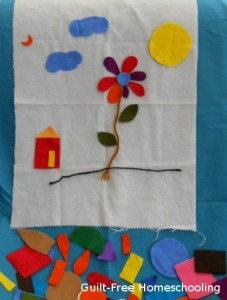
I cut a remnant of flannel cloth about the size of a pillow case, but I did not attach it to a board. Instead, we would spread it over a pillow or sofa cushion or any suitable surface and place felt shapes on the cloth. My tactile child loved to smooth out the pieces, rearrange them, and rub them with her fingers. She would use the random geometric shapes to make simple pictures or sort the pieces into groups of squares, rectangles, triangles, and circles. We had a storage box for all of the pieces that allowed them to be stored flat, since a wrinkled or folded piece does not make good pictures in the next session. Our flannel cloth was folded up and placed in the top of the box for the next use. I also added a few pieces of yarn at my daughter’s request, to use for flower stems, grass, fences, and other imaginative play. This was her favorite quiet-time toy, and she never ran out of ideas for pictures to make with the pieces.


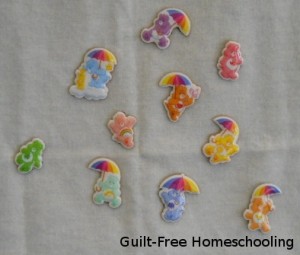
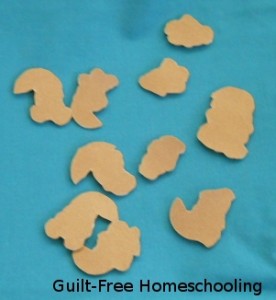
A sheet of Care Bear puffy stickers added another dimension to this set by sticking each one onto the back of a piece of sandpaper and carefully cutting around the sticker. Re-usable stickers!


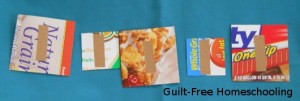
The more I thought about my old Sunday School lessons, the more I realized we could use this low-tech play set for some creative learning aids. I glued a small strip of sandpaper onto the backs of some cereal-box cardboard math cards for some magically-adhesive, tactile flashcards.

Colors, shapes, letters, words, numbers, and more — how will you use this idea? This activity can grow with your students and expand to fit their needs. How about lots and lots of sandpaper-backed letter squares for tactile spelling practice? Or lots and lots of little number squares and arithmetic symbols for tactile math practice? Ooooh, how about flannel-graph fraction pieces? Mix and match fractional segments to prove that three-quarters of a circle occupies the same space as nine-twelfths of that circle.

The tactile student who plays with a paper clip or twirls his pencil during lessons needs that finger interaction as much as a visual student needs to study the diagram or read the directions himself. Tactile learning aids work for any student who prefers to keep his fingers busy, not just for fidgety youngsters. Tactile fingers help the student absorb information, just as much as standing up and moving around helps a kinesthetic learner pay attention and concentrate. Older students can make their own flannel-graph states from a cut-up map for tactile, self-checking, geography practice. Use flannel-graph techniques to create a timeline of historical events. Even diagramming can be accomplished with flannel-graph word cards! If some lesson concept is giving your student trouble, try making some flannel-graph manipulatives for it. Brainstorm together, and let your imaginations run wild! The textures can be surprisingly helpful for learning — and a lot of fun, too!


See this article for more ideas: Felt Shapes

Workshop Wednesday: Map Puzzle

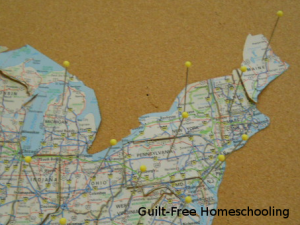
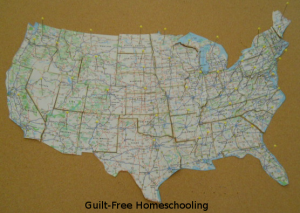
Take one large, atlas map of the USA (preferably an older one, not the one needed for an upcoming vacation or business trip). Cut it apart on state borders; mine was a 2-page map, so I taped the pages together before cutting the states apart. Optional: Leave the smaller states of Rhode Island, Connecticut, Massachusetts, Vermont, & New Hampshire together as one unit, making them slightly harder to lose. Using a large bulletin board and some long “quilting” pins (mine are approx. 1 5/8″ long), reassemble the map by pinning the state puzzle pieces in place on the board, forming the contiguous 48 states.


This puzzle can take students further than traditional USA jigsaw puzzles, since the pieces are not different colors and the highway markings can be used as clues for lining up the pieces. State borders become less noticeable, and major cities, highways, lakes, rivers, and other geological features are included on an atlas map, taking this from a simple puzzle activity to a fascinating exploration. The learning continues after the puzzle is assembled, by following the interstate highways from state to state, coast to coast, or border to border. Students can trace the route of a past family vacation or plan another, perhaps even evaluating various paths of travel across the country. Select two states at random and plot the most direct route from one to the other or the most scenic route or the best route to use during summer or winter driving for avoiding super-hot weather or snowy/icy roads. Older students who are nearing driving age may find this activity particularly interesting.


The map puzzle in these photos does not include Alaska or Hawaii, since they are usually not represented on maps in the same scale as the other states. The state of Hawaii consists of more than 100 islands, not just the eight larger islands we usually see on maps. The total land area of the Hawaiian islands is less than the area of the state of New Jersey, but greater than the area of the state of Connecticut. Alaska has more than twice the land mass of Texas, but Alaska’s boundaries and archipelago islands stretch its dimensions to massive proportions (see link below). Other state-to-state comparisons can easily be made with these puzzle pieces. A globe or world map is also helpful in comparing size and location of the various states, using latitude and longitude lines as guides.

Another way to supplement your explorations is with Google Maps. Use the satellite views to zoom in on tiny islands or coastal details, or visit the Grand Canyon, Mount Rushmore, Niagara Falls, or New York City’s Central Park (or anywhere else!) with Google Street View to take a virtual field trip! Many locations include a selection of up-close-and-personal photos from previous visitors to enhance your “travels.”

Here is a map showing the full size of Alaska as compared to the continental USA — http://www.tongass-seis.net/media/images/AK-USA.jpg

Other topics could be explored with a little extra research, then compared to today’s highways on this puzzle map:
The Appalachian Trail
The Lewis & Clark Expedition
The Oregon Trail
The Santa Fe Trail
…and many others!

Similar puzzles can be made from other maps for more fun geography — state road maps cut on county lines; a Canadian map cut on province boundaries; a map of Mexico or Australia cut on state borders; a map of South America, Europe, Africa, or Asia cut on borders between countries.

Workshop Wednesday: It’s So HOT, You Could Fry an Egg Outside!

So we did! Not during the most recent heat wave, but back when my kids were little, and the thermometer was stuck above 100 degrees for way too many days in a row, we proved that we could fry an egg outside. Here’s how we did it:

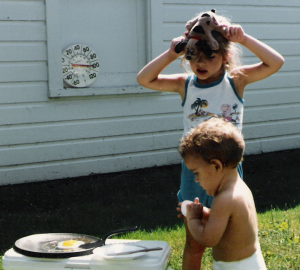
I placed my cast iron griddle in a spot that would remain sunny all day and left it there for at least an hour to get good and hot before starting the egg. The black iron really absorbs a lot of heat — science discussion #1. Then I smeared a little butter on the hot surface (to keep the egg from sticking and creating a bigger mess) and broke the egg onto the melted butter — this step was very undramatic, with no sizzling or crackling like you would expect to hear when frying an egg on the stove — science discussion #2. I placed a glass lid over the egg to help trap the solar heat (and keep any bugs away from our egg) — science discussions #3 & #4. Then we got busy and did other things for several hours, trying to keep cool while our little egg enjoyed its sauna — science discussion #5 was about the moisture inside the glass lid. We checked on the egg about once each hour, and if I remember correctly, I think it took about 4 hours for the white of the egg to appear cooked and, well, white. Then we posed for pictures. Notice that 1) there is proof of the temperature on the thermometer in the shady background, 2) my little guy snatched the eggshell off the plate just before I snapped the photo, and 3) a Pound Puppy is maintaining a safe distance from that hot griddle atop my daughter’s head.

Based on my son’s age here, this photo was taken in the summer of 1987! My now-adult daughter reminded me of this photo and suggested I post it now so that you can try frying an egg outside as a hot summer day activity and have a few brief scientific discussions of your own. Please don’t try to eat the egg after it’s spent so much time in the sun — no one wants food poisoning as their next summer day activity — science discussion #6!

Workshop Wednesday: “Stealth Learning” Through Free Play

“Stealth Learning” is my term for lessons that don’t appear to be lessons but can teach as much as or more than their formally planned and structured counterparts. A prime example is letting kids play with manipulatives or learning aids, instead of using them only to illustrate planned lesson activities. Kids will naturally use these materials in ways other than their formal use, but that’s where the stealth learning part comes in. Sneaky, right?

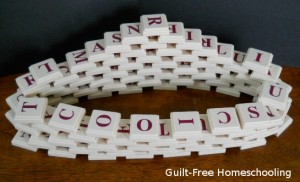
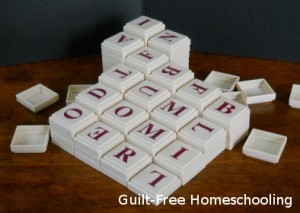
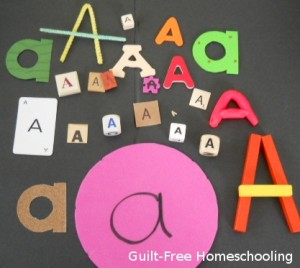
Suppose you subtly leave a set of Scrabble letter tiles lying on the table after the spelling lesson is done (yes, Scrabble tiles are fabulous as tactile spelling manipulatives), or you might casually place the tiles on the table well before they are needed, in anticipation of the spelling lesson (again, stealth teaching mode). Now excuse yourself to go shuffle the laundry, pull something out of the freezer for dinner, or some other valid excuse to leave your student in the same room as the abandoned manipulatives with no other planned activities to occupy his attention. A quick admonition to “wait here, I’ll be right back” may be necessary for some students, but the pile of pieces on the table will beckon to his fingers.

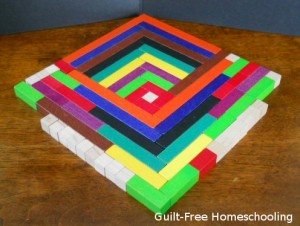
Feel free to delay your return as needed to give your budding explorer ample time to begin stacking, aligning, and organizing the pieces in patterns and structures that will teach him great stealth lessons in spatial math concepts such as height, width, depth, horizontal, vertical, parallel, perpendicular, area, perimeter, volume, and so on. He may not yet know all the proper terms for what he is learning, but those will come through formal lessons later. For now, let him play and experiment and learn through stealth methods.

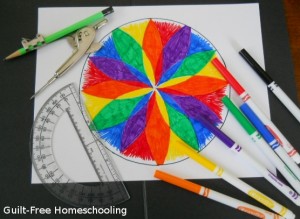
Lining up letter tiles or math blocks in a checkerboard design is valid learning. Stacking letter tiles in an attempt to create one very tall column is valid learning. Building forts or fences with dominoes is valid learning. Pouring water or cornmeal or rice from one measuring cup to another is valid learning. Drawing intricate designs with a compass is valid learning. Coloring the squares of graph paper to create elaborate patterns is valid learning. Borrowing parts and pieces from your collection of games is creative play and stealthy learning, and sorting them into their respective sources again provides even more stealthy learning. These lessons may not be what the designers of these items originally had in mind, but they are valid lessons, nonetheless.

Think for a moment about the lessons that are learned from the simple act of lining up dominoes on end into curvy rows that can be toppled in rapid-fire succession by one gentle touch on the first domino in the line. First, you learn that it requires a steady hand, precise fine-motor coordination, and siblings who won’t purposely jiggle the table. Second, you learn about spacing the dominoes accurately enough that each one strikes the next with precision when falling, and you learn problem-solving skills when things go awry, causing the process to stop before the entire row has gone down. Third, you learn whether you will experience that momentary thrill of watching your feat of engineering perform in exactly the manner you intended, or if you need to make a few more adjustments to your design and try again. Those are extremely important lessons in life, not just in dominoes. Who has not done this activity? How many of us have repeated it again and again and again until we finally achieved success? Has anyone given up domino stacking forever because of an initial, failed attempt? These are more than stealth lessons of observing physics in action. These are stealth lessons in precision and perseverance that no spelling workbook or math lesson can teach, even though precision and perseverance are required to succeed in both spelling and math. These are lessons of the kind that spurred the imaginations of Thomas Edison, Isaac Newton, and Benjamin Franklin, and caused them to wonder “what if…?”

Allow your students to combine components from a variety of learning aids and games, designing new ways to use them, and ultimately learning new lessons—stealth lessons. To restrict “learning aids” from being “playthings” is to limit learning. Another way to encourage further discovery-play is by innocently asking leading questions, such as “what would happen if you did this…” or “is it possible to stack those like this…?” You can take advantage of a teachable moment to add the appropriate vocabulary now, or you can wait until later, reminding them of their free-play adventures and relating those to the lesson concept of the day. Try not to spoil their fun by instructing your kids in how to play with these new-found toys, but let their imaginations drive them. Insisting they formally narrate what they’ve learned is another fun-killer, but do listen with interest as they excitedly volunteer details of their discoveries. By paying close attention to their stories, you’ll notice what they’ve learned—even if they don’t realize they’ve learned it.

Playing games requires some degree of thought, planning, or strategy, and that translates into stealth learning. Word puzzles based on quotations, axioms, and folk wisdom provide more stealth learning. Other types of puzzles teach logic, math, and other valuable skills through very stealthy methods. Play is learning, and learning can be play. Stealthiness connects the two.

See also:
A Day without Lessons
The Know-It-All Attitude
Homeschool Gadgets: An Investment in Your Future or a Waste of Money?
The Importance of Play in Education
The Value of Supplemental Activities
Is Learning Limited to Books?
Sorting toys Is Algebra
Gee Whiz! Quiz

Topical Index: Learning Outside the Books


Workshop Wednesday: Natural Science

Summer is a great time for science exploration. The backyard is the perfect location for mixing Diet Coke and Mentos (search You Tube if you don’t know what I’m talking about), and the weather is relatively cooperative for spending time outdoors. There are abundant species of plants, birds, bugs, and other critters just waiting to be studied, so by adding a few basic supplies, we can turn a boring afternoon into a great learning experience.

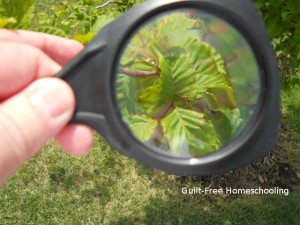
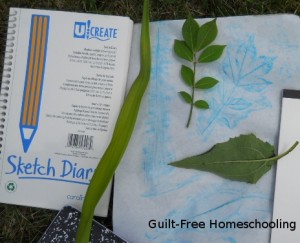
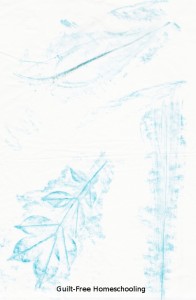
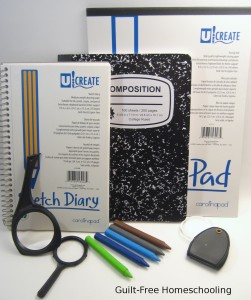
The required supplies may surprise you: a pocket-sized magnifying glass is good enough for this project, and some simple drawing supplies complete the list. A small sketchbook and pencil are good for making simple drawings, tracing paper and dark crayons work well for texture rubbings, and a notebook and pencil can serve as your journal for noting what species are found or recording any experiments you try. Toss these into a bag or backpack, along with some bottled water, snacks, bug spray, and sunscreen, and then head out on an exciting trek through the wilderness or a walk around the block, which can yield just as many thrills in the variety of species to be found!

We went on picnics and nature hikes in our favorite parks, but we also found that walking the same route through our neighborhood would reveal new discoveries each time. The trees bloomed and leafed out at different rates in the Spring, flower beds bloomed throughout the seasons, and weeds could be as much fun to identify as anything else. Birds were another category we learned to identify, both by sight and by their songs or calls. Fishing with Dad always gave us opportunities for seeing more natural wonders.

We made rubbings of leaves, we drew sketches of birds and bugs (not very artistic, but good enough to help us look them up later in wildlife reference books), and we studied all sorts of things through a magnifying glass. Sometimes we just sat in amazement and watched the miniature world of an anthill or a pond full of tadpoles. We watched bees and wasps diligently visiting every blossom on an apple tree. We giggled at the antics of squirrels burying acorns, then digging them up again only to bury them in another spot. We listened to the birds and learned to mimic them well enough to have them answer when we called. We sorted a handful of random pebbles into several types of rocks. We carefully pulled flowers apart, petal by petal, to study the intricate designs. The various categories of nature study could fill an entire summer by selecting a different interest each day!

When I was in high school, my science teacher required each student to compile an extensive collection of plants as a year-end project, and each year he increased the number of species! I think the final tally was 40 wildflowers, 40 trees, 10 grasses, and 5 mosses – all different, no duplicates, and we had to label each one with its correct name. My kids loved the idea of being able to identify that many individual species, so we hiked through some of the same areas that I had frequented during high school, just to see if we could find those same plants again. I wish that when I was making my high school collection that I’d had the book we used then. We had a wildlife reference book that covered everything from trees to mushrooms to wildflowers and more creepy-crawlies than you want to know about. There are now many websites for reference, and you can find apps for your smart-phones, too! If you don’t already own or have access to the supplies listed above, visit our Etsy shop to purchase the GFHS Natural Science Mobile Learning Lab, which includes a Usage Guide with many activity ideas.

Here are a few references to get you started:
“Natural Science Mobile Learning Lab” from Guilt-Free Homeschooling
What Bird Is That?
What Tree Is That?
North American Wildlife

Workshop Wednesday: Jumpropes

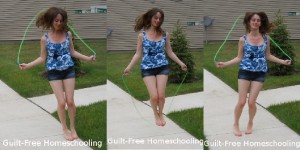
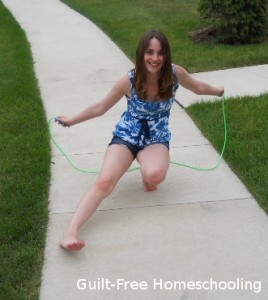
I spent a lot of summer days in my childhood jumping rope, so when we heard about a precision jumprope team in our area, we had to investigate. My kids joined the group and learned some amazing acrobatic tricks that make jumping rope much more fun and a great way to impress your friends! In this Workshop Wednesday, we will also move beyond merely jumping the ropes and explore some other ideas that will show you how to use jumpropes in making ordinary lessons extraordinary! These tips will take lessons off the table and out of the classroom and make them into kinesthetic learning fun!

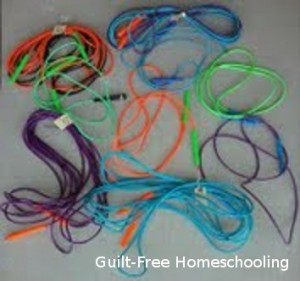
Jumping rope is a great strength and stamina building activity, which is why boxers and other athletes use it as part of their training. Before we get started in the how-to’s of fancier jumping, let’s talk over some basics. Speed ropes are best for this type of activity; a speed rope is plastic or vinyl but may be solid or a hollow tube, with handles that spin freely. To get your rope to the perfect size for your body, stand on the middle of the rope and pull the handles up as high as they will go: the handles should come up to your shoulders. To shorten a rope, untie the knot in one end and retie it at the appropriate length, sliding the handles back in place; you can cut off the excess rope if you wish, or keep some extra length for kids who are still growing. If your rope is too short, you will be more likely to trip over it; if your rope is made of something soft like braided cotton roping, it will move too slowly and mess up your timing.

Ow! If you are new to jumping rope or haven’t done it for a long time, you will probably experience a painful side-ache after an extended period of steady jumping. This is an indication that you are retaining too much carbon dioxide from breathing in more than you are breathing out. You can remedy this situation by exhaling forcibly for a count of 5, then inhale for only a count of 3, and repeat until the ache is gone. I know it hurts, and this is hard to do when all you want to do is gasp for more air, but controlling your breathing like this for about a minute will dissolve that pain! The more you practice jumping rope, the quicker you will get in shape, and the sooner those side-aches will be a thing of the past. Trust me.

If you’re all practiced up and ready to move beyond ordinary rope-skipping, try using a jumping-jack technique: move your feet about shoulder-width apart on one jump, then bring them back together on the next jump, repeating the out-in-out-in movement over and over. Another variation is a forward-backward jump: jump a half-step forward on the first jump, then jump back a step on the next jump, repeating the forward-backward-forward-backward motion. Another move that is fun to watch (and impresses your friends) is called the Slalom: move both feet to the left on one jump, then move both feet to the right on the next jump, repeating left-right-left-right.

As your legs get stronger, you can try squatting down on one jump, then standing up on the next: up-down-up-down. When your muscles are ready for a really big challenge, try the Cossack, which resembles a Russian Cossack dance done while jumping rope: squat down for jump #1, extend your right leg on jump #2, pull in your leg again for jump #3, extend your left leg for jump #4, and repeat jumps 1-4. Every jump takes place in a squatting position, but you hop up and down a little as you jump the rope and switch your legs out and in. Try practicing the leg moves without the rope first for best results. It takes lots of strength and coordination to do this one, but no one who sees you perform it will ever forget it, and they may ask you to show it off to everyone who comes along!

Once these basics steps have been mastered, you can use them to make boring lessons more interesting. Mom can call out a spelling word for the student to spell out loud while jumping. Mom can hold up math flashcards, and the jumping student can call out the answers. What other basic facts could be reviewed while jumping rope? Try defining vocabulary words, giving examples of parts of speech, calling out matching states and capitals, and so on. The jumprope games of my youth incorporated counting rhymes, but today’s kids could use songs, raps, or poems for whatever subject they are learning and give an auditory element to their learning-while-jumping.

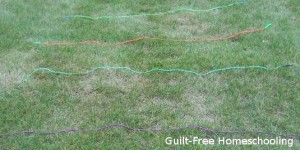
After everyone’s tired from all that jumping, the jumpropes can still help out in lessons. Lay several ropes in the grass or on the floor in vertical parallel lines and create a timeline, using the ropes for century divisions. Hang a name tag around Barbie’s neck and let her represent Betsy Ross. GI Joe can receive a similar name tag and become Jim Bowie at the Alamo. My Little Pony might represent the Cavalry at the battle of Little Big Horn, and a tiny model of the Empire State Building can be built from Legos, and all of these historical people and events (and more) can be placed in the appropriate places in your time line. Those same parallel ropes could be used for lanes in a relay race or as part of an obstacle course, and please don’t overlook the obvious math lesson concepts of vertical, horizontal, parallel, and perpendicular.

Now let’s rearrange the ropes a little to make a hopscotch pattern on the grass, as a nice change from playing hopscotch on hard concrete. Tennis balls can be used instead of rocks for the marking “stones,” and the squares can be marked with numbers or other information written on large pieces of paper or cereal box cardboard, held in place with shoes, bricks, or anything heavy that won’t blow away on windy days. Remove the obstacles and add a garden hose and a sprinkler for some hot weather fun!

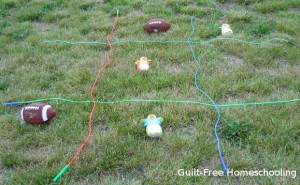
Another rearrangement of the ropes can create a giant tic-tac-toe grid on your lawn. Use extra shoes or sports balls for the markers. Little ones can walk across the grid to place their markers, but older kids will enjoy the challenge of standing behind a marked line (another jumprope!) and trying to toss their markers onto the correct squares. Objects that bounce and roll will only add to the challenge and the fun.

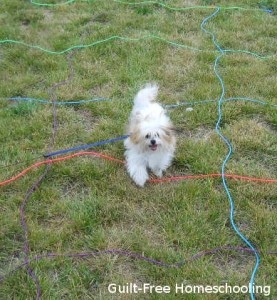
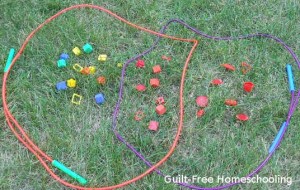
Our lessons for today wouldn’t be complete without making gigantic Venn diagrams with our jumpropes. This example shows square things in the left group, red things in the right group, and square red things in the intersection of the two groups. Challenge your students to create their own Venn diagrams for practice in understanding the various ways objects can be categorized, perhaps using sports equipment, toys, shoes, or anything that can be sorted appropriately. Jumpropes can also be used indoors for this type of jumbo lessons on the floor.

See also:
Hopscotch–A Powerful Learning Game
Kinesthetic Learners

Verified by MonsterInsights